• Welcome to the Yamaha FZ6 Forums. Member registration disables ads and allows you to post and share. Register Here.

Tire Change

Randomchaos

Flaming Hot Doughnut
Elite Member
Joined
Mar 27, 2011
Messages
595
Reaction score
9
Points
0
Location
Maynardville, TN
Visit site
So, got my new tires in, and don't feel like paying another $100 to just have them mounted and balanced. After looking around on the internet, watching a few videos of other people doing it by hand, I have decided to give it a go myself! Anybody have some tips for doing this on the FZ6 before I get started tomorrow? I plan on cutting up a plastic jug to protect the rim from the tire spoons, and using the 2x4 leverage trick to break the bead. Should I remove the brake rotors and the rear sprocket, or just try to make sure its elevated enough off the ground to not put any pressure on them?

Thanks in advance for any help!
 
So, got my new tires in, and don't feel like paying another $100 to just have them mounted and balanced. After looking around on the internet, watching a few videos of other people doing it by hand, I have decided to give it a go myself! Anybody have some tips for doing this on the FZ6 before I get started tomorrow? I plan on cutting up a plastic jug to protect the rim from the tire spoons, and using the 2x4 leverage trick to break the bead. Should I remove the brake rotors and the rear sprocket, or just try to make sure its elevated enough off the ground to not put any pressure on them?

Thanks in advance for any help!

dont remove the rotors.
remove the rear sprocket hub and inspect the cush drive for cracks.

get a wheel stand if you're going to use irons. if you're not going to get a fancy tire changer, get the stand at least. it will save your back and your rotors.

i have a Happy Trails Tire Bead Breaker, which is a fancy c-clamp. There isn't a tire bead that can't be broken with this thing. I've used it on some extremely stiff sidewalls. I've tried using a kickstand and putting almost the full weight of another bike on those tires, and the bead wouldn't break. The happy trails was the only thing that worked. keep that in mind.

also, get some weights and a balancer. harbor freight to the rescue, again!

some links:
Neduro's Tire Changing Class - ADVrider
ignore the rim lock stuff^

Tire Iron BeadBrakR slide show - BestRest's Photos
skip the bead breakr stuff. that thing sux. the happy trails one works!!

use wd40 for lube. it wont evaporate when it's hot out.

it's good to know how to do this with an offroad bike, and not as important for a sportbike/sport-tourer. dirtbikes use tubes so you have to replace the tube for a flat, so you have to be good at this procedure for if you're out in the wilderness.


good luck. it's better to have a friend with a tire changer who will do this for beer. seriously.
 
Leave your new tires out in the sun, it makes a huge difference when they're warm. I've done several sets of my own tires and I've never needed to use lube doing it that way. Do make sure to replace the valve stems, and you can use an old tire underneath to protect the rim/rotor.
 
I love swapping rubber on this bike. It's pretty easy to do at home with basic tools and patience.

All the advice above is solid. I can add the following:

1. One of my favorite tips from this site is using the back (hex) end of a standard 5/8" spark plug socket for the front axle. The tool in the stock kit is crap and often breaks.

2. Be sure to loosen the set screw before trying to unscrew the front axle.

3. Don't touch the brake brake lever/pedal with the wheels removed.

4. Be sure to pay close attention when loosening the chain tension screws on the swing arm. Mark or otherwise note their original position. This just makes life easier later.

5. Somebody mentioned a clamp tool above.. I've been happy with cheap c-clamps (you'll want to pinch the sidewalls together and keep that portion in the "deep" center of the rim while you work the opposite side of the tire into the rim.

6. Buy 3 short tire irons rather than two long ones. The extra leverage from the long ones puts your rims at risk.

7. The 2x4 bead break method works a treat. I leave the wheel assembled and simply make a loose frame out of scrap lumber to keep the sensitive bits off the ground.

8. WD40 really is the perfect lubricant for the job.

9. Wear eye protection and gloves. Regardless you'll still get hurt somehow.

10. You can use jack stands and the existing axles for balancing. It's definitely "good enough" and much cheaper than buying a balancing jig. Your local tire shop should give/sell you some balance weights.

Good luck - take your time
 
+1000 on wd-40 as your tire lube it will save all kinds of b1tchin and moanin, if you don't have have any wd soapy water works just fine, but be careful if you try to use some other spray lubricants because most others can actually eat into the rubber
 
That's good advice to keep the irons/spoons short; cause when you have the tires bead properly recessed into the wheel, you don't need a big spoon to get results. This will save you as you don't want to dork up your rims. :thumbup:

Although we all likely have WD, liquid hand soap works well to.

As for the back of the bike; w/the later model swing arms, you don't need to mess with the adjusters at all and frankly I don't know why you'd have to on the early ones either? Leave them alone unless the chain needs adjusting it'll save you time.

Throw some painters tape over the exposed dust seals to keep debris out of the seals while getting the tires off/on. Have some lube handy and clean the axle spacers and seals removing the old road grime. Grease all of the seals lips and dab grease into into four corners of all of the grease/dust seals before putting it back together. A light coating on the axles will help keep rust at bay too should moisture get trapped in there.
 
Finally managed to change the tires yesterday. Thanks for all of the tips guys! I stopped by the Knoxville CycleGear and picked up some tools. Got a set of 3 tire irons, some little rim protectors on ropes, a really neat hammer/wedge style bead breaker, and some wheel weights.

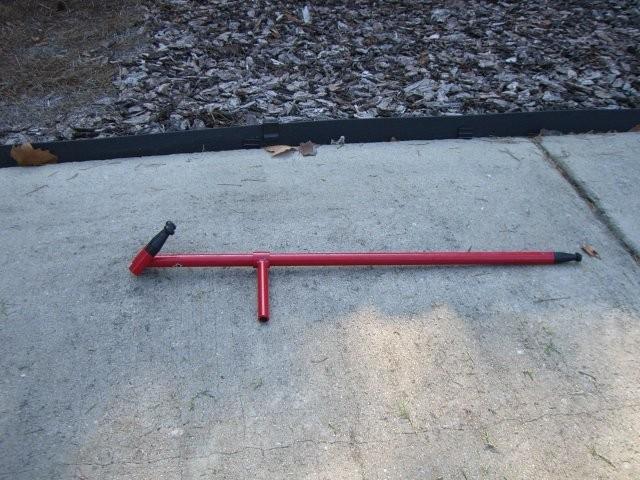
I have removed the front wheel multiple times from the FZ6, so that came off in a snap. The included tool Yamaha puts in the tool pouch actually worked for the front axle, after a bit of fine tuning to it with a hammer. Didn't want to fit in the axle at first. The bead popper I got worked surprisingly well. Motion Pro - Motion Pro Bead Popper. Took a bit more time than a regular leverage style bead breaker, but didn't require any room to do leverage, and cost less than a regular bead breaker tool. As far as the rim protectors, STOCKTON TOOL COMPANY Rim Protector - Parts & Accessories - Cycle Gear, these things are junk. They practically split in half on me, and didn't protect the rim much after they did that. Ended up using a garden hose to protect the rim when doing the rear tire. The tire iron set I bought was these, STOCKTON TOOL COMPANY Tire Iron 3-Piece Set - Parts & Accessories - Cycle Gear. They worked excellent. Not much else you can say about tire irons lol.

I have always been kinda afraid to remove the rear wheel. I have watched guys at trackdays take hours trying to refit a rear wheel after getting new tires put on. I have to say though, the FZ6 is a snap to remove the rear wheel from, and put back on. The rear tire was also a bit easier to remove since it was so worn. Used some Joy dish soap to make it easier putting the new tires on. Worked extremely well, and cleaned up nicely with a little water.

Overall it took me and my father-in-law about 2 hours to do. The rims have a few nicks here and there from those blasted rim protectors that "broke", but other than that, it went perfectly! New tires look great. Hopefully today I will get a chance to try them out on my lunch break :).
aefe72e5-6ae4-7bab.jpg

aefe72e5-6af9-6def.jpg
 
Last edited:
Finally managed to change the tires yesterday. Thanks for all of the tips guys! I stopped by the Knoxville CycleGear and picked up some tools. Got a set of 3 tire irons, some little rim protectors on ropes, a really neat hammer/wedge style bead breaker, and some wheel weights.

I have removed the front wheel multiple times from the FZ6, so that came off in a snap. The included tool Yamaha puts in the tool pouch actually worked for the front axle, after a bit of fine tuning to it with a hammer. Didn't want to fit in the axle at first. The bead popper I got worked surprisingly well. Motion Pro - Motion Pro Bead Popper. Took a bit more time than a regular leverage style bead breaker, but didn't require any room to do leverage, and cost less than a regular bead breaker tool. As far as the rim protectors, STOCKTON TOOL COMPANY Rim Protector - Parts & Accessories - Cycle Gear, these things are junk. They practically split in half on me, and didn't protect the rim much after they did that. Ended up using a garden hose to protect the rim when doing the rear tire. The tire iron set I bought was these, STOCKTON TOOL COMPANY Tire Iron 3-Piece Set - Parts & Accessories - Cycle Gear. They worked excellent. Not much else you can say about tire irons lol.

I have always been kinda afraid to remove the rear wheel. I have watched guys at trackdays take hours trying to refit a rear wheel after getting new tires put on. I have to say though, the FZ6 is a snap to remove the rear wheel from, and put back on. The rear tire was also a bit easier to remove since it was so worn. Used some Joy dish soap to make it easier putting the new tires on. Worked extremely well, and cleaned up nicely with a little water.

Overall it took me and my father-in-law about 2 hours to do. The rims have a few nicks here and there from those blasted rim protectors that "broke", but other than that, it went perfectly! New tires look great. Hopefully today I will get a chance to try them out on my lunch break :).
aefe72e5-6ae4-7bab.jpg

aefe72e5-6af9-6def.jpg

Nice job. Good write up.
 
Nicely done. That Yamaha tool pouch axel wrench DOES NOT want to fit the axel without some good old fashioned hammerin'!
 
the other thing to note is that the heaviest part of the tyre should be marked by a spot, which should go opposite the valve

you can also use a garden hoe or shovel to break the bead (not recommended if you plan on using the tyres again though)
 
I tried doing it once on my old Kawi 600. I'm never trying it again, what a PITA. And I wasnt able to get the bead set because my compressor wouldnt flow enough air, so I had to take it to a shop for that & balancing.

To anyone thinking about doing it themselves, I would suggest to call up a bunch of shops first and find out what they charge. $25/tire is worth it to avoid the aggravation and swearing. On my local forum, there's a guy that does it for $15/tire.
 
props in doing that the hard way!

My Harbor Freight tire changer with motorcycle wheel adapter and a real tire changing tool with nylon tips has paid for itself after just 2 tire changes! I've helped fellow riders change their tires as well...this would be a great thing to go in on with a few riding buddies, with 3 people it would only cost about $50-$75 each initial investment and you would save that with the first change.

240290693-M.jpg


4_no_mar_tire_changing_tool_120.jpg
 
the other thing to note is that the heaviest part of the tyre should be marked by a spot, which should go opposite the valve

you can also use a garden hoe or shovel to break the bead (not recommended if you plan on using the tyres again though)

That circle or spot is actually supposed to be lined up with the valve stem
 
I couldn't find a how to on this so I'll just ask here as I'm about to remove the tires to get some new rubber on the rim.

Do I need to remove the brake caliper, rotor on both sides of the front, rotor+ sprocket on the rear?

Is there anything I should keep in mind while doing this or is there some part I'm missing that I should be replacing within in the wheel?

I've gone through a few threads on the topic and I believe I'll be able to pull this off.
 
I couldn't find a how to on this so I'll just ask here as I'm about to remove the tires to get some new rubber on the rim.

Do I need to remove the brake caliper, rotor on both sides of the front, rotor+ sprocket on the rear?

Is there anything I should keep in mind while doing this or is there some part I'm missing that I should be replacing within in the wheel?

I've gone through a few threads on the topic and I believe I'll be able to pull this off.

On the front remove both calipers but I have never removed the front rotors to change the tires, it's not necessary just don't put pressure on the rotors during changing.

On the rear remove the sprocket (it will fall out of the wheel hub once the wheel is removed anyway. It has little triangle shock absorbing spacers in the hub that come out too. No need to remove rear rotor but rear caliper and the metal bracket it's on have to be moved out of the way to clear the rotor of the swing arm.

Replace the valve stems with every other change at least.
 
On the front remove both calipers but I have never removed the front rotors to change the tires, it's not necessary just don't put pressure on the rotors during changing.

On the rear remove the sprocket (it will fall out of the wheel hub once the wheel is removed anyway. It has little triangle shock absorbing spacers in the hub that come out too. No need to remove rear rotor but rear caliper and the metal bracket it's on have to be moved out of the way to clear the rotor of the swing arm.

Replace the valve stems with every other change at least.

I should have the tools for it except the big sockets(19mm?)for rear and the front I believe it's a (17mm?)hex. Correctly me if I'm wrong, either way I'll find out before I head to the store. Do you happen to have the part number on the valve stem? I know the tires on this bike have been replaced once so it might be a good idea to get new ones.
 
Back
Top