Need some help !

Hobbesca

Junior Member
Elite Member
Joined
Apr 28, 2010
Messages
179
Reaction score
2
Points
0
Location
Comox
Visit site
So ran into a small snag with my bike, I got vandalized. Mostly minor crap, still a pain in the ass though.

They cut my seat, had a spare so that's ok.

Busted my windshield snagging a new (to me !) off of eBay, but in a real kick in the butt, they cut my front brake lines. Would have been more damage I'm sure but they were interrupted by a very nice feller who held them until the police showed up.

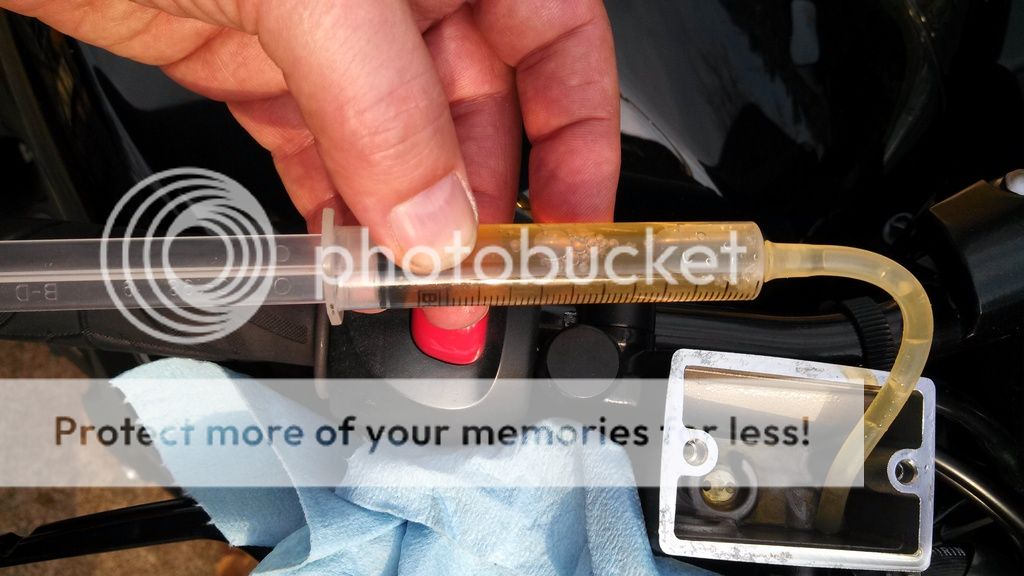
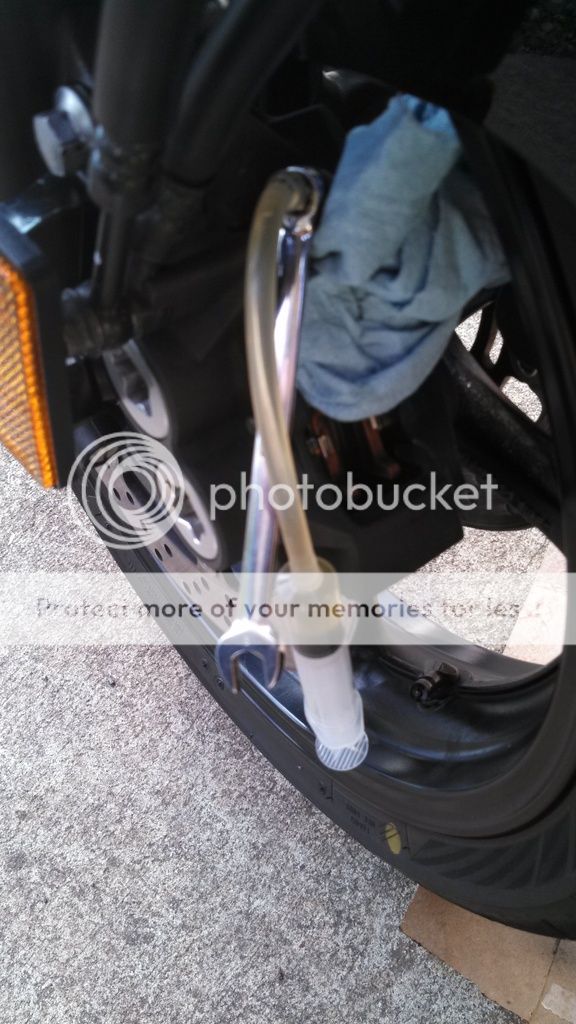
My problem is I snagged some new SS lines but I can't seem to get the brake system to build any pressure, right side pistons I pushed in when I was changing the lines and the left side is still pushed out. I however didn't clean them when I had the calliper off, my bad been a rough week.

So what could I be missing ? Should I pull the caliber off and clean the pistons ? I'm wondering if they aren't sliding or something is pooched on them, seals ?

Early spring here is great but know I can't ride because of this, pretty sure front brakes are important ....

Thoughts ? Help ?
 

FinalImpact

2 Da Street, Knobs R Gone
Site Supporter
Joined
Mar 16, 2011
Messages
11,137
Reaction score
184
Points
63
Location
USA, OR
Visit site
WOW! Thats gotta suck but its better than smashed tanks and things of that nature. Sorry man.

Quick easy solution is grab a 50cc syringe, fill the reservoir, crack the bleeder on the longest line and PULL the fluid down from the top. Fill the Reservoir and repeat on the other side. Once done filling the lines, now you use the lever to build pressure and pressure bleed them. Look here Post #7 -- Click! BRAKE BLEEDING, CALIPER AND PAD INSPECTION

The process I use to bleed brakes:
Tip number one - buy a syringe and some soft tubing. Preferred is silicone as it can stretch to any size fitting you might encounter and it very pliable. When it comes time to do a brake flush, simply suck out the old fluid, clean out the reservoir and dump in the new DOT 4 fluid. Note: A turkey baster will work to remove old fluid too. Our goal here is to NOT MIX old and new as its more fluid to pump out.


  • NOTE: Always use Fluid from a NEW UNOPENED CONTAINER!!!
    The reason being, once the seal on the container is broken, the fluid begins absorbing moisture. Also, If it possible, perform brake repairs/bleeding on low humidity days!
    PROCESS:
  • Crack the bleeders to insure they can be loosened and then snug them down FIRM. Fit a long section of hose to the bleeder and into drain pan.
  • Clean MC lid, remove it, remove old fluid (clean inside and seal if dirty). DO NOT PUMP lever when fluid is removed....
  • Fill MC w/FRESH FLUID, install cap/lid.
  • Pump lever/pedal and hold lever down with pressure.
  • Crack the bleeder and continue applying pressure to lever. When the lever bottoms, seal the bleeder promptly.
  • Repeat above steps until clean fluid is coming out. WATCH THE FLUID LEVEL! Don't allow the level to get low or it will force air into the lines!
  • Do both sides if applicable.
  • On the final bleed (both sides), seal the bleeder before the lever reaches bottom. This prevents air from entering the system.
  • Fill MC to correct level, install lid and clean everything spotless!
  • Repeat once a year using NEW DOT 4 fluid!


NEW LINE INSTALL:
If you've installed new lines and have allot of air in the system, use the syringe and open a bleeder. Connect the syringe and pull back on the plunger to pull fluid through from the reservoir.
- BEGIN AT BULLET SECTION above to obtain a firm lever!

Use a syringe to remove old fluid! It's way better than pumping it through!

Click here to view the original image of 1024x576px.
IMG_20140323_172559_017_zpsngh1dyhp.jpg


If you have a long hose, run it straight into a pan or bottle. Here I was in pinch and just let it fill up the syringe.
IMG_20140323_174410_150_zpsdslv3jzy.jpg


  • Do not get brake fluid on anything as it eats paint and will/can dull powder coated items too.
  • ** DO NOT LET THE MC reservoir go empty and suck air or your brakes will be all mushy and you'll have to start the bleeding process over!! **


***********************************

Additional tips:
IMO Vacuum bleeding never gives a solid feel. Pressure bleeding forces the trapped air under pressure to condense into larger bubbles. As the bubbles increase in size, they often move to the top where the bleeder is and can be removed.
To assist the trapped air bubbles in making their way out of the brake system, use a dead blow hammer or a firm block of wood and tap on the caliper striking towards the ground. DO NOT TAP INLINE WITH THE CALIPERS PISTONS ESPECIALLY on FLOATING CALIPERS! If you choose to tap that way, do so gently you can damaged the disc and induce air into the system. This small shock (hammer tap) can remove trapped air bubbles. The momentary shock helps them condense and make their way out of the caliper. Don't leave marks or damage anything. Your tapping too hard if this occurs!

Note: The rear of both S1 and S2 FZ6's are floating calipers. The front of the S2 models are fixed 4 piston calipers. S1 front calipers are floating calipers.

***********************************
 

Hobbesca

Junior Member
Elite Member
Joined
Apr 28, 2010
Messages
179
Reaction score
2
Points
0
Location
Comox
Visit site
That's so awesome thanks, think I'm gonna change the seals and pads while I'm broken down.

Might as well make the best of this
 

TownsendsFJR1300

2007 FZ6
Site Supporter
Joined
Feb 7, 2009
Messages
12,531
Reaction score
1,176
Points
113
Location
Cape Coral, Florida, USA
Visit site
That's so awesome thanks, think I'm gonna change the seals and pads while I'm broken down.

Might as well make the best of this


+1 on changing the seals.

Besides possibly pushing crap into the bores(making things worse), Yamaha recommends the seals be replaced EVERY TWO YEARS.

In real life, expect 4-6 years. The system has mostly air in it now so it'd be a great time to service them...
.
Do you have the "separate single lines" to each caliper OR the "loop" over the front fender style (looks stock)?
.
.
.
Two, separate lines from the master cylinder:
 
Last edited:

lawlberg

Booth Babe
Joined
Aug 13, 2012
Messages
907
Reaction score
11
Points
18
Location
Sydney, Australia
Visit site
That's so awesome thanks, think I'm gonna change the seals and pads while I'm broken down.

Might as well make the best of this

I just finished (this weekend) changing the seals and completely rebuilding a pair of R6S (Same as an S2 FZ6) front brakes that were seized and all fouled up.

I'll say be ready for some frustration, it can be pretty tough to get the pistons out if things aren't cooperating. I used a compressor with a standard fitting (didn't seal very tight with the hole the banjo bolt fits into), but was able to get the pistons out. You'll want a few small blocks of wood, possibly some large Zip Ties, and cardboard in order to keep pistons in place while removing one at a time, once you get the hang of it, it'll be fine, but since you can't brake the caliper in half, you have to worry about the pistons hitting each other, or interfering when you're trying to get one out.
 

TownsendsFJR1300

2007 FZ6
Site Supporter
Joined
Feb 7, 2009
Messages
12,531
Reaction score
1,176
Points
113
Location
Cape Coral, Florida, USA
Visit site
I just finished (this weekend) changing the seals and completely rebuilding a pair of R6S (Same as an S2 FZ6) front brakes that were seized and all fouled up.

I'll say be ready for some frustration, it can be pretty tough to get the pistons out if things aren't cooperating. I used a compressor with a standard fitting (didn't seal very tight with the hole the banjo bolt fits into), but was able to get the pistons out. You'll want a few small blocks of wood, possibly some large Zip Ties, and cardboard in order to keep pistons in place while removing one at a time, once you get the hang of it, it'll be fine, but since you can't brake the caliper in half, you have to worry about the pistons hitting each other, or interfering when you're trying to get one out.

Did ya get at least ONE pinched finger and utter a 4 letter word??

And plus 1 on using an air compressor.

I just used a very pointy nozzle, slipped some rubber tube(tight) around the end and cut it at an angle.

With the tip cut at an angle, you can get into each fluid transfer orifice and blow each piston out (regardless of the other pistons)..

100 PSI usually takes care of it...
 

Hobbesca

Junior Member
Elite Member
Joined
Apr 28, 2010
Messages
179
Reaction score
2
Points
0
Location
Comox
Visit site
I bought the single lines, when I bought my bike it had them and I know from stock cars they hold up better.

These ones seems a touch longer (maybe an inch ?) but they seem to fit nice, I will pop the Pistons tomorrow and redo the seals seems like a good time to do them. Also it's snowing here again and studded tires are hard to find for my bike ....
 

lawlberg

Booth Babe
Joined
Aug 13, 2012
Messages
907
Reaction score
11
Points
18
Location
Sydney, Australia
Visit site
Did ya get at least ONE pinched finger and utter a 4 letter word??

And plus 1 on using an air compressor.

I just used a very pointy nozzle, slipped some rubber tube(tight) around the end and cut it at an angle.

With the tip cut at an angle, you can get into each fluid transfer orifice and blow each piston out (regardless of the other pistons)..

100 PSI usually takes care of it...

Extra rubber hose would have made things a bit easier, I couldn't track down what I was looking for so I wound up being needlessly frustrated. Fortunately I was still gun shy of pinching my fingers after an incident with a hammer back in December, so I was expletive free!
 

FinalImpact

2 Da Street, Knobs R Gone
Site Supporter
Joined
Mar 16, 2011
Messages
11,137
Reaction score
184
Points
63
Location
USA, OR
Visit site
Once you apply a little pressure you can see which are free and which are stuck. Get the stuck one moving by isolating the others using an aluminum, steel, or hardwood to block one side. Then insert a larger block to the more free piston on the other side. Add filler and basically pin the 3 pistons in place so they cant move.

Pad the caliper and pop out the single piston using air.
Now cover the hole with aluminum plate and a C-clamp, to free the opposing piston...

The goal is control... Also, pumping them out and cleaning them, then pushing them back in does free them up a lot.

You can even do this before the caliper is removed using the hydraulic system. Hold the brake lever down and you can manipulate each piston by hand...
 

Hobbesca

Junior Member
Elite Member
Joined
Apr 28, 2010
Messages
179
Reaction score
2
Points
0
Location
Comox
Visit site
Big thanks to Finalimpact and TownsendFJR1300, brakes are complete and I'm pretty sure I would have been extremely annoyed with out your input.

Did my fronts complete, seals and pads (they were below the mins) and then since everything was so much fun I did the rears also. The pads were fine and the seals seemed alright but hey in for penny right.

I did notice that the brake fluid from the rears also had some crude in it, I think had picked up some moisture seems like a decent idea to change it out every year going forward.

Either way thanks folks appreciate the info
 
Top