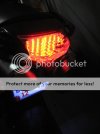
This install isnt really that hard once you get a clear idea of what is needed to be done to accomplish it. this kit is not a simple 10 minute plug and play, but can realistically be finished in about 30 minutes if your mechanically inclined. PLEASE keep in mind, the previous owner did some tail modifications to my bike, so if you see something that doesnt match, use your best judgement.
for $20, this is a pretty good mod. i probably would be alittle peeved if i had paid the original $80. there are no instructions, so here is the way i did it. ymmv.
THE FOLLOWING IS TO REMOVE THE TAIL SECTION. if youve already done this, skip to the next section!
first, of course, remove the seat.
next, remove the small allen head bolt securing each side panel. once removed, pop off each side panel. there are two rubber grommet type fasteners, and depending when the last time they were removed was, they may take some pulling to get off.
now, go ahead and unplug the bulb from the taillight housing. you can leave the housing attached to the tail section, it will be removed later.
now remove the two philips head screws attaching the black moulding directly beneath the taillight and between the exhausts.
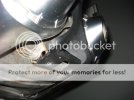
remove the four tail section mounting bolts. they are hex 12mm. there are two on top in front of the tail light...
and there is one on each side, normally hidden by the side panels. there is also a philips head screw on the bottom of each side that needs to be removed...fingers pointing to each...
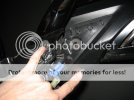
now, pull out on the two sides of the tail section gently and lift up to give you some room for the next step. on the left side of the bike, on the backside of the tailsection, you will see a silver bracket that secures the taillight wire. it is secured with two philips head screws...go ahead and remove these.
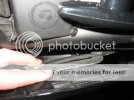
you may finish lifting the tail section off of the bike now!
with the tailsection loose, you will need to seperate one side of the plastic facia panel from the actual tail section. this will allow the taillight assembly to be removed. there are two philips head screws on the under side of the tail section, remove them. now, on the left side of the tail section, gently use a flat blade screwdriver to pry the several small tabs securing the facia panel and lift one side of it away from the tail section (tabs are below the silver heat shielding, tail section is upside down in pic)
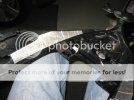
the facia panel should hang away from the tail section like so..
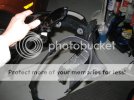
you may now remove the two philips head screws holding the taillight in place. carefully pull the taillight from its resting place (it may take some effort)
remove the taillight lense using a small flat blade screwdriver to carefully lift up on the mounting tabs.
TO INSTALL THE LED TAILLIGHT KIT (congrats if youve made it this far!)
the silver collar piece needs to be attached to the back of the led circuit board. the wires that are soldered in place are kindof in the way, but you can very carefully bend then out of the way. there are two holes in the circuit board that correspond with two tabs on the collar. the tabs also have holes in them for the screws. NOTE: the collar will NOT sit flush on the circuit board...dont try to make it do that!
you will use two of the philips head screws in the kit to attach the collar in place. from the led side with screws in place...
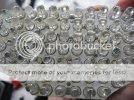
from the inside...
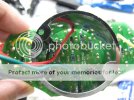
NOTE: i am NOT using the kits turn signals, just the tail/brake lights. i cut the turn signal wires off. if you do use them, they get placed into the recessed channels on the side of the collar and up and out of the holes at the top of the channels. this allows the collar to sit flush inside the reflector housing.
i could not think of how the manufacturer intended to keep the circuit board secured to the reflector housing, so i drilled a very small hole in the top of the taillight assembly with the led's collar in place. i then used another of the philips screws from the kit to hold it all together. it is very secure, so i am recommending this step (unless you can think of something i couldnt!)
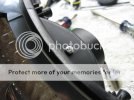
you may now attach the kits clear lense. note that the two tabs shown (one on each side) below did not connect with the tabs on the taillight housing. the remaining tabs did attach and hold it very securely...enough so that i didnt bother to mess with these two tabs.
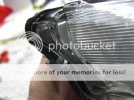
plug the light into the bike and make sure it works. if so, (and it should) reattach the taillight assembly to the tailsection and reverse all prior steps.
it was too cold to raise the garage door, so heres the best view you will get for now!