My new/first real project

erburtt

Junior Member
Joined
Mar 19, 2013
Messages
212
Reaction score
6
Points
0
Location
Kingston, ON
Visit site
Ive always disliked one thing about my fz6, and that would be that I dont have enough to fiddle with on it, it always starts, runs perfect, does exactly what it should. The previous owner took care of all the beginner mods, and I installed hyperlights, made my own fender eliminator, stainless brake lines, and reflective rim tape. Things beyond that start getting expensive. So I decided to pick up a bike for the winter I could customize and build from the bottom up, keep my busy.

Behold: 1979 Honda cm185T, $300 delivered and came with an ownership
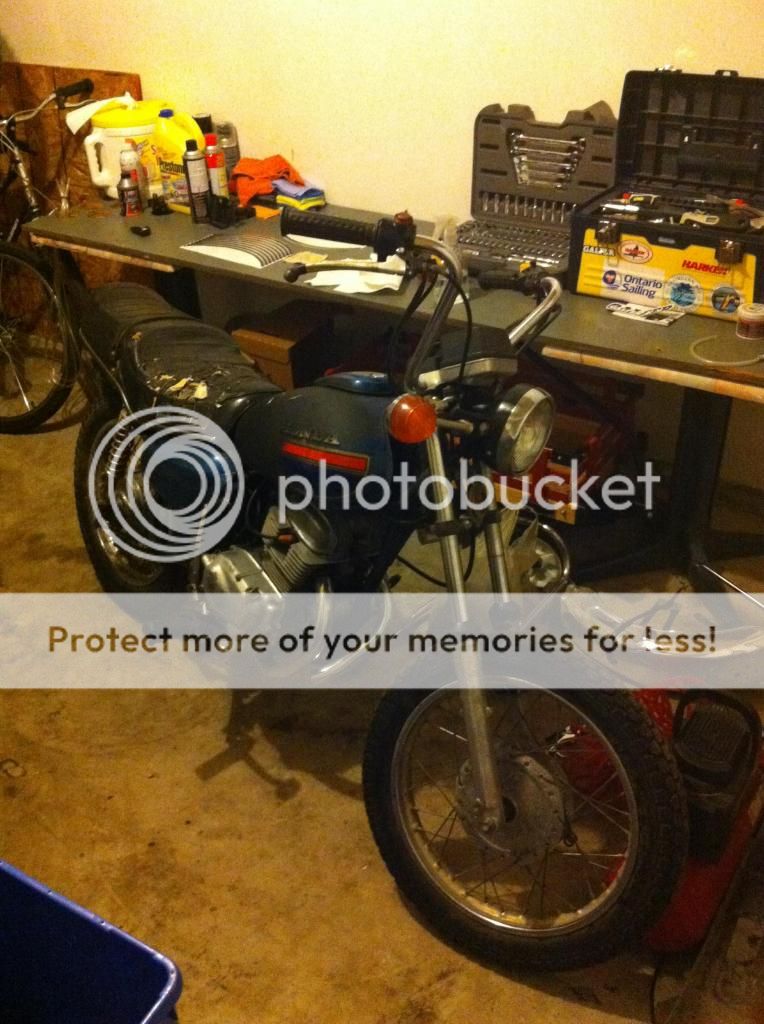
This was day 1 just after the previous owner dropped it off for me, it doesn't run, PO says no spark.

Damage control:
No spark
Very rusty tank
Shot tires, original to the bike
Torn up seat
Absolutely awful chain
No mufflers, who needs em anyways, its only a 180cc
Rear sprocket worn down sharp enough to saw wood
Lots of dirt and grease, did I say lots?

Good things:
PO did the clutch plates and oil/filter change
Brakes seem to be in good condition
Clean carb, seems to be in good condition
New air filter
only 14,000 km (hopefully, the tack turns over at 99,999)

Day 3:

SHE RUNS!

I adjusted the points and ignition timing, got it to spark, sprayed some gas in the cylinder and she fired up on the second kick. This might be a bad thing since now I know it runs I feel comfortable ordering parts for it

This is sort of my inspiration for how I want it to look when Im all finished

Exact same bike, just lots of powdercoat and fabrication, I have a little bit of welding experience so hopefully that helps.

I would say my biggest hurdle so far has been dealing with an ignition system im unfamiliar with and the unreasonable amount of sticky old wax and grease covering everything, it seems the original owner went the no clean and just add more lube route on the chain.

At this rate Im going to be done before winter even starts!
 

Nelly

International Liaison
Elite Member
Joined
Jul 8, 2007
Messages
8,945
Reaction score
125
Points
63
Location
Co Offaly, ROI
Visit site
Ive always disliked one thing about my fz6, and that would be that I dont have enough to fiddle with on it, it always starts, runs perfect, does exactly what it should. The previous owner took care of all the beginner mods, and I installed hyperlights, made my own fender eliminator, stainless brake lines, and reflective rim tape. Things beyond that start getting expensive. So I decided to pick up a bike for the winter I could customize and build from the bottom up, keep my busy.

Behold: 1979 Honda cm185T, $300 delivered and came with an ownership

This was day 1 just after the previous owner dropped it off for me, it doesn't run, PO says no spark.

Damage control:
No spark
Very rusty tank
Shot tires, original to the bike
Torn up seat
Absolutely awful chain
No mufflers, who needs em anyways, its only a 180cc
Rear sprocket worn down sharp enough to saw wood
Lots of dirt and grease, did I say lots?

Good things:
PO did the clutch plates and oil/filter change
Brakes seem to be in good condition
Clean carb, seems to be in good condition
New air filter
only 14,000 km (hopefully, the tack turns over at 99,999)

Day 3:

SHE RUNS!

I adjusted the points and ignition timing, got it to spark, sprayed some gas in the cylinder and she fired up on the second kick. This might be a bad thing since now I know it runs I feel comfortable ordering parts for it

This is sort of my inspiration for how I want it to look when Im all finished

Exact same bike, just lots of powdercoat and fabrication, I have a little bit of welding experience so hopefully that helps.

I would say my biggest hurdle so far has been dealing with an ignition system im unfamiliar with and the unreasonable amount of sticky old wax and grease covering everything, it seems the original owner went the no clean and just add more lube route on the chain.

At this rate Im going to be done before winter even starts!
That looks brilliant, Kerosene is fantastic for removing chain gunge.
Thanks for posting,

Nelly
 

Smersh

The Pillaging Tatar
Elite Member
Joined
Jul 1, 2010
Messages
828
Reaction score
50
Points
0
Location
Greenwich, CT
Visit site
it always starts, runs perfect, does exactly what it should.

Man, we are some picky and hard-to-please crowd. :D

Looks like an awesome project, man! Good luck! keep us posted on the progress - i'm very interested in what you are going to do with it. One day I'm hoping to do something similar
 

erburtt

Junior Member
Joined
Mar 19, 2013
Messages
212
Reaction score
6
Points
0
Location
Kingston, ON
Visit site
I figured it was time to update this a little bit, I'm keeping this thread as a sort of journal with pictures for myself.


I've done quite a bit in the past couple of months, started by tearing the bike down to the absolute minimum, I believe the only thing left assembled is the spokes in the wheels.


Its more of a bicycle now!

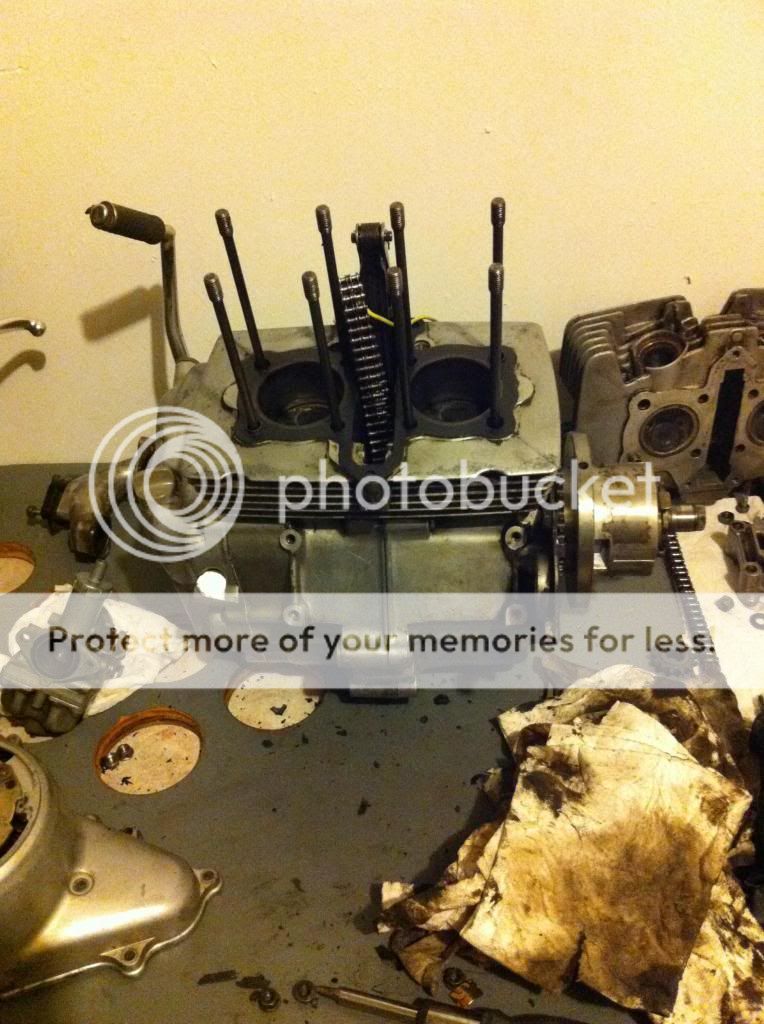
I took the engine out and tore it down as far as having the cylinder jug and pistons off, found a previous owner had made a cylinder gasket out of some cardboard among some other "unique" fixes.

Before:


After:


An order of some OEM parts from Honda was in order, got a bunch of gaskets, exhaust o-rings, some rubber boots for kick start and shift pedal.


A lot of taking the engine apart was for my own learning, I didn't change the rings as that would have been an extra $80 in parts but at least im comfortable tearing it back down if I need to do it down the road.

I've been ordering a lot of new parts from ebay, and a local dealer these include:
New chain
New throttle cable (turned out to be wrong size, got hosed on the shipping too!)
Back sprocket
Head bearing
Brake and clutch lever
Headlight + bucket with H4 bulb (old is a sealed beam)
Set of allen bolts for the engine covers
OEM used exhaust (needed it for the headers mainly)
New turn out style mufflers
Used gas tank from a 70's Suzuki with the look I want
New bars
New handlebar switch
New hand tooled brown leather seat
Bar end mirrors
Fuel pet****

Im going with a minimalist approach, took the electric starter off and am eliminating as much of the stock electrics as I can. I bought a 12v rechargeable power source to run brake and signal lights off of so I can go LED and not worry about working around the stock 6V system.

Things I still need to order or buy include:
Tires (priced a set out at $150 installed!)
potentially new brake shoes
handlebar grips
turn signals and brake lights
flip up mount for the seat.
Brand new aftermarket Carb? (comes with a throttle cable which is really hard to find)
Pod air filter
Jet kit for the carb
handlebar top clamp
handlebar mount for my iphone which I will be using as a speedo
 

erburtt

Junior Member
Joined
Mar 19, 2013
Messages
212
Reaction score
6
Points
0
Location
Kingston, ON
Visit site
Continuing with my build I chopped the frame and cut the old tires off the rims made sure to do it behind any reinforcing gussets so I know I'm doing nothing to its structural integrity.

One side down, guess I'm committed!


Here it is with the tank on it, both the tank and frame required some altering to get it to fit, I still need to apply some heat to the tank and widen it slightly underneath.


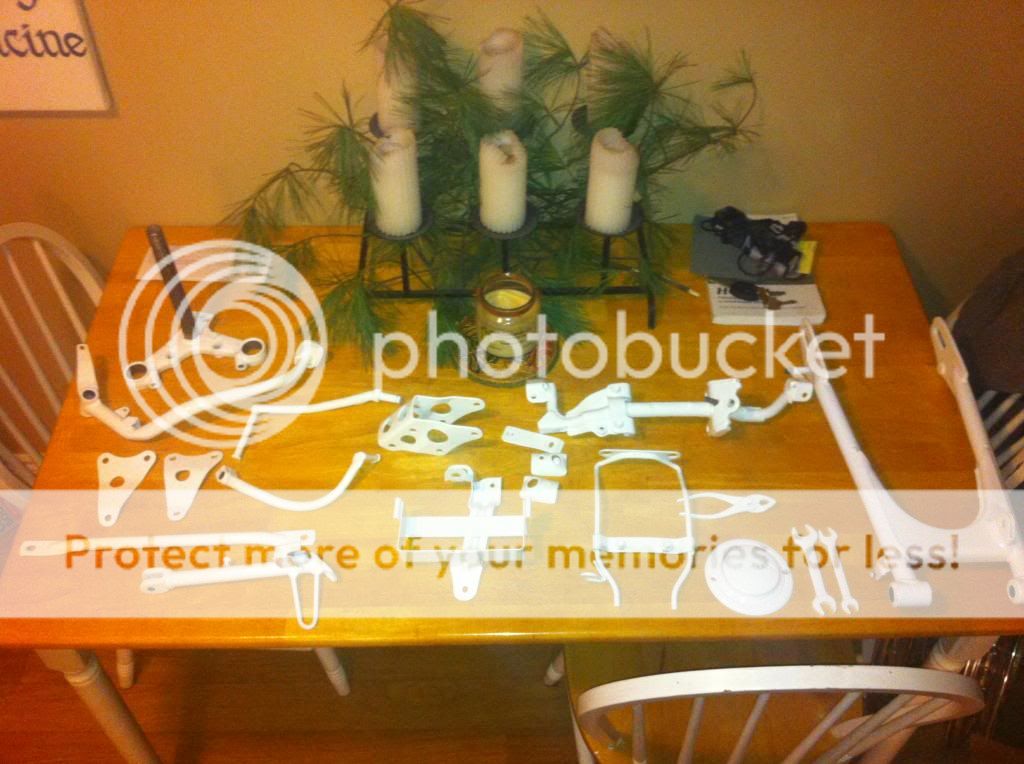
I got a large batch of parts done at a local powder coating shop. I have mixed reviews on the final product.


You might be able to tell my girlfriend is gone for the week! I don't think this would fly regularly

I'm happy with most of the powder coating done, however they did manage to fudge up some of it:

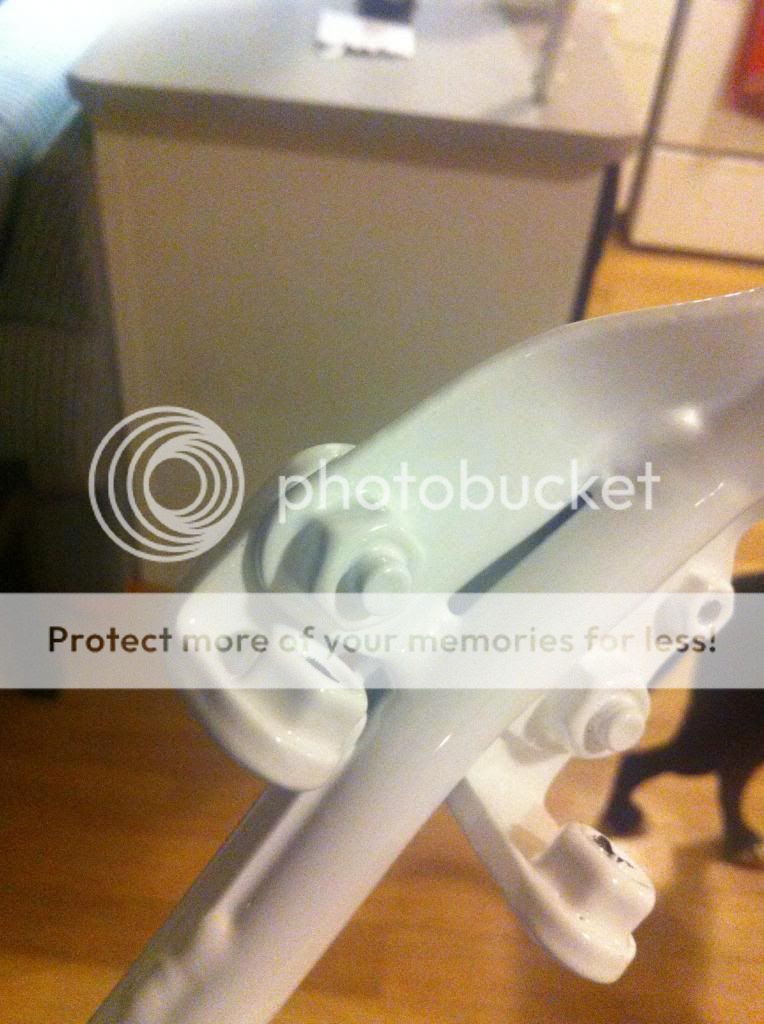
No pre-baking results in this:


Looks like they forgot a plug in it too

I was brushed off by the workers when I tried to go through my box of parts with them and explain what I wanted done. I was assured they knew what they were doing... So I wonder how things turn out like this:


Yes they didn't bother to take the piece apart and just coated over the bolt, nut, and threads! I only had it together so it didn't get lost.

I'm taking the parts I'm concerned about back today to be redone, shame they didn't do it right the first time, Its going to be a bigger pain for them to strip them all again, a little unnerving when I need to explain what a prebake is or why parts need to be taken apart
 

nivag

Junior Member
Joined
Sep 2, 2008
Messages
470
Reaction score
8
Points
18
Location
London, England
Visit site
Look forward to seeing this finished.
I've heard it a few times that powder coaters don't bother to split parts unless they are expressly told to.
 

erburtt

Junior Member
Joined
Mar 19, 2013
Messages
212
Reaction score
6
Points
0
Location
Kingston, ON
Visit site
Time for an update! I've been working on my bike on and off when I can... got pretty busy with school and whatnot so progress has been a bit slow.

I'm done ordering parts for the most part, everything that's gone on lately has been fabricating little brackets everywhere, doing all my wiring (from scratch I might add) and assembly/making things fit

This one is going to be a bit pic heavy:

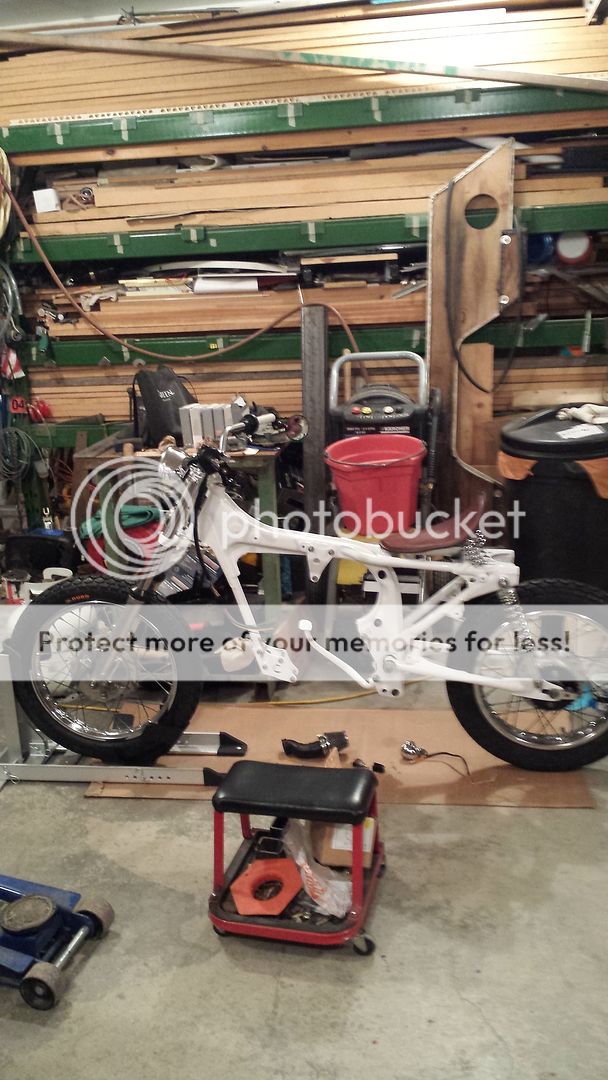
Got her started to be put back together, those are brand new tires and a nice handmade leather seat, still working on how to properly mount it.


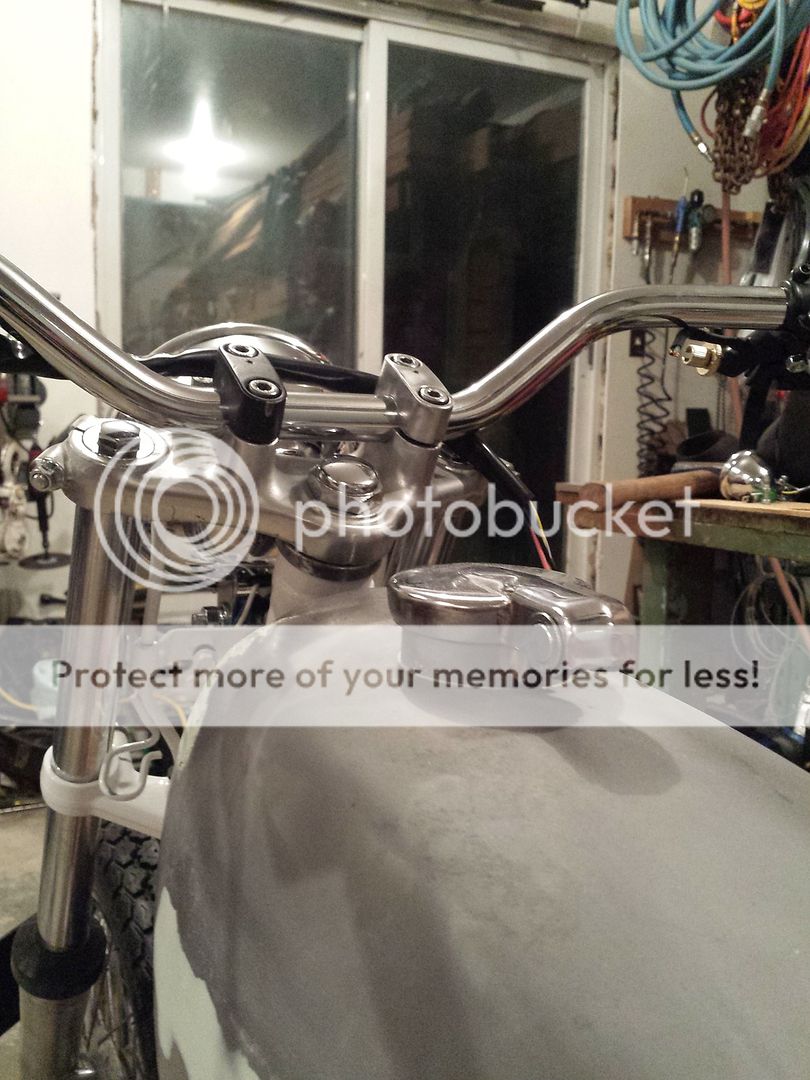
Brand new controls and headlight. This is what the face is going to look like.


That looks like an engine! I think the last pics I posted were this all apart on my bench, got it all put back together with new gaskets, almost screwed up the timing on my first try but I caught the mistake and got it right (I hope)


My taillight and turn signals recessed into the frame, you'll notice the tank, I filled all the emblem cutouts and put a ton of work into it with primer and sanding, the seat mounting is starting to take shape


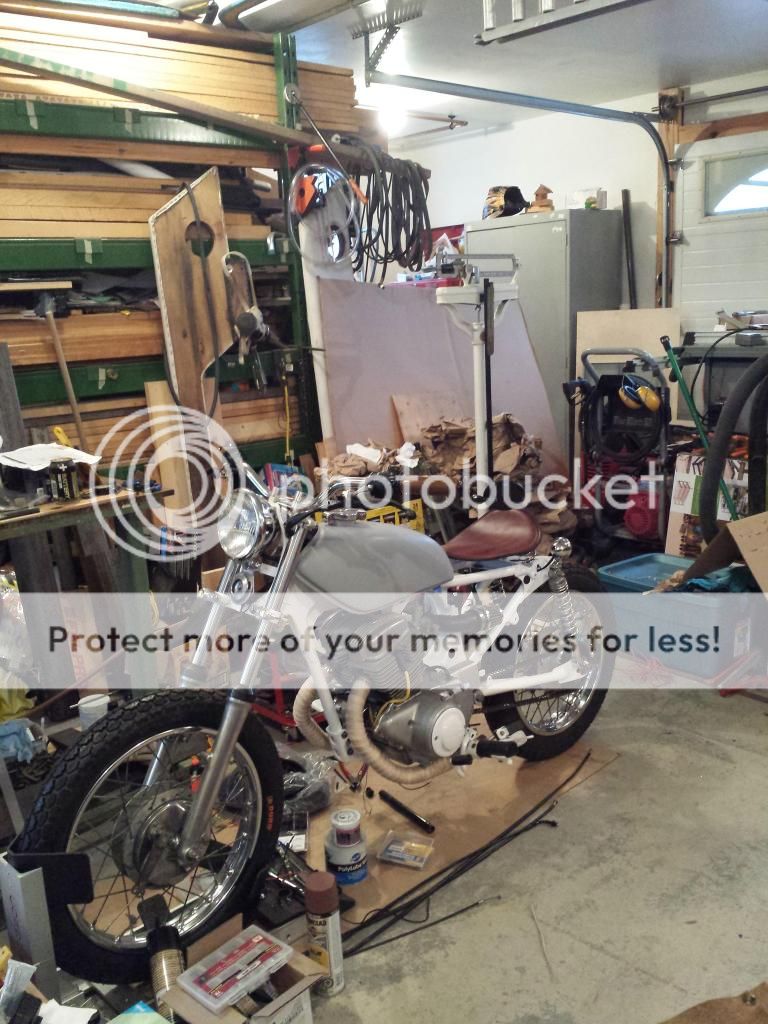
Bit of a wider view, I have my headers installed now, wrapped them with some high heat tape, The grips I searched far and wide for, they sure dont make them that easy to buy for those in Canada.


This is the gas tank prior to priming, the cap has a locking mechanism Ive had to take apart and rebuild myself, I took it to a locksmith where they almost broke it and immediately dropped a part I had to crawl around on the floor to find, they did provide me with a key for it though, only one pin so pretty easy to use. It works great now.


She's beginning to take shape!


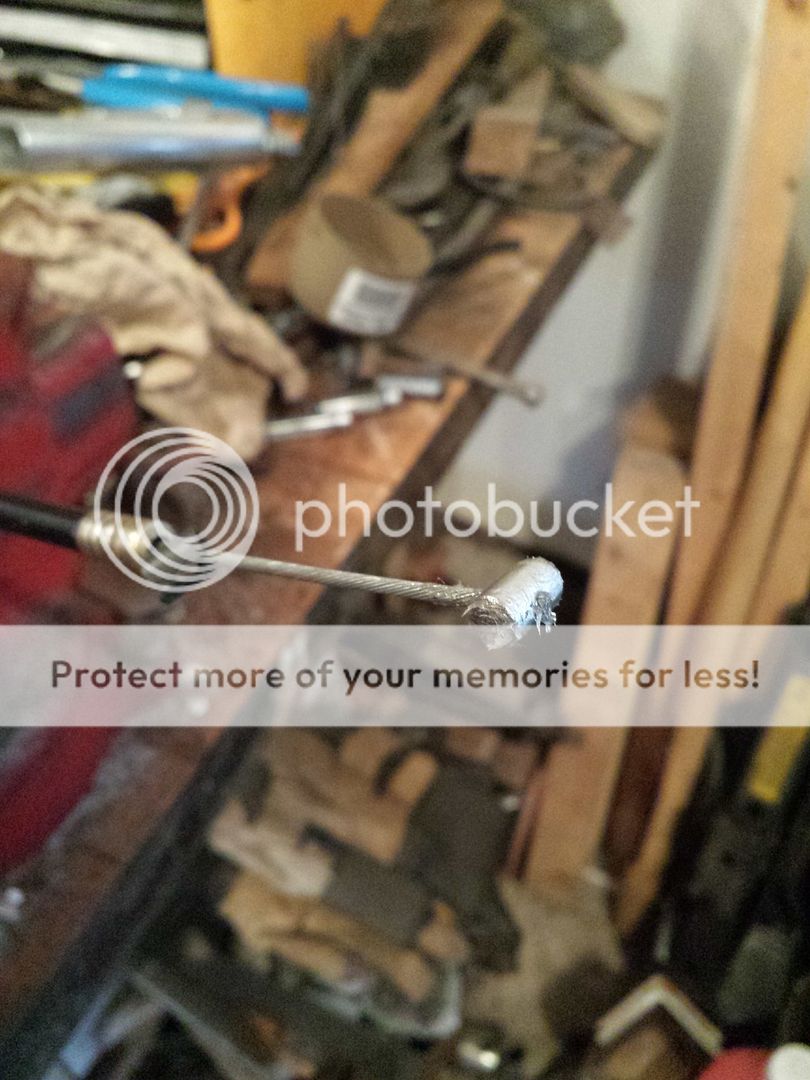
Custom cable making, Im going the oldschool route with a solder pot. Aftermarket cables for this bike are extremely hard to find so I had to be careful when i was shortening the ones I had, only one shot at it! I shortened the clutch and front brake cable successfully though


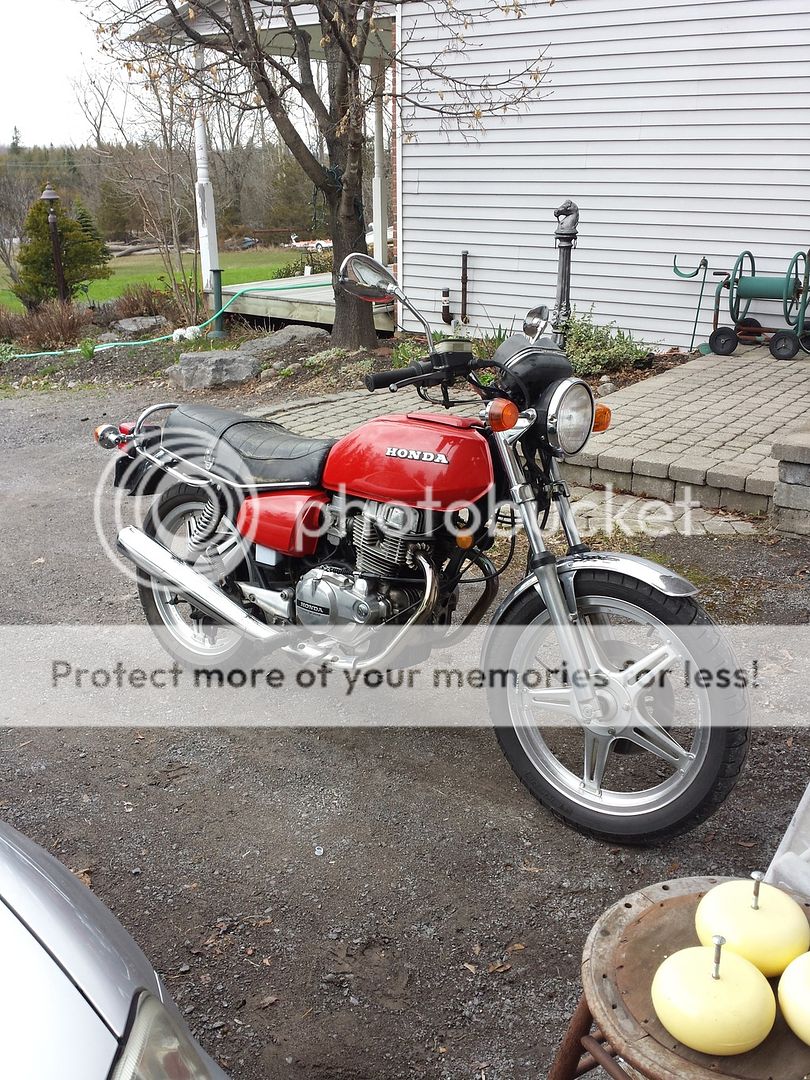
Next project?! I have a problem... In reality we picked this bike up for my little brother, runs great, but when he's done learning on it I'll be taking it and rebuilding it. Not sure if I want to go a mod/restoration or just a nice classic restoration... this ones in pretty good shape so I'm thinking of keeping it classic
 

erburtt

Junior Member
Joined
Mar 19, 2013
Messages
212
Reaction score
6
Points
0
Location
Kingston, ON
Visit site
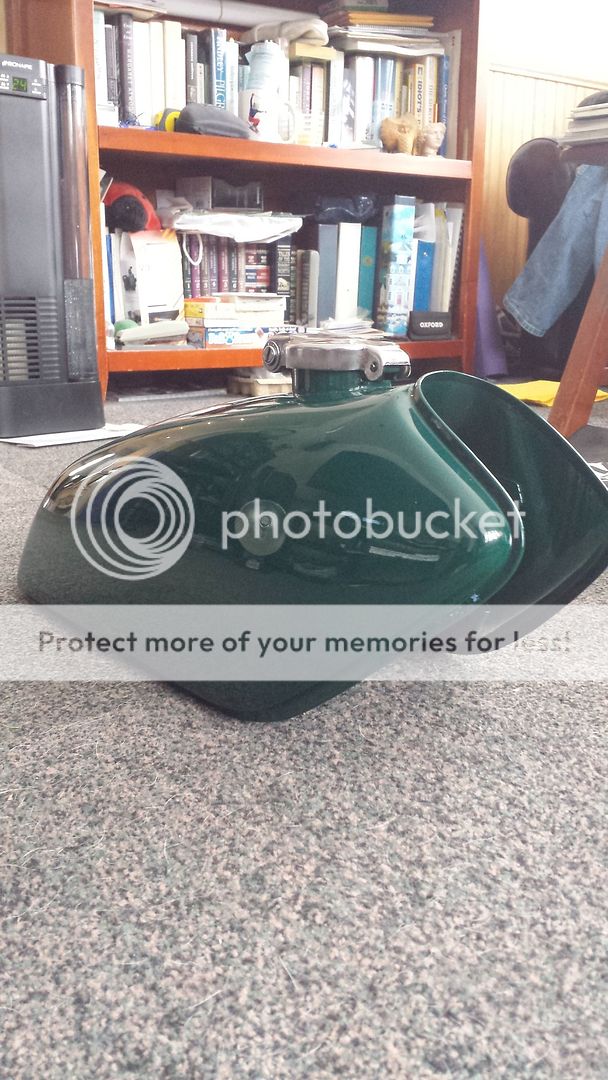
I decided against painting the tank on my own, I wanted a good quality clear coat finish on it, something I cant really do at home with a rattle can... So I took it to a local body shop and $125 later Ive got this!


Mounting the tank was a bit of a hurdle, its not actually for this bike, I bought it for the shape, none of the mounting stuff was even remotely close to the same. This tank is off a Suzuki TS250 or something. I made some custom aluminum mounting brackets though that bolt onto the frame at the engine mount spots. This will support it and heavy duty interlocking plastic thingys (like velcro but not designed to move at all or really come apart often) will hold it in place.

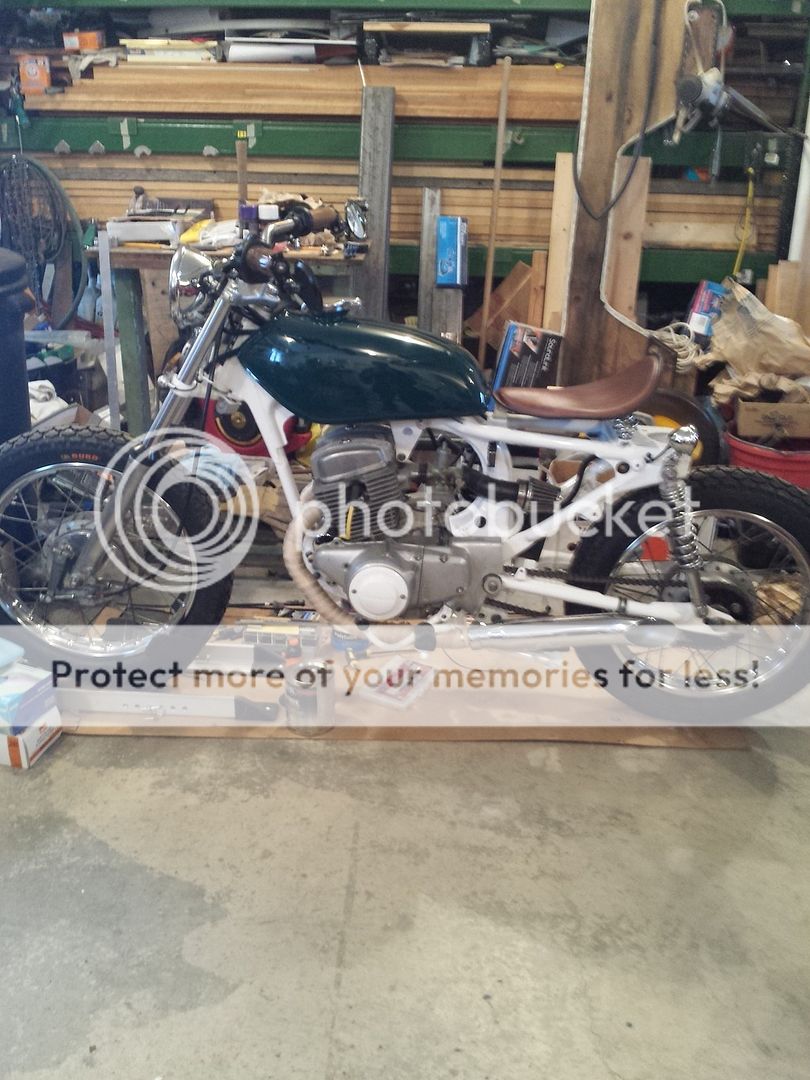
Side view with my new mufflers installed, might sound pretty mean when I fire it up for the first time. I sold off the old tubes I cut off the headers when I bought them


Little bit of bling for the front, this is from my custom wood burning tool for my various wood working projects


Just about there!


Wiring harness is done, everything works (for now!) all I'm waiting on is a relay that works with these lights, I tried a couple LED relays but they all required more current then what's passing through them. My wiring harness is a bit funny, its a 6v bike but I wanted to run LED's for my turn signals and brake light, so I installed a little rechargeable 12v power pack that runs those while the rest of the bike is on the 6v circuit.

Final steps are: painting and installing my Honda emblems on the tank, rejetting the carb (I changed the intake and exhaust), installing the tank properly and for good, getting a safety inspection done (fingers crossed), and taking the thing for its first ride!
 

kinderwood

Junior Member
Elite Member
Joined
Apr 27, 2008
Messages
200
Reaction score
3
Points
0
Location
Frederick, MD
Visit site
Really cool. I especially like the rear indicators recessed in the frame.

Were you able to get the powder coating issues sorted out?
 

raja777m

Ride like you own it..!
Joined
Mar 31, 2015
Messages
848
Reaction score
2
Points
18
Location
Charlotte, NC
Visit site
Rear sprocket worn down sharp enough to saw wood
That cracked me up like hell.
I wish you a very good luck on the new project bro.
 

FinalImpact

2 Da Street, Knobs R Gone
Site Supporter
Joined
Mar 16, 2011
Messages
11,137
Reaction score
184
Points
63
Location
USA, OR
Visit site
Great Progress! Looks very NICE!!

Does your location require fenders to pass inspection? Also, where the engine is first fitted - the chrome looks pretty fair on the headers but they were chopped up???
 

erburtt

Junior Member
Joined
Mar 19, 2013
Messages
212
Reaction score
6
Points
0
Location
Kingston, ON
Visit site
Really cool. I especially like the rear indicators recessed in the frame.

Were you able to get the powder coating issues sorted out?

Yeah, I took it back and complained to them, they restriped the parts they did wrong and redid them... hard to spot any bad bits now at all with everything installed and on the bike
 

erburtt

Junior Member
Joined
Mar 19, 2013
Messages
212
Reaction score
6
Points
0
Location
Kingston, ON
Visit site
Great Progress! Looks very NICE!!

Does your location require fenders to pass inspection? Also, where the engine is first fitted - the chrome looks pretty fair on the headers but they were chopped up???

That's still something I need to find out, a lot of "$100" safety's go on around here if you know what I mean... I obviously make it a safe bike to ride, but if I bend some rules on silly local regulations I'm not too concerned, the funny thing is the safety inspection might require stuff like a speedo, turn signals, etc. but the highway traffic act doesn't, so as long as I get it certified cops cant/wont ticket me for the missing stuff (within reason)

The chrome on the headers was okay... I polished and cleaned them up quite a bit before, the old muffler tubes (which were welded on) were pretty ugly and restrictive so I cut them off and went with my aftermarket mufflers. Both an aesthetic and performance improvement
 
Top