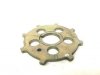
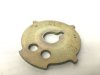
Second one is the trigger wheel. Of course all thanks for this one is given to [MENTION=15974]FinalImpact[/MENTION]. And, to say it first, just like he says, this is at your own risk.
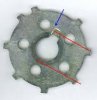
Ok, so when I did the trigger I took a few pics, in case anyone wants to do it and could use them. All steps to getting to the wheel are already listed so I won't be redundant. Once you have the wheel in hand, it's time for some filing. The one thing I forgot to take pic of was the file itself. I used a little jewlers file, and ground off one of the SIDES (not one of the faces), so that all those file strokes would not mar the face of the wheel itself. The marks you do see on the wheel are just surface marks, there is absolutely no deflection there (i.e. those scratches are less than .0001") I was going for 4 degrees of advance, so in my case this equated to taking just over 1/32" off of the nub. Your results may vary, check your math!
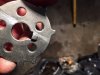
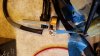
Okay, so filed, checked, double checked, good. Now to fill in the back side of the wheel. I could have welded it but I was doing this for the forum, so I decided on the flat peen instead. I figure more people have a hammer and vice than can weld. In the next pic you see where I have taken a hardened piece of steel that is about the same width as the nub, and placed it in a vise (just snug). Then, I put the wheel on the vice, with the frontside of the nub on the piece of steel. Couple taps lightly on the backside of the nub (where we've been filing), and Voila, now your piece of steel sticks up from the vise just far enough to support the nub when the rest of the wheel is flat on the vise. Now you tighten the vise. VERY tight, like hammer on the handle tight.
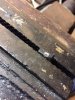
Ok, get your flat peen. Again, I just used a piece of hardened steel rod. But make sure that the surface is truly flat, and truly at a 90 degree angle, so that you can control the peen.
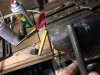
Ok. Now place the flat surface of the peen on your nub. Make sure you are only about half way on. Make sure you are on the backside (the side you did not file). We are going to give a couple whacks with the hammer, and as the backside gets smooshed down, it will expand outwards. Remember, we only took off a little, so we only need it to expand a little as well. When I did this and the nub ended up a bit flatter than it was before, that was alright because there was still enough there to grip in the keyway very well.
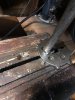
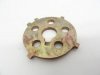
Originally when I took the bolt out to remove the wheel, there was a little play from the nub not completely filling the keyway (probably only a few thousandths, but there was play). When I peened the backside I went just a tiny bit too far (on purpose). Then, I filed the very small amount of extra off of the backside. Now I had the leading edge I filed for the advance, the trailing edge that I flat peened and filed back to fit, and a wheel with a nub that was perfect and actually had to be pressed in to the keyway like a key (nub) should be.
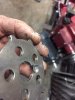
Oh shoot, that pic was after the peening but before I filed the backside back to fit. But you get the idea. It really was a tight, good fit, with plenty of grab, and I am personally not concerned at all about reliability issues. Any of them would arise from movement, and seeing as how it could move originally (once you loosened the bolt), and it can't move now, I'm pleased.
Well, ok, that's it for now. Hope I wasn't confusing in any way, and hope these pics are good. Y'all will have to excuse my alligator hands. The constant wet/dry/wet/work around here takes it's toll on a man

.