Learning CURVE = Deployed!
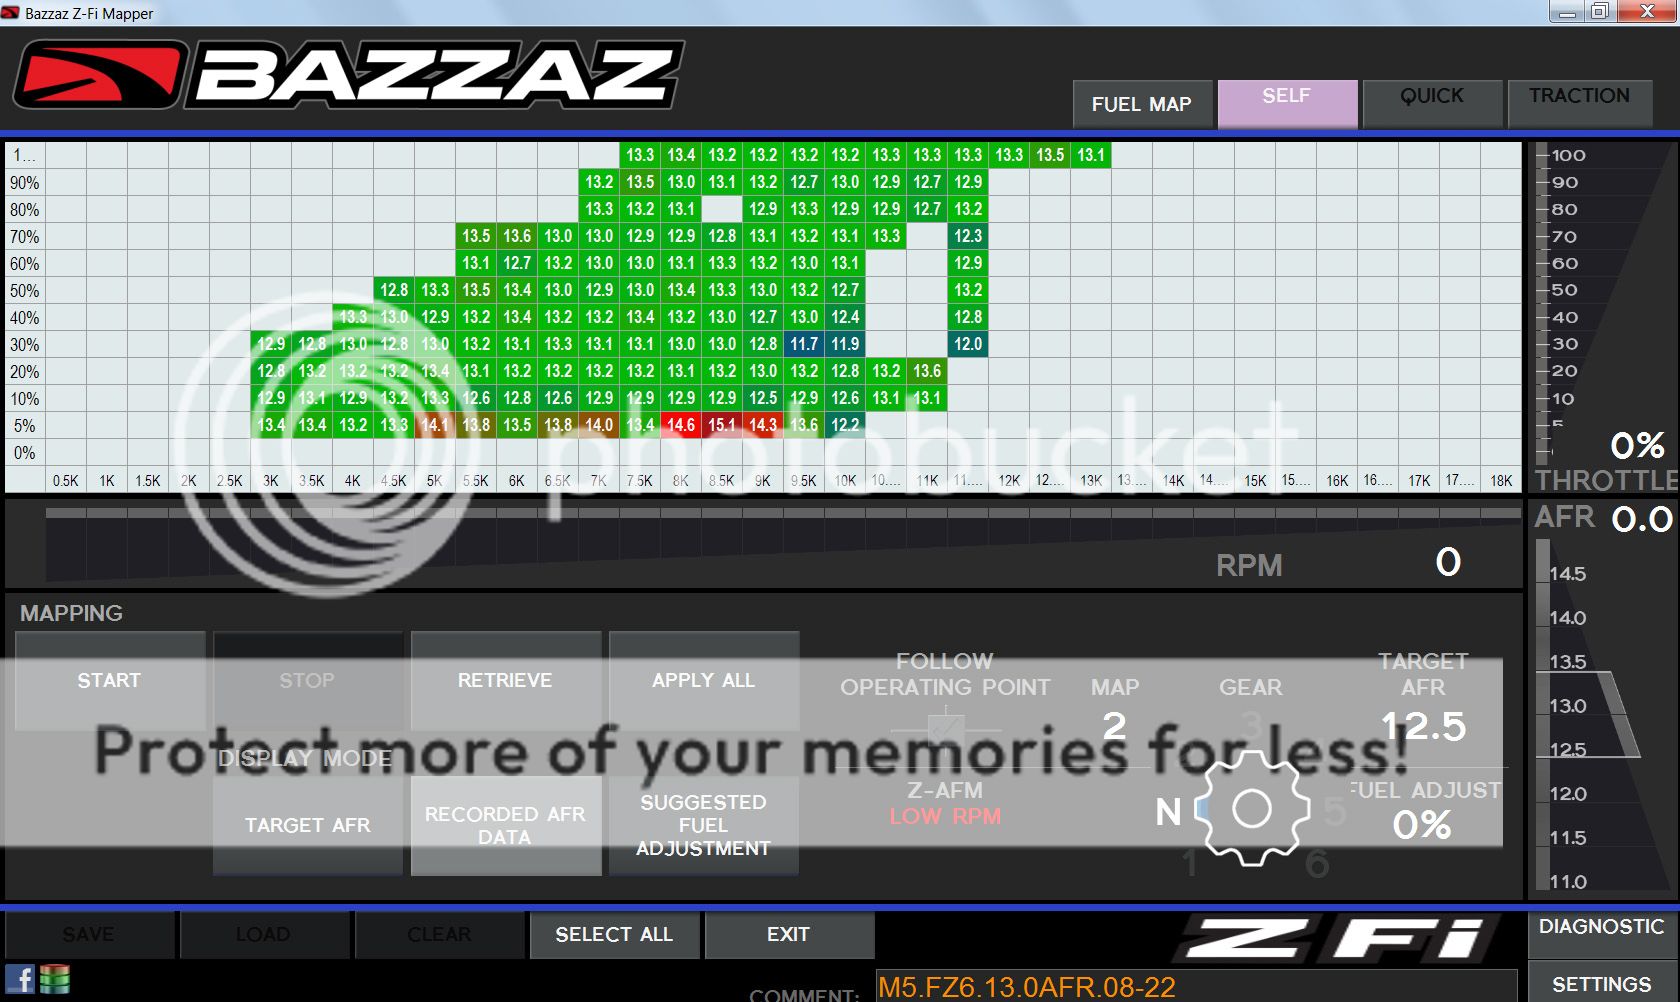
Busy the last few days, but today was a Great day for testing and we started here: Pick an AFR and log data about how to get there.
After ripping about, i.e. mainly trying 3rd and 4th gear pulls using
Throttle
Positions (TP) from ZERO through WOT, and hovering at: -> 10, 20, 30, 40 --> to 100% to load the engine so it works longer in each gear and "feels the range of work it can do AT that throttle position". We came up with this map!
A map based upon TP and what Work can be done at that position.
The Goal being to get some Dwell time with every TP from ZERO through 100% as you have to linger there and not just pass through it too quickly.
Example: 3rd gear, 10% throttle, and let the engine pull from Idle UNTIL it wont REV any more at that specific TP. This action builds data for that TP. Then hit 20% and repeat. This takes some time and a big wide open area that won't get you ran over or impale yourself into something when attempting the 90 and 100% positions of 3rd and 4th gear!
With testing complete, the data logger builds a map knowing our conditions and then suggests a map (think lets make corrections) to obtain our target 13.0 AFR. Sadly, this hardware comes with ZERO instructions or details telling you "hang time per condition matter, but we KNOW it does! From scratch, here is what it gleaned from my 60" run attempting to build a profile that matches my Target 13.0 AFR!!

For a given TP, you need to dwell there to capture enough data. During this "capture phase" it likely needs lots of samples before it can qualify that TP as a valid input. Again, if you took like 1st gear and cracked the throttle to 50%, Assuming you're not tied to a post, the engine is going to REV and meet the challenge, and then Stabilize and not gain anymore RPM. The problem is in 1st gear is it happens so quick its over! Hence me picking 3rd and 4th. Well and some 5th and 6th to ofset the "cruise conditions" required to get home.