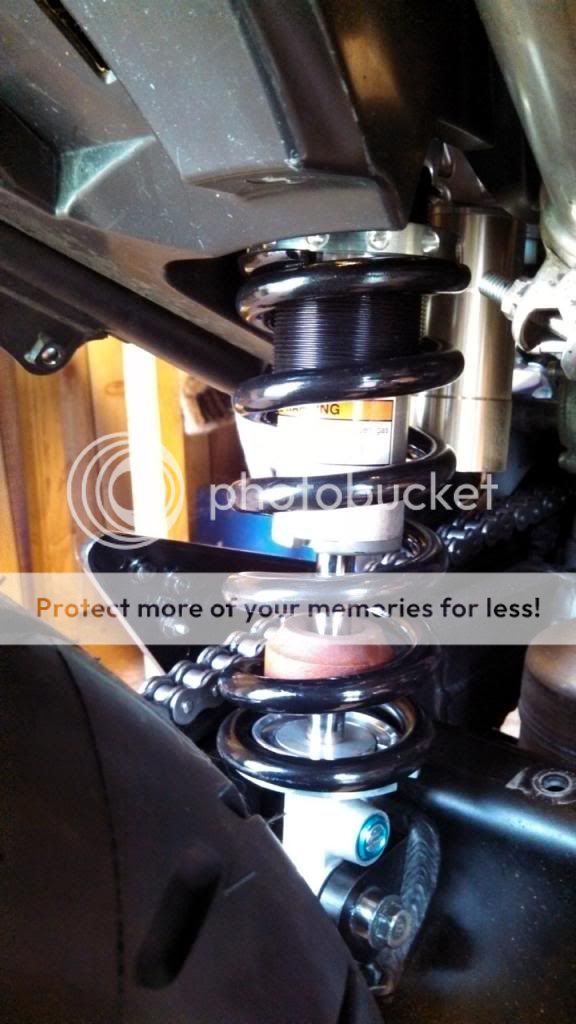
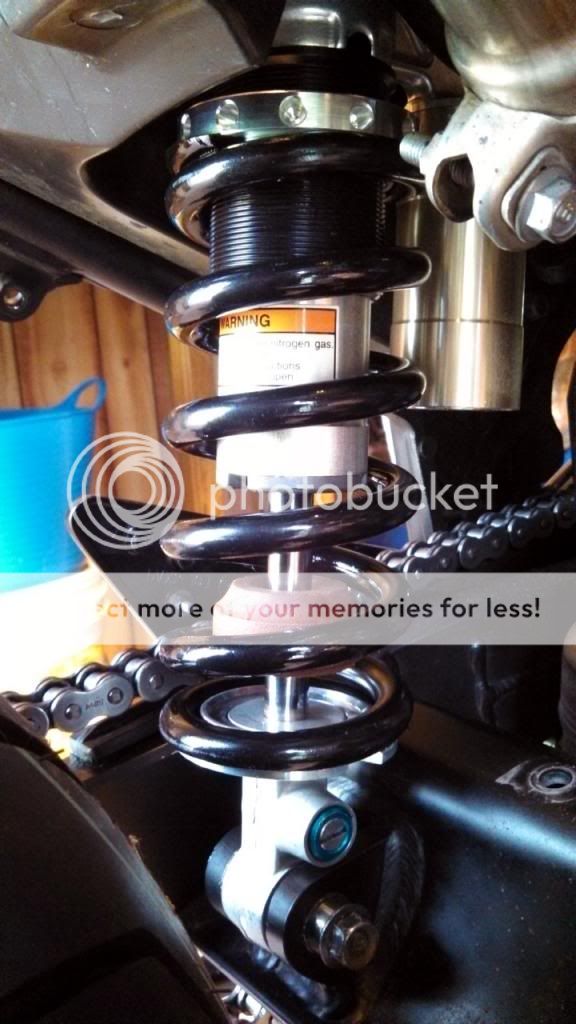
Sorry to post the whole thing... pictures are in here. On a mobile device. PITA to edit....
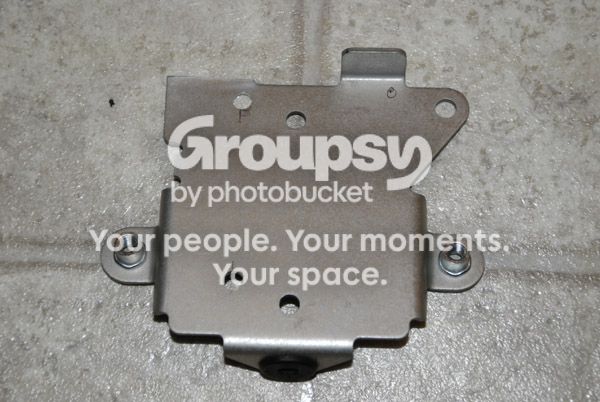
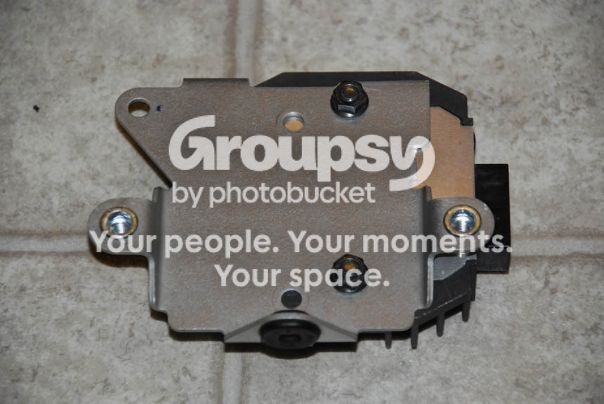
RR is on this aluminum plate. Do you have this?
See the tank mount. Those two bolts secure that plate to the chassis.
I'll delete the extra when on PC...
**********
R1 shock install....
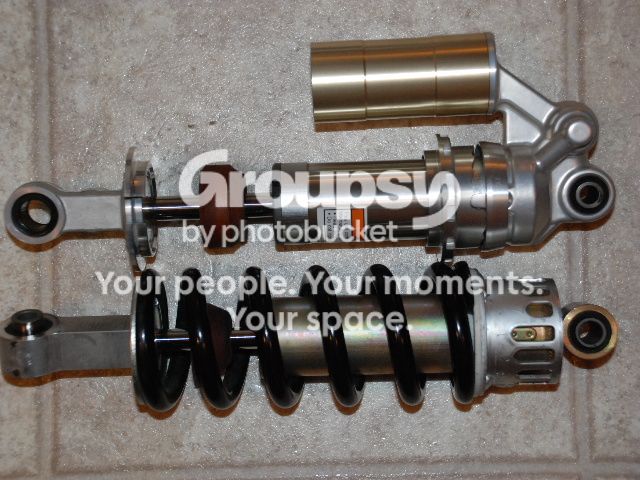
This has been done before but most chop up the hugger and under seat storage area to fit this shock to the bike. I did not wish to chop on mine as I need the storage and the hugger keeps debris off the shocks stem so it will last longer and not tear up the seal from debris being thrown at it. Out of pocket expense was $260. Modifications to the FZ are NOT invasive and can be undone. Plastic is the only thing trimmed out of the way for adjusting the compression and rebound. The shock bolts on once the upper bushing is replaced and is about ½ the cost of an Ohlins or other after market replacements unless you find them used. The catch; "for best performance" you need someone to take the shock apart and valve it for your needs and install an after market preload adjuster. This is NOT Required but Highly recommended!!!
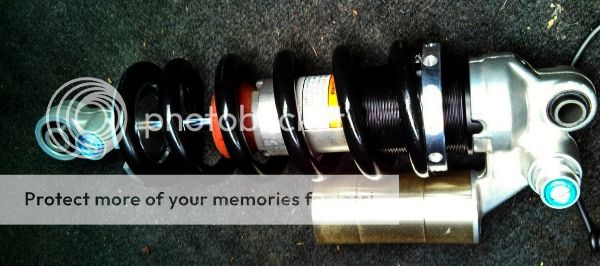
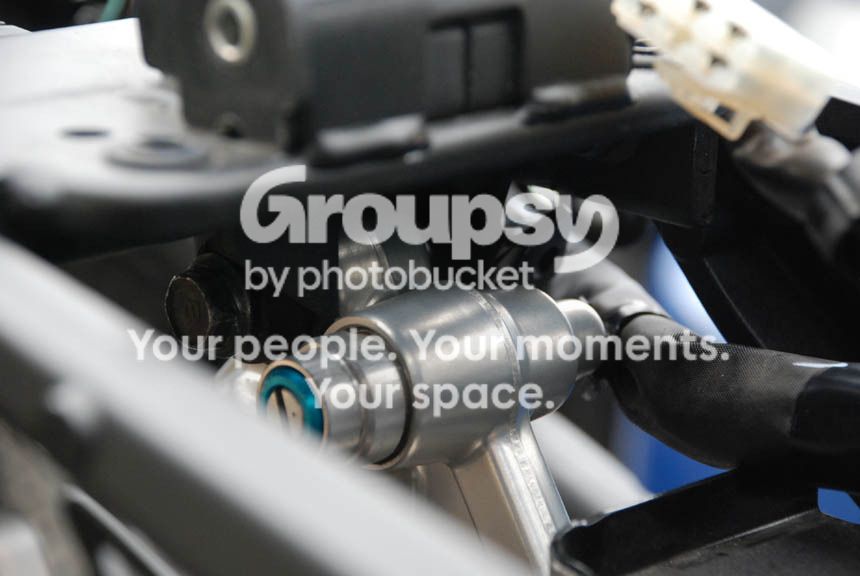
If you spin the shock around as I have done here, you retain all of the under-seat storage. The bike will look stock except the added nitrogen reservoir on the shock.
Me, I'm 205Lbs w/gear, ride aggressively in the corners and have R6 forks. Also I seldom ride 2 up or longer than 300 miles. I like my suspension FIRM but in contact with the road at all times. The Stock shock was on setting #5 and yielded 29mm of sag. So I kept my OEM spring and installed it on the R1 Shock. With the adjusting collar, the SAG was returned to 29mm which is good for me. You can not use the Yellow R1 spring its rates are to light. You can use your stock spring or you could use an after market spring. This is where a choice must be made as the installed SPRING HEIGHT for the R1 and the FZ6 is not the same. The "installed height" (space where the springs sits), must be returned to the same height the FZ shock body was at or your SAG will be altered.
Options: Modify the R1 pre-load adjuster, Replace pre-load adjuster, install a custom spring, or for some, use as is. i.e install FZ spring on R1 shock - FZ6 setting #7 is equivalent to R1 Setting #1!
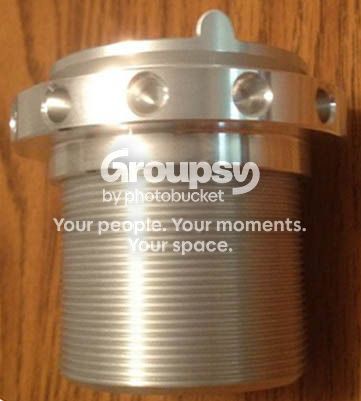
I went with an after market adjuster and installed the FZ OEM spring. However, this requires the shock be taken apart. We can discuss other options if someone does not wish to take the shock apart. Results may vary.
PAID LABOR:
Suspension person to revalve shock, fresh oil, fresh notrogen charge, install preload adjuster, install FZ6 Spring. My cost was $170
Your Labor:
Remove old shock, install replacement shock. Also, R&R tank, hugger, seat, etc.
Parts:
R1 coil over shock w/vertical reservoir 2001-2004 top/FZ6 bottom
30mm M6 X 1 bolt X2
20mm M6 X 1 bolt X2
Blue Loctite for these bolts
20mm spacer X2
12mm spacer X2
Large Zip ties to hold wire loom
Shock bushing P/N 34L-22216-00-00 ((Need a press to install this))
Shock Preload Adjuster Collars R1, RaceTech SYPA S4001 <<MUST TAKE SHOCK APART TO INSTALL!!!!
Shock bearing P/N 93315-31758 NOT Required unless yours are bad!!
Shock bearing seals P/N 93109-17071 NOT Required unless you replace 93315-31758
Tools:
Sockets, extensions, box wrench, screw driver
Drill & bits, sharp knife for plastic trimming / side cutters
Press to install upper bushing // mandrels for shock body-bushing
File - large
**
To begin; remove the seat, rear pods, fuel tank and
disconnect the battery. Remove Rear hugger. This is up to you, but the under seat tray can be left or you can remove it. It's much easier if out of the way, but I suspect the work can be done with it in place. Its your call. Remove the ECM and Regulator Rectifier mounting pan.
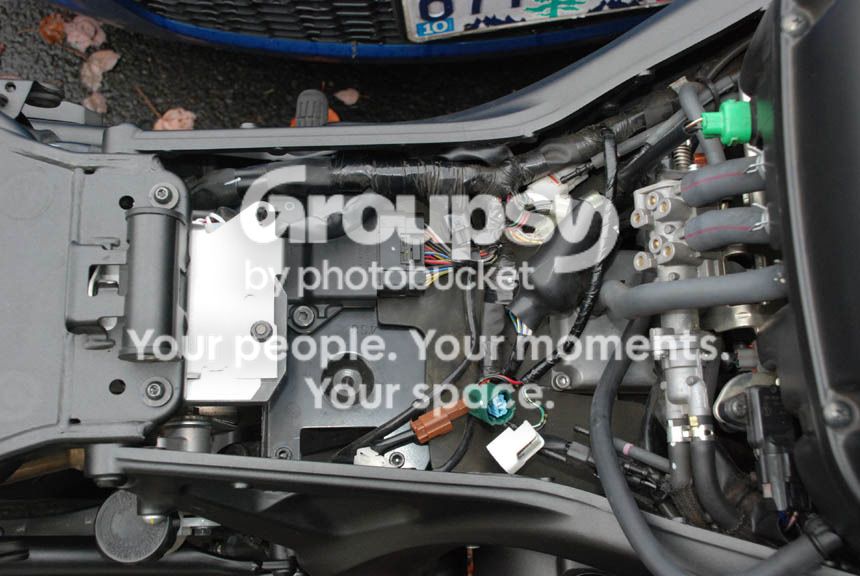
To spin the shock around and retain under seat storage, RAISE the ECM tray!
Here you can see the shock will not fit until the tray is raised. Once done, all is well.
The shocks compression adjuster will hit the Regulator Rectifier so it needs moved just a little. Shave off the tab on the mounting tray and drill some new holes moving it over and forward as far as possible.
Also, bolt it on the proper direction, It be backwards in that shot!
Add a spacers to ECM tray:
Add 20mm spacers to the rear and 12mm spacer to the front of the pan. Install new longer bolts through pan and spacers with Loctite on the bolts. This will allow the shock reservoir to tuck nicely under the pan and still allow clearance of hoses and wires under the fuel tank. I unbolted the ECM, just to make it easier.
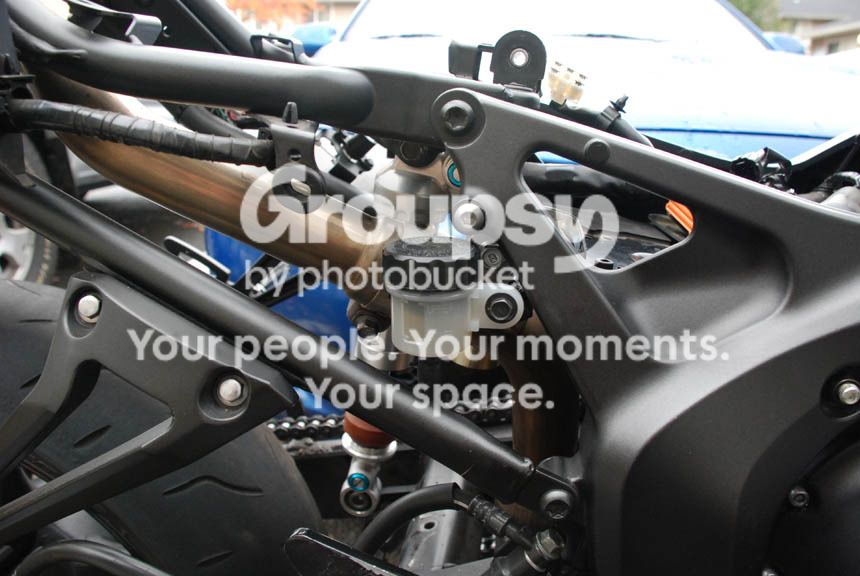
When the pan goes up, it hits the rear brake resivour. Unbolt it and bend the tab out slightly. Install resivour.
There is one tab for the ECM loom which needs bent. Bend tab so it does not contact shock or abraid wire loom.
Install and connect the ECM and RR. Work under the tank and seat is complete.
I have no pictures, but you need to press out the TOP BUSHING and replace it with PN: 34L-22216-00-00, as the R1 uses a smaller bolt.
Install RaceTech SYPA S4001 (must take shock APART) and FZ6 spring. NOTE: I paid someone to do this as I lack the proper tools. While the shock is apart; i'd suggest you have it revalved to center the rebound adjustment and tailor this shock to our bike. Remember the R1 uses linkage thus the metering to control motion has a different requirement.
Installed:
When fitting the shock, use the longer machined shaft from the FZ6 lower bearing. Grease it, inspect the bearings and install the shaft and bolt.