Somethin Black

FinalImpact

2 Da Street, Knobs R Gone
Site Supporter
Joined
Mar 16, 2011
Messages
11,137
Reaction score
184
Points
63
Location
USA, OR
Visit site
I really like those grips, and the rear signals look extremely nice on the bike. Might have to get me a set of them. Great looking bike so far!

Thanks!
As for the sigs, the verdicate is out at the moment. I've got a whole thread in the electrical section for it. But it is clean and neat! :thumbup:

Great Grips, larger OD than most and VERY sticky!!!! The bad news is if you do find your hand in the wrong spot, my gloves won't slide on them so you have to nearly completely let go and reposition. Only happens when I stop at lights and need to go sooner than expected - so its rare. . .

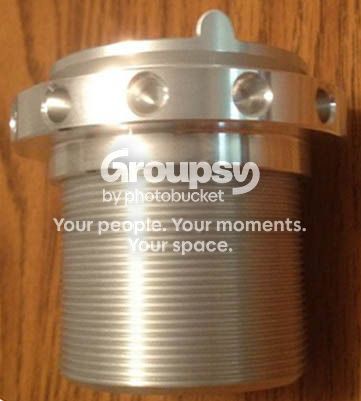
Spider Grips, Peak Road with Traction Gel Technology. A great Product! Applied with gloss black lacquer spray paint and ready to ride in 20min. SpiderGrips.com
 

FinalImpact

2 Da Street, Knobs R Gone
Site Supporter
Joined
Mar 16, 2011
Messages
11,137
Reaction score
184
Points
63
Location
USA, OR
Visit site
Rear signals look great.
What brand are they?


the2wheels - description: Integrated LED Turn Signals built-in brake light, item 048-1_1pair http://www.600riders.com/forum/fz6-electrical/43909-what-the2wheels-dont-tell-you-led-stalks.html

be warned - I'm waiting for input from the manufacture as I am questioning if the product will allow an incandescent lamp to be in the circuit. Read the thread above for details. Mine do not allow the stock 1157 lamp to be in place AND have the LED "stalk style" running lights to work. Pull the OEM brake lamp and all is fine. . .
 

FinalImpact

2 Da Street, Knobs R Gone
Site Supporter
Joined
Mar 16, 2011
Messages
11,137
Reaction score
184
Points
63
Location
USA, OR
Visit site
The bike is a whole lotta fun to ride these days but I still haven't completed my To Do List of Mods!

Exhaust and Head light Modulator have not come into the works yet. And the seat need some help! Fortunately the leathers I picked up last winter keep the good from riding into the tank so I'll likely leave the seat until this winter comes.

From the nose Back:
--------------------------------

Pod Lights (LEDs)
Stickers gone (not a mod, just sayin)
Dual head lights
FZ1 bars (black)
Spider Grips
R6 Forks
Rear sets to black
Evotech Tail tidy
Integrated brake, run, & turn LED tail stalks

That's about it I guess. . . Love the Brigstone BT 016 Pros! Great tires
Because I ditched the side reflectors on the back I think some red rim tape is in order. . .
 

FinalImpact

2 Da Street, Knobs R Gone
Site Supporter
Joined
Mar 16, 2011
Messages
11,137
Reaction score
184
Points
63
Location
USA, OR
Visit site
2012-10-17
Rear R1 shock came. The prices on fleebay are so low its like how could you not play around a little???
I need to swap springs and grind on the upper shock mount and plastic. In the mean time here are some things to think about.

=====================================

2008 FZ6 Rear Shock:
Eye to eye: 300 mm (11.82")
Travel: 50mm (1.97")
Setting #1 light: 175.2mm (6.90")
Setting #7 firm: 165.8mm (6.53")
Installed length MANUAL SAYS: 172.0 mm (6.77 in), doesn't say what setting tho, suspect #3.

Range of preload: 9.4mm (0.37")
Coil OD: 77.6mm (3.055")
Coil Dia: 11.76mm (0.463")
Spring free length 185.0 mm (7.28")
Spring rate K1: 12.99 kgf/mm (727.45 lb/in), 127.40 N/mm

=====================================

2003 R1 Rear Shock:
Eye to eye: 300 mm (11.82")
Travel: 65 mm (2.56")
Setting #1 light: 165mm (6.50")
Setting #8 firm: 158mm (6.22")
Installed length MANUAL: 162.5 mm (6.4 in), doesn't say what setting tho.

Range of preload: 8mm (0.31") // Min = 1, Ship @ 4, max = 8
Coil OD: 77.6mm (3.055")
Coil Dia: 11.00mm (0.435")
Free length 176.5 mm (6.95 in)
Spring rate K1: 8.83 kg/mm, (504 lb/in), 88.3 N/mm

SHOCK dampening from fully turned in:
Rebound damp min: 20
Reb Standard: 15
Rebound damp max: 1

Compression damp min: 20
Compression damp stand: 15
Compression damp max: 1

=====================================

So my FZ is set on #5. From this I will measure the installed height at the #5 position and adjust the R1 body to this distance. Looking at the info I gathered this will be a bit of a challenge and may require some adjustments to the spring seat/retainer as the area for the spring is not the same between the two bodies/adjusters. Hopefully this is obtainable.
The other issue is the R1 Shock assembly has more travel. The Shock needs to be fitted to the bike WITHOUT the spring and then exercise the entire range of travel so I know how the chain will be affected and where and what is going to hit if anything. It may be worth while to add a solid spacer under the biscuit to limit the travel so its equal to the FZ shock.

Simple math indicates the this shock would allow 6.6" of travel vs 5.1". is that a problem? IDK!
If the shock allows me to set the installed height equal to my current setting #5, I think we'll be off to a good start once the springs are swapped. Also the bushings will need some help too!

I measured the distance between the spring lands to see if I stand a chance of getting the SAG around 28mm after the FZ spring is put on the R1 Shock. It doesn't look likely but HOPEFULLY one of us measured wrong there is a window of overlap that works for me.

FZ #1 light: 175mm // R1 #1 light: 165mm
FZ #7 firm: 166mm // R1 #9 firm: 158mm
--------------------------------------------
- - - - - - - 9mm - - - - - - - 7mm

Although the range is near the same, the actual distance between the spring lands is where the issue lies. Well unless you opt for the custom wound spring! Mind you I'm using someone else's measurements for the Fiz shock as mine is still on the bike and difficult to measure. All I'm saying is be prepared to switch up the spring retainer to get the proper pre-load so the setup has a reasonable sag and stands a chance of working right.

When I do the swap I'll measure the sag in the setup as is now. Measure the ride height of the bike alone and with me on it (mainly the tail section) and when done with the swap try and get the spring setting back to the way it was (or close) so i can focus on dialing in the compression and rebound settings. That's the plan at least.

Here you can see the small amount of overlap which may work out OK for some, but essentially the highest FZ setting is the LOWEST R1 setting which explains why this isn't a home run by simply swapping the springs. If all goes well maybe I can swap the spring retainer from the FZ to the R and gain some distance?
View attachment 45273

Setting #1
View attachment 45302View attachment 45303View attachment 45304

Setting #8
View attachment 45305View attachment 45306


EDIT:
Throwing in the actual measurements from my FZ6 shock:
#1: 175 mm
#3: 173 mm
#4: 171 mm
#5 170 mm

#7: 167 mm

Yep, 170 to 171 is the space i need. R1 lowest is 165 mm. Looks like we focus on making the adjuster 10 mm shorter!
 
Last edited:

FinalImpact

2 Da Street, Knobs R Gone
Site Supporter
Joined
Mar 16, 2011
Messages
11,137
Reaction score
184
Points
63
Location
USA, OR
Visit site
Right ON!
I think 2012-10-22 18.43.36.jpg has it FTW!!! Not that I'm a big betting person but I bet the 10mm we lost can be had by swapping the steel spring retainer from the Fiz to the R and life as we know it will be restored to NORM when the springs are swapped!

It's hard to tell from the Pictures, but I guess we'll find out once they are apart!!! Thanks Joe!

Reminder; the two shocks Fizzer and R1 have different spring heights when installed so to get the ride height back to normal we need the spring landings to be pretty close to the same as they were before the swap!

Joe, I'd guess you'll beat me to the punch and have both of yours apart before I even get started!
 

motojoe122

No ride is too far...
Moderator
Elite Member
Joined
Oct 12, 2010
Messages
3,579
Reaction score
44
Points
0
Location
Somers Point, NJ
Visit site
You are welcome:thumbup:
Hopefully these will help all who dare to step off the curb into the street:eek:
And all those pics were at the #1 preload setting.
 

FinalImpact

2 Da Street, Knobs R Gone
Site Supporter
Joined
Mar 16, 2011
Messages
11,137
Reaction score
184
Points
63
Location
USA, OR
Visit site
OK - here is what I'm blabbing about. . .

Hopefully this is the same diameter on the shocks end and the hat can where the spring contacts can be swapped!
View attachment 45376


Not to BORE anyone, but until I can work on the bike, all I can do is plan the attack!


To fit over the shock body the ID must be 38mm. The OD can be as much as 41mm to support the springs tension.
View attachment 45371


Offset, the R1 retainer appears to have a Zero offset. THe spring seats the same place as the shock ends.
View attachment 45375

We can gain about 3mm of needed space by grinding off the nubs here. Be sure to "round them" if you want them to rotate nicely. Any more than that and the #1 (and up) adjustments will be lost. But if we need a couple mm, there it is. When I get the shock off the Fiz and apart I'll see if the Steel retainer can be substituted. If so, grinding the NUB's may not be needed.
 

FinalImpact

2 Da Street, Knobs R Gone
Site Supporter
Joined
Mar 16, 2011
Messages
11,137
Reaction score
184
Points
63
Location
USA, OR
Visit site
Finally did some playing (while some of you were taking cover) and pulled the OEM shock and to see what I can glean from shoving the R1 shock back in the hole.

I'm going to opt for spinning it 180 and tucking the reservoir up under the ECM. If this can be done there minimal trimming of the frame needed or cutting of the tray or hugger! I like these options (mines 08)! I didn't have time to dig as far as I wanted but it sure looks like the tray the ECM is bolted too can be moved up enough to clear the shocks reservoir by simply placings some stand offs under the back of it. I'll have some handy when it comes time to install it. Plus with it turned around you can access the valves to dial in the settings from the right side.
I really didn't like the idea of loosing storage or chopping a nasty hole in the hugger.

Contact with ECM tray:
View attachment 45443

Shock Spun Around:
View attachment 45444


Checking clearance: Bad news, can't add much length to the retainer or the retainer will hit the swing arm at full extension. We need about 10 mm. We only have about 3mm to give.
View attachment 45445


Some cutting required
There is a metal tab on the ECM tray that supports the main loom on the left side via a zip-tire. It will have to be removed to allow the shock to seat in the mount properly. Beyond that, it looks like it will drop in with no grinding to the mount. Not that I oppose grinding, I just don't want holes in the plastic as this will keep it looking stock for all practical purposes! :Flip:
View attachment 45446

What I did get to do was look closely at the FZ shock. There is nothing to be gained by swapping the spring retainers. It appears it is also near flush (see posts above).

View attachment 45447
 

FinalImpact

2 Da Street, Knobs R Gone
Site Supporter
Joined
Mar 16, 2011
Messages
11,137
Reaction score
184
Points
63
Location
USA, OR
Visit site
I'm still waiting for the adjuster from Racetech to come in, but in the mean time I prepped the bike so it will bolt in without cutting plastic or metal. Again, not that those things concern me, I just wanted to keep my seat storage as I fill it up often!

With that I am happy to report that you can turn the shock around 180 degrees and cut nothing, no metal, no plastic and drop the shock in. It fits!

You must move the ECM tray up 20mm and shift the voltage regulator over (drill new holes) in its aluminum mount but no one could tell unless the bike is disassembled.

I had to bend two tabs for clearance. On the left side, fold the tab out which holds the wire harness. On the right side, pull the pan the ECM sits on, bend the tab down that support the rear brake reservoir and add some spacers and bolts to the pan. Everything under the tank still clears with room to spare.

Parts list:
30mm M6 X 1 bolt X2
20mm M6 X 1 bolt X2
Blue Loctite for these bolts
20mm spacer X2
12mm spacer X2
Large Zip ties to hold wire loom


Shock bushing P/N 34L-22216-00-00
R1 coil over shock w/vertical reservoir 2001-2004
Shock Preload Adjuster Collars (set) RaceTech SYPA S4001 {if your under 190lbs, i'd recommend this}.

Still waiting for this:
racetech1web.jpg
View attachment 45534 Pic from RT site. lol

ADD 20mm Spacer to back of pan both sides and 12mm to the fronts:
DSC_5705web.jpg


We have clearance now:
DSC_5711web.jpg


Bend this tab:
DSC_5708web.jpg


Drill aluminum plate moving the Rectifier/Regulator over and ahead slightly:
Also, bolt it on the proper direction, It be backwards in that shot!
_DSC5704web.jpg


Attach reservoir, must bend the mount tabs down a little:
DSC_5707web.jpg


Work under the seat is complete, bolt in the shock and install plastic:
DSC_5710web.jpg
 

FinalImpact

2 Da Street, Knobs R Gone
Site Supporter
Joined
Mar 16, 2011
Messages
11,137
Reaction score
184
Points
63
Location
USA, OR
Visit site
I GIVE THE FOLKS AT RACETECH A THUMBS DOWN FOR NOT MENTIONING YOU HAVE TO TAKE THE SHOCK APART TO INSTALL THE ADJUSTER!


PRODUCT/SITE/CUSTOMER SERVICE FAIL!!!!!

Pretty much anywhere along the way THEY COULD HAVE mentioned this, but no. Wait until its in your hands! :stupidpc:

:popcorn:
 

darius

Never stop exploring
Joined
May 26, 2012
Messages
1,155
Reaction score
19
Points
0
Location
Above California
Visit site
Shocking! :rolleyes:

How much is that going to slow you down? Somethin' red is rocking a purple Hyperpro spring now.

I got tired of the rear bouncing off the road. It could use more damping but it's 100x better. Resprung the front, too with new oil.
 

FinalImpact

2 Da Street, Knobs R Gone
Site Supporter
Joined
Mar 16, 2011
Messages
11,137
Reaction score
184
Points
63
Location
USA, OR
Visit site
Minimal - it was just a test to see if this shock is an improvement to the bikes ride quality. I got all giddy thinking a bolt on adjustment solution was in reach. :rolleyes:

Gonna get quote from the local shop to pull it apart for work and add the collar. If its not to my $liking$, I milled the R1 step collar such that if I need it back together, its ready to be installed that way too. The milled collar provides the same installed height the FZ spring setting was at the past two years. Eeither way its going back together in the next 2 days!. :thumbup:
 

jrevans

Old-School Member
Joined
Feb 5, 2008
Messages
520
Reaction score
14
Points
18
Location
Eastern Pennsylvania
jrevans.fbody.com
I milled the R1 step collar such that if I need it back together, its ready to be installed that way too. The milled collar provides the same installed height the FZ spring setting was at the past two years.

Make sure you show us what/how you milled the stock collar, so us cheapskates who are over 190lbs can make this work for our conversions. :D

With Superstorm Sandy and the rapid decrease in temperatures, it seems as though my riding season may have come to a shockingly quick end! I do hope to get out for a few more days if it gets out of the 40s again.
 

FinalImpact

2 Da Street, Knobs R Gone
Site Supporter
Joined
Mar 16, 2011
Messages
11,137
Reaction score
184
Points
63
Location
USA, OR
Visit site
Make sure you show us what/how you milled the stock collar, so us cheapskates who are over 190lbs can make this work for our conversions. :D

With Superstorm Sandy and the rapid decrease in temperatures, it seems as though my riding season may have come to a shockingly quick end! I do hope to get out for a few more days if it gets out of the 40s again.


It really doesn't get any easier, pull the spring, chuck the anti-rotation ring the adjuster sits on, and mill or file the ramp flat. Where once there was 3 bumps (2 valleys) there is now a flat spot. It just happens to make the distance 171mm which is the SAME distance the spring was at in the Fiz. With the Eye to Eye numbers being the same, "I should" (haha) get the same sag i had with the Fiz shock & Spring.

Sadly, its rained here for the past 30 days without lifting and all the good roads are covered in leaves and needles so I hear ya on that. :(
 

darius

Never stop exploring
Joined
May 26, 2012
Messages
1,155
Reaction score
19
Points
0
Location
Above California
Visit site
Minimal - it was just a test to see if this shock is an improvement to the bikes ride quality. I got all giddy thinking a bolt on adjustment solution was in reach. :rolleyes:

Gonna get quote from the local shop to pull it apart for work and add the collar. If its not to my $liking$, I milled the R1 step collar such that if I need it back together, its ready to be installed that way too. The milled collar provides the same installed height the FZ spring setting was at the past two years. Eeither way its going back together in the next 2 days!. :thumbup:

I hope you have better luck as the local bike shops I called would only quote me their hourly rates when I asked about the shock spring swap I just went through.

I'm not paying $109 an hour and having it take an unknown length of time based upon whether the shop has the right tool and whether they want to screw me over.

So I did it myself and it cost just $17 for the spring compressor from Harbor Freight. PITA but it worked.
 

FinalImpact

2 Da Street, Knobs R Gone
Site Supporter
Joined
Mar 16, 2011
Messages
11,137
Reaction score
184
Points
63
Location
USA, OR
Visit site
I hope you have better luck as the local bike shops I called would only quote me their hourly rates when I asked about the shock spring swap I just went through.

I'm not paying $109 an hour and having it take an unknown length of time based upon whether the shop has the right tool and whether they want to screw me over.

So I did it myself and it cost just $17 for the spring compressor from Harbor Freight. PITA but it worked.

I have good guy that I bring work too and he does stuff like that for free but I hear ya. I once had a place to do everything but it went away. . . Things take a little more time now. . . Its all back together now. Waiting for the RAIN to stop!!!! Preload adjustments have been optionalized for a test drive! I'll get back to it!

So what have you done? Did i miss a thread somewhere?
 
Top