• Welcome to the Yamaha FZ6 Forums. Member registration disables ads and allows you to post and share. Register Here.

Shaved Seat

Which looks better?

  • The stock seat

    Votes: 4 16.0%
  • They look about the same

    Votes: 8 32.0%
  • The DIY seat

    Votes: 13 52.0%

  • Total voters
    25
  • Poll closed .

SANGER_A2

Super Member
Joined
Oct 12, 2008
Messages
1,528
Reaction score
27
Points
0
Location
Southampton
Visit site
Although the seat on the FZ6 is lower than the GSX-650F, it's still a lot higher than my old GPZ500S and a bit too awkward to park etc as I'm on tip-toes. I decided that instead of paying hundreds for the lowered seat, I'd try lowering mine first as I'd either be selling mine once I bought the new one. I'm very pleased with how it turns out and actually think it looks better than the stock one. And all it cost me was about a fiver for some new heavy duty staples (of which I still have 90% of the packet). BARGAIN!

I wanted:-
  • Reduced height when sat on the bike to feel "safer"
  • To be able to sit further back for comfort
  • To stop my nads being crushed against the tank
  • To stop the seat sloping forwards so much (and see above)
  • To have less width on the sides to be able to get my feet closer to the ground
  • To have less height on the seat to be able to get my feet closer to the ground
  • Still be able to slide around the seat and hang off when needed
  • It to not look like crap

Personally, I think I've achieved all of the above now. Read on to see what I did.


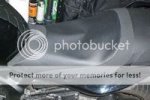
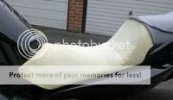
Here is how the stock seat looked:-
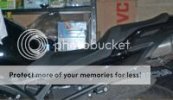
tn_16Shaved_Seat_01.jpg

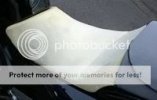
Here you can see my normal seating position. I like to sit far back:-
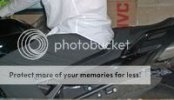
tn_16Shaved_Seat_02.jpg

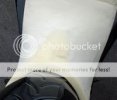
The first step is to remove the staples for half the seat using a small flat-head screwdriver and a pair of needlenose pliers. Then you peel back the cover covering the part of the seat you're going to modify. Don't take off the whole thing:-
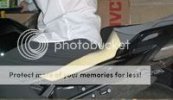
tn_16Shaved_Seat_03.jpg

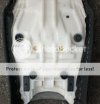
Here you can see the original staple layout:-
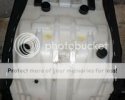
tn_16Shaved_Seat_04.jpg

These staples all need removing carefully:-
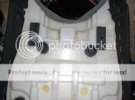
tn_16Shaved_Seat_05.jpg

Notive the way that the cover flips over here to protect the tank from the staples:-
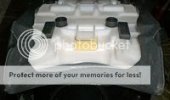
tn_16Shaved_Seat_06.jpg

I roughly planned out which bits to cut off. I used the marks left by the seat cover to help me. I decided I needed to reduce the width on the sides, leave a hump in the centre at the front, cut out some of the foam further back to let me sit further back in the seat and reduce the height of the seat further back:-
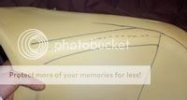
tn_16Shaved_Seat_07.jpg

Here you can see the first cut. I used a serrated knife I had in the garage I bought from Tescos ages ago for about £1:-
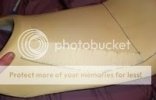
tn_16Shaved_Seat_08.jpg

Here you can see the knife and the cutting method. The trick is to move the knife back and forwards a lot and let the serrations do the work for you. Don't force the knife down:-
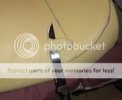
tn_16Shaved_Seat_09.jpg

Here I've taken out very roughly the shape I want on one side:-
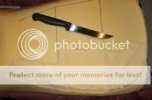
tn_16Shaved_Seat_10.jpg
 
Last edited:
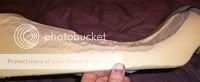
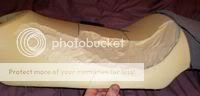
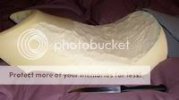
You can see the reduced height and the extra space at the rear of the seat:-
tn_16Shaved_Seat_11.jpg

And from another angle:-
tn_16Shaved_Seat_12.jpg

Here is the first draft. As long as you don't take out too much, it's easy to improve by shaving more off:-
tn_16Shaved_Seat_13.jpg

It's not looking very smooth yet, but wait and see:-
tn_16Shaved_Seat_14.jpg

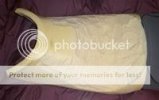
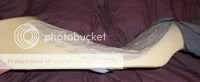
Lots of foam taken out of the rear of the seat here:-
tn_16Shaved_Seat_15.jpg

The most important part is the sanding if you don't want it to look like crap. This isn't finished. I found a sanding block was easiest. Use it in one direction in long strokes:-
tn_16Shaved_Seat_16.jpg

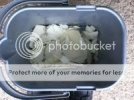
This is about a third of all the foam I removed in the end. I've got a carrier bag full of the stuff somewhere:-
tn_16Shaved_Seat_17.jpg

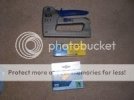
These are the tools needed to get the cover back on. You need a heavy duty stapler and heavy duty staples. The original ones I had were the Tacwise 13/6mm staples I had already. These were a good height but too weak. The other staples are the ones I ended up using for good. They were much more heavy duty but 10mm is too long. I couldn't use them all over:-
tn_16Shaved_Seat_18.jpg

After my first version, I just pulled the cover over it and rode around for a few days to see how it was. The cover didn't fit well due to the hump I left in the middle at the front:-
tn_16Shaved_Seat_19.jpg
 
Last edited:
Here you can see what I rode around on:-
tn_16Shaved_Seat_20.jpg

The edges etc still weren't sanded perfectly, but this was just to see if the shape was good enough:-
tn_16Shaved_Seat_21.jpg

I realised that the hump was causing pain to my nads instead of the tank. The hump is a bit easier to see here:-
tn_16Shaved_Seat_22.jpg

I cut off the hump completely and spent ages sanding down the entire front half of the seat until it was smooth and curvey all over. I'm talking a good hours sanding! Also, don't sand it on the bike. Just put in on occasionally to check it looks okay. I managed to scratch my side plastics a bit where I was careless! Then I just put the cover back on it loosely and rode for a few more days until I was happy it was perfect for me.

When I was happy, I stretched the seat cover out over it and started to staple it down. I ended up doing this twice as the first set of staples I used weren't good enough. Nearly all of them bent and wouldn't go in far enough and only 1 in 10 was good enough to leave in.

I took all the crap staples out and bought some hardcore ones. These went straight in with no problems. First I stretched the cover quite tightly at the front and put about 5 staples in to hold it in place at the point where the seat meets the tank. Then I started working my way forwards from the back. I stretched the cover until it was tight and did right-side, left-side, right, left etc all the way forwards. This got rid of any wrinkles and kept it all symmetrical.

I found that 10mm staples were too long to use where I had sanded the foam extra thin (where my legs go when pushing the bike around) - so I had to leave that area until the end and use the rubbish staples. If I had to do this again, I would look for 6mm heavy duty staples and if I could not find any, I'd use 8mm. 10mm is just too much.

When I was finally happy, I had this:-
tn_16Shaved_Seat_23.jpg

Here you can see my staple job. Not as good as stock but solid:-
tn_16Shaved_Seat_24.jpg

Again, I made sure that the material protected the tank from the front staples by folding it over and using a couple of staples at the edges to make sure it stayed folded over:-
tn_16Shaved_Seat_25.jpg

Here the stock seat is on the bike. In that picture, it's obvious there's a lot taken off the back, but the reduced height isn't as obvious. You can see that the cover is stretched down more though and the edges are rounded:-
tn_16Shaved_Seat_26.jpg

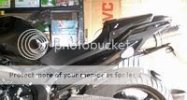
Here is me sat on my new seat:-
tn_16Shaved_Seat_27.jpg
 
Last edited:
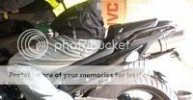
Here's a view of it looking damn nice:-
tn_16Shaved_Seat_28.jpg

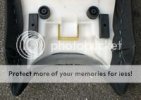
From the front:-
tn_16Shaved_Seat_29.jpg

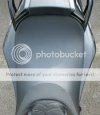
From the back:-
tn_16Shaved_Seat_30.jpg


This is a mod I'm VERY glad I did. I can flat-foot at lights now with no problems (I'm 5 foot 8) and I feel much more secure when riding. It's not as good as the GPZ, but I feel more like I'm sat "in" the bike rather than perched on top of it. I think it actually looks nicer than stock too! :) I'd recommend it to anyone. For anyone thinking of doing this, there are loads of sites and videos on the Internet about how to do it. This site is especially good. It's hard to really screw it up and you can always just glue on any foam you take off that you wish you hadn't (although I would recommend just taking off smaller bits at a time and doing loads of sanding.
 
Last edited:
Well done:thumbup: now for a long ride report. Maybe i missed it, stock skin and no adhesive?

This could be a sticky or added to the "how to" section.

Enjoy!
 
Well done:thumbup: now for a long ride report. Maybe i missed it, stock skin and no adhesive?

This could be a sticky or added to the "how to" section.

Enjoy!
Yup stock seat cover and no adhesive used on the foam etc. I haven't ridden the bike for more than 45 minutes since owning it! Work is crazy busy and as I'm a teacher that means working in the evenings and at weekends too. I just don't get time to ride any more! :(

It doesn't seem less comfy. When I go touring in the holidays I will be buying a gel, air or sheepskin pad depending on which has the best reviews and is possible to get for a reasonable price in the UK.
 
That's awesome! Great job, thanks to you, I've now got no fear of doing this myself!

TBH it was damn easy! The first cut was scary but I got brave very quick. Looks better than just chopping huge chunks out of the underside that has been done before. I wanted to change the stock shape. Not just lose a bit of height! :rockon:
 
Good job Sanger!

I wasn't as brave as you, I took my girlfriends seat to a professional upholsterer to do, only cost £15 too :)

I cannot believe it only cost you £15!!! When I read this stuff, I thought it said £150. Which I thought was pricey, but I wasn't overly surprised. Bikers tend to get ripped off as we all love our bikes too much! :ban:
 
Excellent job, looks great and it should be a "STICKY", this gives other people the option of making the bike fit THEM and also not going crazy with adjusting the rear shock.
 
Outstanding job! I tried to rep you, but...I need to spread it around first....:( Just don't tell my wife that.
 
I cannot believe it only cost you £15!!! When I read this stuff, I thought it said £150. Which I thought was pricey, but I wasn't overly surprised. Bikers tend to get ripped off as we all love our bikes too much! :ban:

Nope, definitely fifteen pounds. I got it at a cheap rate as I just asked him to do it when he had some time free, rather than book a day at it, and it was on the understanding that the seat didn't need recovering or any alterations to the rigid pan. As it turned out, I dropped it off on the monday and picked it up on the tuesday so I was pleased with the turnaround, if he had done the work while I waited it would have cost more.

Have to admit, if I had access to a professional grade staple gun it would definitely be something I'd have had a go at myself, but the cost of the tools would have set me back way more than having someone else do it, so I was quids in!

Hats off to you for an awesome DIY job though mate.
 
Fantastic...love your work....sticky it please someone....if i had'nt just bought a seat, i may of done this myself....hang on...i still can.

Corbin seat for touring...shaved seat for Sport Riding.

Hmmmm....thanks!

:rockon:
 
Beautiful job and nice writeup. I wish I saw this a year ago - I would not have pushed for so long to get the lowered seat shipped from Germany to the US (and cost an arm and a leg!). Don't get me wrong - I am very happy with my Yamaha lowered seat, but this seems easy enough and would have been faster for me! Let us know how it feels. I see that you didn't put a gel insert?
 
All I can say is "wow"!! Great work and cudo's for being brave enough to even attempt doing it! Fantastic write up too!

You have inspired me to try the same. I'm same height as you, but after putting on my RIZOMA rearsets, I can flat foot the bike. I just want a comfier seat for long rides and don't really want to shell out $500+ for a top Saddlery seat.
 
Nice work! I bought the comfort seat and have been slowing shaving away the stock seat almost identical to what you've done here. That's an awesome job!!!
 
Nope, definitely fifteen pounds. I got it at a cheap rate as I just asked him to do it when he had some time free, rather than book a day at it, and it was on the understanding that the seat didn't need recovering or any alterations to the rigid pan. As it turned out, I dropped it off on the monday and picked it up on the tuesday so I was pleased with the turnaround, if he had done the work while I waited it would have cost more.

Have to admit, if I had access to a professional grade staple gun it would definitely be something I'd have had a go at myself, but the cost of the tools would have set me back way more than having someone else do it, so I was quids in!

Hats off to you for an awesome DIY job though mate.
All you need to do is buy a cheap metal heavy duty stapler like this one for under £15. :) Although you did get a massively good deal on yours!
 
Beautiful job and nice writeup. I wish I saw this a year ago - I would not have pushed for so long to get the lowered seat shipped from Germany to the US (and cost an arm and a leg!). Don't get me wrong - I am very happy with my Yamaha lowered seat, but this seems easy enough and would have been faster for me! Let us know how it feels. I see that you didn't put a gel insert?
I didn't bother with a gel pad as I couldn't get hold of one for a decent amount of money. Plus I've heard so many stories of them holding in the heat or the cold. I'm going to look for a gel pad to use temporarily for touring and see if I want to incorporate it in permanently.
 
Back
Top