• Welcome to the Yamaha FZ6 Forums. Member registration disables ads and allows you to post and share. Register Here.

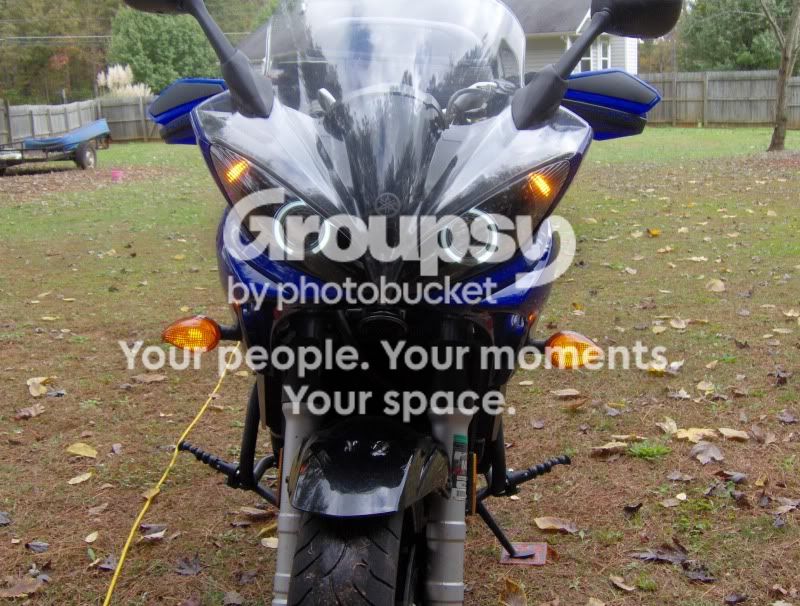
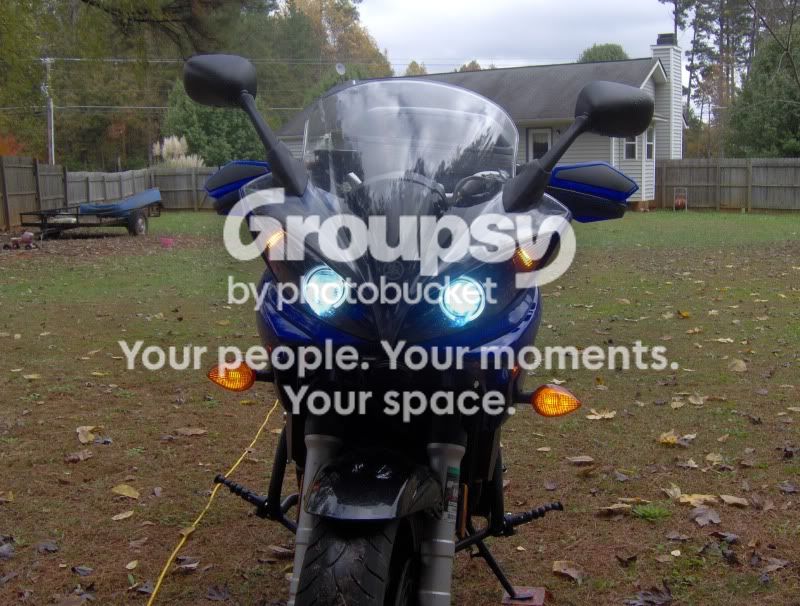
Bi-Xenon projector with angel eye installed

If you want two wire to function as three wire, you have to use a relay as is outlined on Boneman's website under Watsen Flush mount installation. You can't just wire the constant (blue) and the flasher (green/brown) together and expect the 12VDC to play nice together.
hmmm. i was referring to this thread (starting at post 11). and i've seen a few people on here do it.
http://www.600riders.com/forum/fz6-mods/22456-pod-lights-i-am-ready-my-next-mod-2.html#post259322


Blue is constant power and, yes, that is what you need to wire the Angel Eyes power to.
thanks. i was concerned about running both the pod lights (which are LED's) and the angel eyes (which i think are also LED's) from the same small wire that the running lights are run from. do i have anything to worry about? if i do i can do what Jman did.


I ran all my grounds into a single wire of larger gauge and put a new ring terminal on it, ran it through the frame to the battery negative. I did the same to both HID positives (ran to a single wire and to the battery) only positive terminal instead of course.
what gauge is safe? i have some 18 awg from working on amps but i don't know if that's thick enough. i also have some thicker auto wire (14awg). if i need thicker i can always go and get some.

also, since you did this for your + did you just use a shared fuse or did you keep a fuse on each light. i would assume a fuse on each light. but i'm not too confident in auto wiring.


I would avoid going solderless as the connection on a butt connection is less than optimal and should a butt connection come loose and you lose headlights, that could spell disaster. Solder will rarely fail.

I only use crimp connections when doing male/female quick disconnects or ring terminals.

Hope this helps.


it is very helpful. and i only planned on doing the quick connects/solderless connectors for my pods and angel eyes. but before i had even clicked on this to see what the responses were i had already decided to take the "shell" off the quick connectors i had, solder them to the wires and use some heat shrink tubing over them. i just wasn't getting them to hold as tight as i'd like them to. i too like solder much better.

thanks guys. not sure i'll finish this up tonight because i have to get ready for a sermon tomorrow. but i should be done tomorrow afternoon. thanks a ton for the help you guys have given. i greatly appreciate it.
 
Last edited:
i finally got it all hooked up but i'm having a problem. i can't get them aimed. i tried to follow boneman's instructions that he found.
Boneman's FZ6 Site - Bi-Xenon HID Projectors

i covered up the throttle side light so i was trying to aim the clutch side. the only "aimer" that seemed to do anything was the top left (view from sitting on the seat) and it seemed to move it side to side. the top right and bottom left didn't seem to do anything.

so i gave up and covered that light and tried to do the throttle side light. with this one i was able to move the beam up and down via the two 10mm outside "aimers" and get it at the hight it was supposed to be. but then i went to the 8mm "aimer" figuring that one will let me go side to side. no matter what direction i turned it didn't seem to affect anything.

i don't know how i would have, but did i mess something up in there? all i did was paint the reflectors and install the projectors.


the other odd thing has to do with the clutch side projector. i covered up each light to check on the bright and dim. on the throttle side the light is nice and wide and the bright makes the light "higher" as you would expect.
BUT
on the clutch side the light shines up into the trees on dim and when i hit the brights it's as if the projector is turned 90 degrees. there is a very sharp cutoff to the left (view from seat) and when i hit the bright the light gets "wider" and the cutoff is a little further left.

it's not possible to put these things in wrong is it? i remember them having notches on the back that made it so that each one could only go in one way.

what am i doing wrong?


a side note: it's frustrating because this is my main mode of transportation to work (only vehicle i can get a parking pass with) and as of right now i can't ride it because i can't get the lights aimed and i don't want to blind people. i should have waited until december. :spank:
 
i finally got it all hooked up but i'm having a problem. i can't get them aimed. i tried to follow boneman's instructions that he found.
Boneman's FZ6 Site - Bi-Xenon HID Projectors

i covered up the throttle side light so i was trying to aim the clutch side. the only "aimer" that seemed to do anything was the top left (view from sitting on the seat) and it seemed to move it side to side. the top right and bottom left didn't seem to do anything.

so i gave up and covered that light and tried to do the throttle side light. with this one i was able to move the beam up and down via the two 10mm outside "aimers" and get it at the hight it was supposed to be. but then i went to the 8mm "aimer" figuring that one will let me go side to side. no matter what direction i turned it didn't seem to affect anything.

i don't know how i would have, but did i mess something up in there? all i did was paint the reflectors and install the projectors.


the other odd thing has to do with the clutch side projector. i covered up each light to check on the bright and dim. on the throttle side the light is nice and wide and the bright makes the light "higher" as you would expect.
BUT
on the clutch side the light shines up into the trees on dim and when i hit the brights it's as if the projector is turned 90 degrees. there is a very sharp cutoff to the left (view from seat) and when i hit the bright the light gets "wider" and the cutoff is a little further left.

it's not possible to put these things in wrong is it? i remember them having notches on the back that made it so that each one could only go in one way.

what am i doing wrong?


a side note: it's frustrating because this is my main mode of transportation to work (only vehicle i can get a parking pass with) and as of right now i can't ride it because i can't get the lights aimed and i don't want to blind people. i should have waited until december. :spank:

The ones I got were keyed for sure. Not sure why that is doing that for you. The only thing that I can think of for the aiming is that the other two screws are not engaged all the way into the threads. On my 08 the three adjusters all had an impact on the positioning.
 
i finally got it all hooked up but i'm having a problem. i can't get them aimed. i tried to follow boneman's instructions that he found.
Boneman's FZ6 Site - Bi-Xenon HID Projectors

i covered up the throttle side light so i was trying to aim the clutch side. the only "aimer" that seemed to do anything was the top left (view from sitting on the seat) and it seemed to move it side to side. the top right and bottom left didn't seem to do anything.

so i gave up and covered that light and tried to do the throttle side light. with this one i was able to move the beam up and down via the two 10mm outside "aimers" and get it at the hight it was supposed to be. but then i went to the 8mm "aimer" figuring that one will let me go side to side. no matter what direction i turned it didn't seem to affect anything.

i don't know how i would have, but did i mess something up in there? all i did was paint the reflectors and install the projectors.


the other odd thing has to do with the clutch side projector. i covered up each light to check on the bright and dim. on the throttle side the light is nice and wide and the bright makes the light "higher" as you would expect.
BUT
on the clutch side the light shines up into the trees on dim and when i hit the brights it's as if the projector is turned 90 degrees. there is a very sharp cutoff to the left (view from seat) and when i hit the bright the light gets "wider" and the cutoff is a little further left.

it's not possible to put these things in wrong is it? i remember them having notches on the back that made it so that each one could only go in one way.

what am i doing wrong?


a side note: it's frustrating because this is my main mode of transportation to work (only vehicle i can get a parking pass with) and as of right now i can't ride it because i can't get the lights aimed and i don't want to blind people. i should have waited until december. :spank:

they are labeled "top" and it is very easy to get them misaligned. I temoorarily installed everything with the outer lens off to ensure everything was good to go. You need to at least be able to get to where you can spin the projectors to where the labelling "top" is indeed on top.
As for the adjusters, I would check your projector orientation to be sure they are properly aligned. then, using a ratchet and 10mm socket, go to work on the outside lower adjustment bolt (below and to the outside of each bulb). It took a heckofa lot of turning to get mine right.
 
Didn't you mention that you were mistakenly trying to un-screw the adjuster screws when you were trying to remove the HLA to begin with? Perhaps that did something?

I only adjusted 2 "bolts', the 10mm one and the 8mm (up/down & Left/Right)one as outlined in my service manual (download it if you don't have it already). It did take some turning, but they did move the projectors.
 
i guess i have a little bit of :tard: in me.

boneman - i tried to make sure that because i had been turning all of the bolts that i had them engaged before i put the covers back on. it's possible that in my turning to adjust them that i got them loose again.

krid80 - didn't even notice writing on them saying top. after the fact i have thought that i should have waited until i got everything wired up before putting the covers on. too bad i couldn't have thought of that sooner.

Jman - i really thought there was only one way to put them in as well.


ok, well i baked the HLA to get the covers off. i don't really want to do that now since the projectors are in there and there would be the rubber coated wires to deal with. where does one buy a heat gun and is there something i should specifically look for in one? meaning are there different wattages and i would need _____ wattage to heat the HLA enough to get the covers off.

thanks again guys. i can't wait until i'm finally done. i could tell last night that the lights are much brighter. i'm ready to be done and ride it.
 
The HLA and wiring should be fine in the oven. If in doubt, turn it down to 150deg. Or you can put the HLA into a cardboard box, seal it up, cut a hole in the top and stick a heat gun or hair dryer though and warm up the HLA that way.

Why didn't your HID's come with any instructions?
 
[ame=http://www.amazon.com/dp/B00005Q7B0?tag=wwwgalttechco-20&camp=213381&creative=390973&linkCode=as4&creativeASIN=B00005Q7B0&adid=1X07RQEG0TC3RPSGEYPY&]Amazon.com: Milwaukee 8988-20 Variable Temperature Heat Gun: Home Improvement[/ame]

Milwaukee is a great heat gun, we have one at my dads shop. It is roughly 5 years old, maybe older not sure. Works great, 2 heat settings, the second is crazy hot!
 
The HLA and wiring should be fine in the oven. If in doubt, turn it down to 150deg. Or you can put the HLA into a cardboard box, seal it up, cut a hole in the top and stick a heat gun or hair dryer though and warm up the HLA that way.

Why didn't your HID's come with any instructions?

no instructions because i made an impulse buy and bought my set from someone on here who didn't provide instructions. and after i pmed them to get instructions i never heard back from them. :spank: hence so many of my questions. i just have all the parts and had to figure it out. and ask questions on here to get clarification.


about the oven... all my wiring and things will be fine in the oven? i'm not opposed to getting a heat gun. but i assumed if you used a heat gun you would just be concentrating on the seam - not putting it in a box to make an oven.
 
Amazon.com: Milwaukee 8988-20 Variable Temperature Heat Gun: Home Improvement

Milwaukee is a great heat gun, we have one at my dads shop. It is roughly 5 years old, maybe older not sure. Works great, 2 heat settings, the second is crazy hot!

the link didn't work but i was able to find it. that's a smidge more than i'd like to spend. would something like this be ok?
Wagner at Lowe's: Heat Gun
i'd pretty much use it for this job and maybe heat shrink tubing in the future.
 
No you are basically making a little box oven with the heat gun. they even show it on the instructions that came with the HIDs...if you got them...

Oven should be fine with the wires. Maybe wrap em up in some tin foil jsut to be safe. Again, you only need to warm the glue and 200deg for 20min really isn't that hot/long and wont melt wire insulation.
 
Last edited:
Most AWG 12 and smaller (up to around -30) can tolerate being run through solder baths, and IR ovens during circuit board assembly.... I just spent a few minutes trying to find temp ratings for the various likely insulation types you'd find in a Chinese HID kit...

The best thing to do is read the nomenclature on the wire itself so you know exactly what kind of insulation you have.

Next best thing, is to guess.

Most of the data I saw in that few minute's poking around indicated 221°F was the point at which issues would happen. If you are 20 degrees down from there, you can comfortably heat the thing up for 20 minutes without issue.... you'd have more 'head room' if you backed off another 10 or 15 degrees. If the stuff will soften enough at 180 or 190, I'd do that instead.
 
alrighty people. i'm done. finally. i did have the one projector turned 90 degrees to the side. i was able to almost get it turned and tightened without putting it in the oven but i couldn't get the last little bit tightened. my hands were sore and just didn't have the strength. plus i decided that if i took the covers off again i could have a look at the adjuster screws.

got everything shut up and then went outside to try and line them up. was doing fine and then my battery died. so i had to hook up the battery tender and charge it to do the other side. finally finished in the rain. now i have to go out and put the rest of the fairing back on.

a few things...

- turns out that the guy i bought the projectors from did email me instructions. problem is it's an account i only use for paypal and ebay. life would have been much easier if i would have looked. and i wouldn't have had to bother y'all with so many questions.

- later i hope to post a few pictures. i'm pretty proud of my mounting job. at least on the left side the ballast and controller are mounted via screws and not velcro. i feel a lot better about that side.

- i know i ran into problems... but this took forever. you guys that say a few hours are my heroes. granted, i don't have a shop so i had to take the fairing off outside. bring it into the living room. move to the kitchen table. then it was time to eat so it had to move to the bedroom. then back to the kitchen table..... you get the idea. i'd say total it took me about 15-20 hours (this includes having to take the fairing off, re-bake it and reinstall everything).

- one of the things i'm proud of is my way to run leads to the battery. i ran my neg and pos directly to the battery. i wanted to be able to get the fairing off in the future without cutting wires or disconnecting things from the battery. so i used some of the black tubing that was around the wires and ran my wires through that and then into the frame to the battery to keep them protected. i went to the auto store and got one of those connectors for hooking up trailer lights and spliced the wires. so now i have a quick connect junction box for those leads that connects next to the other two junction boxes.
i noticed a flaw in my genius plan... i should have flipped the connectors. i have to be pretty careful when i disconnect them to make sure the exposed hot doesn't touch part of the frame. :eek: i'll switch them over christmas when i get my stebel horn. until then they should be fine.
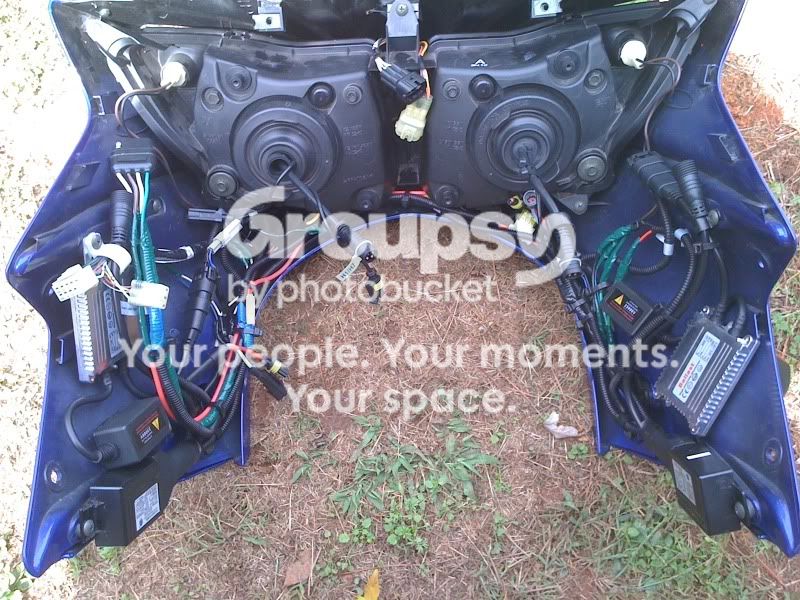
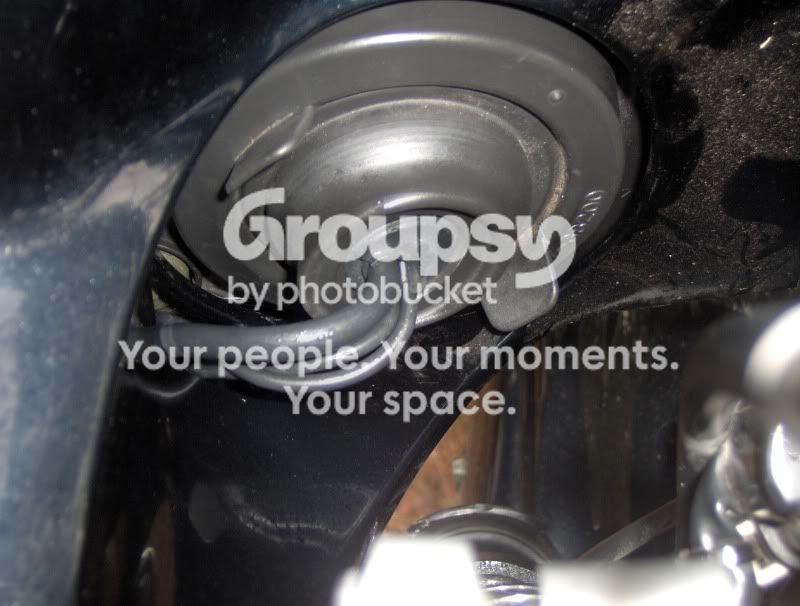
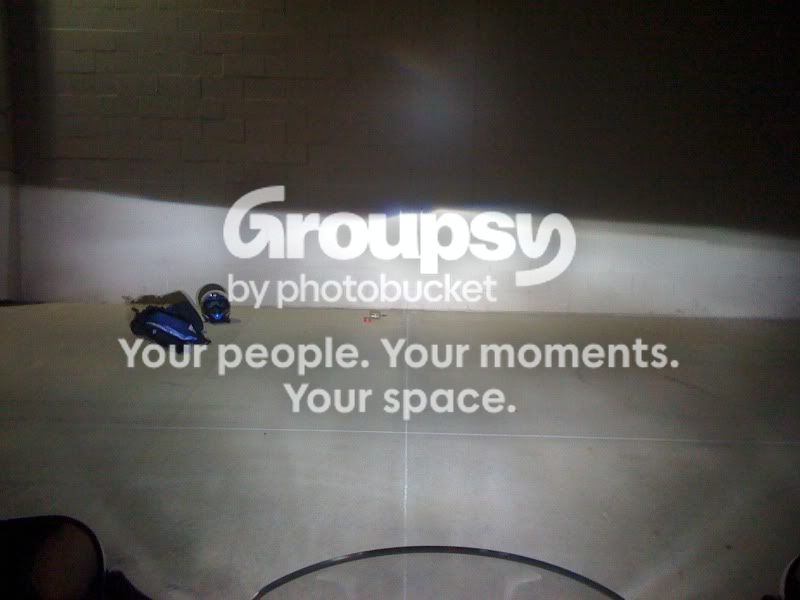
- boneman and Jman, you were both correct in aiming. the manual does only show two screws needed for adjusting. so i tightened up the one that it doesn't show and used just the two that it said to use. but the top 10mm will also aim the lights. but you don't have to use it.

thanks a ton guys. i'm looking forward to using them tonight when i ride home from work. i'll report back on how they do.
 
Well knee deep in the install now.

Painted the housings, installed led pod lights, and the projectors last night. Everything went pretty straight forward. Taking off the frontend took a bit of time, first time taking the whole fairing off the bike.

Couple of questions as I'll try to wire it all up today.

1) Do I cut off the old headlight connectors to tie it up to the HID controllors?

2) There's a extra relay part on the wiring loom (low power/hi power), I guess that's not need on the h7 side?

3) Where did you run the power cables for the new lights on the bike? Is their a spot on the frame that's safe and easy to get to the battery +

Thanks
 
Well knee deep in the install now.

Painted the housings, installed led pod lights, and the projectors last night. Everything went pretty straight forward. Taking off the frontend took a bit of time, first time taking the whole fairing off the bike.

oh boy... you're having fun now. :eek:

i'll try and help with what i did. but there are plenty of ways to do this.

1) Do I cut off the old headlight connectors to tie it up to the HID controllors?
i didn't cut. going off of boneman's diagram here is what i did.
- popped out the black/green wire for the h7
- put electrical tape over the connector and then heat shrink tubing over the electrical tape.
if you look in this picture you can see it in the cluster of wires just under the connectors coming from the h7 projector.
IMG_0202.jpg

- because i'm cheep (and it was too late at night to go to the auto store) i popped the "connectors" out of the extra female socket that comes with the h7 projector.
- i used one of them to tie in with the yellow/black high-beam wire on the h4 female connector
- i then used the other two in the "top, sideways" connection areas and tied them together and ran them to the spotted green wire used in the dual headlight mod

once those changes were done you simply plug in the male connectors from the controls into the female connectors of the fairing wiring harness.

2) There's a extra relay part on the wiring loom (low power/hi power), I guess that's not need on the h7 side?
see previous answer.
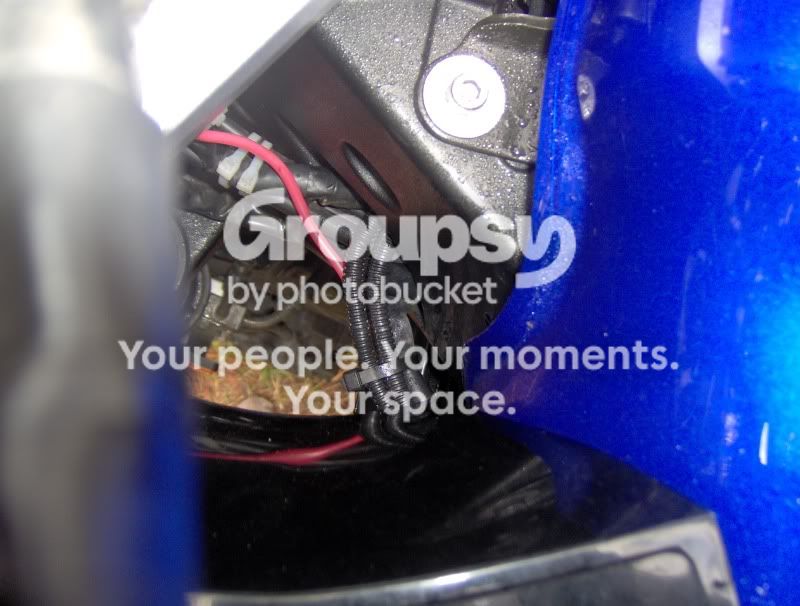
oh, and i also didn't like how the rubber disk was on the h7 projector. that extra controller loom has a smaller rubber disk like the h4 that fits nicely in the rubber boot that you put back on the back of the HLA. i cut the h7 disk off and put the one from the extra controller on it.

looking at the previous picture i posted you can see that the h4 has that nice little rubber disk that mates up nice with the boot. but the one for the h7 is too big and just leaves a "hole" in the boot. in this picture you can see where i cut the disk off the extra controller and put it on the h7 projector.
HPIM0137.jpg


3) Where did you run the power cables for the new lights on the bike? Is their a spot on the frame that's safe and easy to get to the battery +
- i tied the angel eyes directly into the turn signals. jman put them on the starter relay. i tried to do that but wasn't too sure of where exactly that would be so i went for the quick and dirty. :D
- for the projector grounds i lopped off the "circle connector" and soldered a longer wire to them.
- i also lopped the circle connectors off the red wires to shorten them.
- i then ran those wires through the opening on the frame up near the neck on the clutch side.
like this right here.
HPIM0140.jpg


- one thing i did to make things a little easier was i got a male and female connector used for hooking up a trailers lights and used it as my junction box between the fairing and frame so i can still take my fairing off quickly.
you can see it quite well in this photo. only problem is i should have put the one you see on the fairing on my bike and the one i have on the bike on the fairing. it would have protected the hot from accidentally hitting the frame.
IMG_0200.jpg


i know i'm wordy, but i hope that makes since. if you need some clarification let me know.
 
Last edited:
^^^

Thanks for the tips.

Forgot to mention, I've got the BD034 Dual light mod cable, sitting next to me, should I install that and tap into it like boneman's diagram.

I may have to make a few runs to the parts store.

The electronics store with all the good stuff is a bit of a hike.

I'll be installing Watsen Flush Mounts too, which aren't here yet, so I'll run the relays while I have access to everything.
 
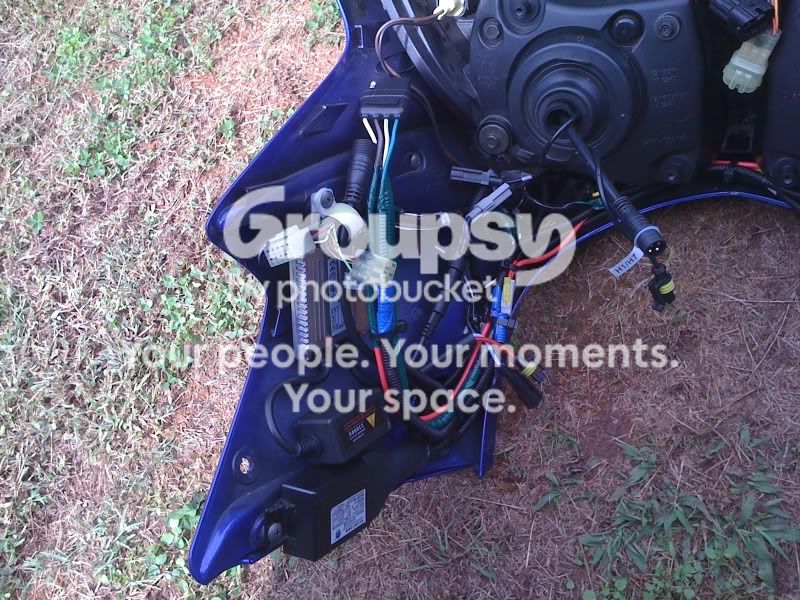
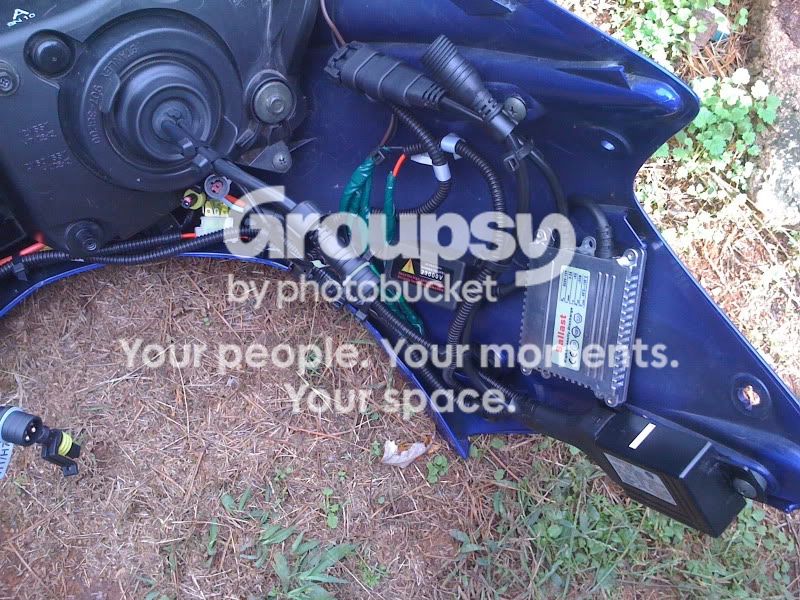
ok, here are my pics of the install.

here's all the wiring. it's not pretty but it works.
IMG_0202.jpg

i decided to do pod lights with this project so they're wired up too.

i was very proud of where i put my controllers because they had a mechanical connection on each end. i say was because i had to rework some things when i put it on the bike. the clutch side controller had to be repositioned because it was hitting the relay(?) that's attached to the metal fairing bracket. and i had to rework the throttle side because the wires were too close to the radiator cap for my comfort.

my first side wired up. doesn't look that bad to me.
IMG_0201.jpg


second side wired up. this side doesn't look good at all.
IMG_0200.jpg


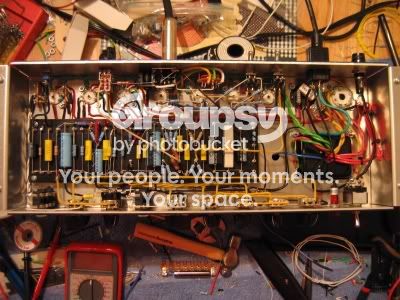
the wiring really bothered (and still does bother) me. my hobby before kids was building amps. here's a pic of one that i did. i like neat wiring.
1836MBOFullD.jpg

my amp wiring inspiration were hiwatt amps.
1090213886049520631S500x500Q85.jpg


finished product before hitting the starter.
HPIM0138.jpg

makes me very much wish our headlight laws were like VA's so i could keep it like this all the time like jman does.

oh, and i wired my pod lights to stay on as running lights and blinkers based on a thread a found here.

here they are lit up.
HPIM0139.jpg


and here they are behind lowes. i don't have a garage door or flat land in my yard. so i went behind lowes to aim them. i aimed them with me off the bike. then i sat on the bike and they were a few inches high. so i adjusted them while on the bike. i think i went a smidg low and need to raise them just a tad.
IMG_0203.jpg


anyway, thanks guys. couldn't have done it without you.
 
Thanks for the tips.
no problem. if you've read through this thread you will see that i asked ALOT of questions. just happy to be on this side and able to help others.

Forgot to mention, I've got the BD034 Dual light mod cable, sitting next to me, should I install that and tap into it like boneman's diagram.
if you have it i would say yes. i did it quick and dirty buy using a solderless connector and "splicing" into the wire rather than the proper way. it was late and i was ready to be done. but if you have it by all means use it. you will need to run a wire from it over to the h7 socket as well.

I may have to make a few runs to the parts store.

The electronics store with all the good stuff is a bit of a hike.
yeah, i gave up trying to count how many trips i made to lowes, radio shack and advance auto. i do with all three were opened at midnight. would have made things easier for me. :D

I'll be installing Watsen Flush Mounts too, which aren't here yet, so I'll run the relays while I have access to everything.
ewwww, nice. looking forward to seeing that when you're finished.
 
Putting it back together after doing the bd34 cable.

Silly question.

When I wire the HID up, should they light up when I turn on the bike? Or only when I fire up the bike?

thx
 
Back
Top