

SANGER_A2
Super Member
I installed these horns on my last bike instead of the two awful stock horns and I was very pleased with them. Although the stock horn on the FZ6 is better than both the GPZ500S horns added together, I thought it could benefit from replacement with these bad boys. They're very cheap and available everywhere.
I realised I would have to make up a cable that splits the voltage from the stock horn cable into two. Then I thought "Hmmm, as I'm going to be soldering anyway, I might as well split it three ways instead of just two and keep the stock horn as well". So I did.
I've got loads of cable lying around and I also had some female spade connectors lying around that I had from other jobs. You need two male spade connectors and 6 female. I popped down to Maplin to buy the male connectors for a pound. I also bought a set of male and female spade protectors when I was there for a pound a packet. This mod has cost me £3! It will be a bit more if you don't have the wire or female spade connectors already though.
You don't even need to buy an bolts etc as I used the bolt that holds the inner fairing in place. It's the one that you have to screw in from the inside and is hidden by the fairing itself so I couldn't get any decent pictures of the horns in place. The Motrax Hootaz come with a little extension bracket thingy if you need it and I used this to get them to hang a bit lower and angled them to point towards the two inlets in the front of the bike.
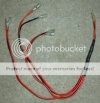
Here you can see the cable I made up. All the connections are sealed in heatshrink and then loads of electrical tape to make them weather-proof:-
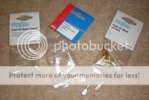
Here are the bits you need. It's all pretty obvious where they go if you look at the previous picture, so I won't go into details:-
Here you can see where my cable connects to the stock horn connectors (I taped it to the right side of the bike near the tank):-
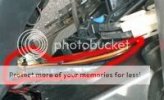
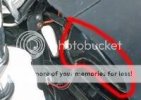
Here you can see the left-hand Motrax horn (I highlighted the horn and it's power cable in red to make it easier):-
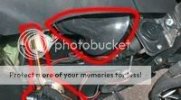
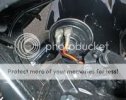
Here is where my cable connects to the stock horn. I had to bend the stock bracket down a bit and rotate it so that the connectors were forwards. This is because the stock connectors are right-angled and don't stick up - but mine aren't:-
Here you can see the right-hand Motrax horn hidden under the inner fairing and the inlet it is pointing to where (hopefully) most of the sound will go:-
And here we have a little Youtube video to show the difference:-
[ame=http://www.youtube.com/watch?v=Nu-339hkRMA]YouTube - Yamaha FZ6 with Motraz Hootaz horns comparison[/ame]
As aways, this and my other mods are mirrored on my website.
I realised I would have to make up a cable that splits the voltage from the stock horn cable into two. Then I thought "Hmmm, as I'm going to be soldering anyway, I might as well split it three ways instead of just two and keep the stock horn as well". So I did.
I've got loads of cable lying around and I also had some female spade connectors lying around that I had from other jobs. You need two male spade connectors and 6 female. I popped down to Maplin to buy the male connectors for a pound. I also bought a set of male and female spade protectors when I was there for a pound a packet. This mod has cost me £3! It will be a bit more if you don't have the wire or female spade connectors already though.
You don't even need to buy an bolts etc as I used the bolt that holds the inner fairing in place. It's the one that you have to screw in from the inside and is hidden by the fairing itself so I couldn't get any decent pictures of the horns in place. The Motrax Hootaz come with a little extension bracket thingy if you need it and I used this to get them to hang a bit lower and angled them to point towards the two inlets in the front of the bike.
Here you can see the cable I made up. All the connections are sealed in heatshrink and then loads of electrical tape to make them weather-proof:-
Here are the bits you need. It's all pretty obvious where they go if you look at the previous picture, so I won't go into details:-
Here you can see where my cable connects to the stock horn connectors (I taped it to the right side of the bike near the tank):-
Here you can see the left-hand Motrax horn (I highlighted the horn and it's power cable in red to make it easier):-
Here is where my cable connects to the stock horn. I had to bend the stock bracket down a bit and rotate it so that the connectors were forwards. This is because the stock connectors are right-angled and don't stick up - but mine aren't:-
Here you can see the right-hand Motrax horn hidden under the inner fairing and the inlet it is pointing to where (hopefully) most of the sound will go:-
And here we have a little Youtube video to show the difference:-
[ame=http://www.youtube.com/watch?v=Nu-339hkRMA]YouTube - Yamaha FZ6 with Motraz Hootaz horns comparison[/ame]
As aways, this and my other mods are mirrored on my website.
Last edited:


