HID Projector Help

Db52280

Junior Member
Joined
Apr 18, 2014
Messages
51
Reaction score
0
Points
0
Location
Moreno Valley, CA
Visit site
Hey guys I posted this question in another part of the forum, but felt like this is a better spot for it. I am in the process of installing HID projectors on my 2005 fz6 the harness that came with my kit has 4 wires (2 pair) that connect to the existing headlight harness. These 4 wires go into the controller than splits to the two ballasts. I am trying to make both headlights work on low and high beam. Thanks for any help you can provide. For some reason I can only post one pic at a time

View attachment 53117
 

Motogiro

Vrrroooooom!
Staff member
Moderator
Elite Member
Site Supporter
Joined
May 8, 2008
Messages
14,996
Reaction score
1,162
Points
113
Location
San Diego, Ca.
Visit site
The black with green tracer is your headlamp low beam. It will not shut off during high beam and can be used directly as the signal to turn on the HID ballasts. This wire is not active until the engine is running so don't be puzzled if you turn the key on and see no voltage. Start the motor..

The black with yellow tracer wire on the other plug is the high beam wire and can be used to operate your high beam shutter.

The wire that powers your HID transformers should go direct to your battery with an inline fuse.

I can only assume this is the type setup you're installing. If you are not using a high/low beam cutoff shutter type lamp I wouldn't install it because you will get a ticket or have to aim them so low they won't work well at all.

Can you give more info on you system? :)
 

Db52280

Junior Member
Joined
Apr 18, 2014
Messages
51
Reaction score
0
Points
0
Location
Moreno Valley, CA
Visit site

Marcin

Junior Member
Joined
May 26, 2013
Messages
305
Reaction score
1
Points
18
Location
Poland
Visit site
Description says that they fit h4 h1 and h7. How is it possible? Usually you can buy a version for one type bulbs only and fz6 has two different types.:confused:
 

Motogiro

Vrrroooooom!
Staff member
Moderator
Elite Member
Site Supporter
Joined
May 8, 2008
Messages
14,996
Reaction score
1,162
Points
113
Location
San Diego, Ca.
Visit site
2X 2 5" Motorcycle HID Bi Xenon Headlight Projector Kit Halo Angel Devil Eye 55W | eBay

Here is the ebay link to the system I purchased. I think you nailed it There is a red wire that goes directly to battery which also goes to the controller which looks like a relay. The 4 wires I am questioning also go to the controller.

So the 2 black - Ground
Blue - Low or High Beam?
White - Low or High Beam?

There should be instructions to tell you which wire goes where. I can tell you what color wire does what on the FZ6 but your kit should tell you what their wires go to. If it gets tuff I'm here in SD! Lol! :)
 

Motogiro

Vrrroooooom!
Staff member
Moderator
Elite Member
Site Supporter
Joined
May 8, 2008
Messages
14,996
Reaction score
1,162
Points
113
Location
San Diego, Ca.
Visit site
Description says that they fit h4 h1 and h7. How is it possible? Usually you can buy a version for one type bulbs only and fz6 has two different types.:confused:

I think the H4,H1 and H7 compatibility have to do with switch/light function and not bulb type since it is a projector kit. The projector kit does not use a reflector and uses one HID lamp. :)
 

Marcin

Junior Member
Joined
May 26, 2013
Messages
305
Reaction score
1
Points
18
Location
Poland
Visit site
Yes, I know that, BUT the whole projector goes inside the headlight, instead of the H4/H7 bulb. And these bulbs have different mounting sizes. That's what makes me wonder. But on the photos I see some strange things - adapters maybe?
 

Db52280

Junior Member
Joined
Apr 18, 2014
Messages
51
Reaction score
0
Points
0
Location
Moreno Valley, CA
Visit site
The quality of the kit is really nice. This is a really easy mod to do, I just have a tendency to way over think things. I'm going to hook up the last 4 wires this evening I will post how it goes.
 

Db52280

Junior Member
Joined
Apr 18, 2014
Messages
51
Reaction score
0
Points
0
Location
Moreno Valley, CA
Visit site
Finished the install. Word of advice make sure you have the projector/ shutter in the right direction. On mine there was no indication of direction but I found a "line" on the angel eye to indicate direction. This was after completely reassembling and trying to adjust. The line goes toward the bottom of the headlight for anyone who buys the same kit. Here are some final assembly images. I will post some night images soon.

View attachment 53185
 

FIZZER6

The Angry Blue Mantis
Joined
Mar 22, 2011
Messages
2,378
Reaction score
33
Points
0
Location
Virginia
Visit site
Finished the install. Word of advice make sure you have the projector/ shutter in the right direction. On mine there was no indication of direction but I found a "line" on the angel eye to indicate direction. This was after completely reassembling and trying to adjust. The line goes toward the bottom of the headlight for anyone who buys the same kit. Here are some final assembly images. I will post some night images soon.

View attachment 53185

Looks good. that's funny they didn't give you an indication on the projectors which side is up. The Morimoto Projectors I recommend have a groove in them that can only be installed in an H4/H7 lamp right side up.

Best modification you can do on a bike if you ride at night.
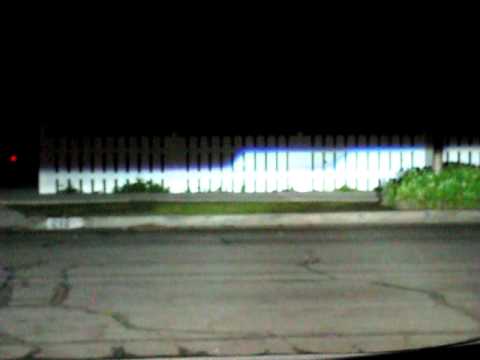
Lets see some pictures of these turned on at night, and aimed at a wall! :thumbup:
 

FinalImpact

2 Da Street, Knobs R Gone
Site Supporter
Joined
Mar 16, 2011
Messages
11,137
Reaction score
184
Points
63
Location
USA, OR
Visit site
Looks good. that's funny they didn't give you an indication on the projectors which side is up. The Morimoto Projectors I recommend have a groove in them that can only be installed in an H4/H7 lamp right side up.

Best modification you can do on a bike if you ride at night.
Lets see some pictures of these turned on at night, and aimed at a wall! :thumbup:

How are you guys securing the projectors to the OEM reflector? This requires chopping out a sizable section from the mole yes? Anyone do any close up pictures of the fitment?
 

FIZZER6

The Angry Blue Mantis
Joined
Mar 22, 2011
Messages
2,378
Reaction score
33
Points
0
Location
Virginia
Visit site
How are you guys securing the projectors to the OEM reflector? This requires chopping out a sizable section from the mole yes? Anyone do any close up pictures of the fitment?

If you use the Morimoto mini (H1) HID projectors you can install them in H7 or H4 reflectors without cutting the hole, you only have to trim off the tabs that used to secure the metal clips that held the original bulbs. The projector stem fits through the existing bulb hole perfectly. Best projector on the market that fits in the FZ6 headlight.

$_35.JPG
hqdefault.jpg
 
Last edited:

Marcin

Junior Member
Joined
May 26, 2013
Messages
305
Reaction score
1
Points
18
Location
Poland
Visit site
As far as I know you put the projector from the front. You remove the plastic (or whatever it is) transparent front part of the headlight (by heating it up), put the projector inside through the bulb hole and screw it from the back side of the headlight with a special nut.
 

FinalImpact

2 Da Street, Knobs R Gone
Site Supporter
Joined
Mar 16, 2011
Messages
11,137
Reaction score
184
Points
63
Location
USA, OR
Visit site
If you use the Morimoto mini (H1) HID projectors you can install them in H7 or H4 reflectors without cutting the hole, you only have to trim off the tabs that used to secure the metal clips that held the original bulbs. The projector stem fits through the existing bulb hole perfectly. Best projector on the market that fits in the FZ6 headlight.

$_35.JPG
hqdefault.jpg

Its that easy? I had no idea! So its nearly a bolt in? Can the mole ever hole a H4/7 bulb again once trimmed? Or is it, no turning back?

I have 2 3Five ballasts which are sitting here doing nothing.... Being as tiny as they are, I may have give this more consideration! Perhaps you recall this --> http://www.600riders.com/forum/fz6-electrical/51497-35-watt-hid-ballast-current-4-0-amps.html

JJD952 - Electrical
 
Last edited:
Top