• Welcome to the Yamaha FZ6 Forums. Member registration disables ads and allows you to post and share. Register Here.

Error 33 breaking my bike abroad- urgent help please

Looks good..

Did you get the pistons in the block?

Not yet- for now it's on hold as the no1 priority is fitting steel lines and cleaning the front brake pistons on the Honda, as I'll be doing a 9 day road trip, which it's self turns out to come with some little complications thanks to the butcher "mechanic" who replaced the seals for the previous owner and messed up some of the screws with some "ghetto ingenuity"- don't have the right hex key, or you used the wrong size and ****ed the screw cap? No worries- just hammer in a torx screwdriver and you're set! And why bother using rubber grease when a dab of brake fluid will make those pistons slide right in?

From here it looks good and few stair at out parts that close...

I'm not sure if this was a factor but humidity in the air is compressed and in the air so you need good water traps, filters, and an at the source in line desiccant dryer at the gun. Depending on the type of compressor, an oil separator is critical too.

Abstract factors are using unknown hoses that have been tainted with oil and water. All these things can derail your best effort at perfection.

I'm not saying you rented hoses but for example in a NONE paint automotive repair shop its common to use automatic oiler to lube your air tools. Hoses from this type of use should never be used to paint with.

And I'm guessing you know this but they make different reducers for different temperatures. Tho it gets expensive on these one off small projects.

Last little bit, other than the cylinder head near the exhaust port the temps likely never exceed 130°C (266°F)...

Good luck...

If you look at the highlights you can see how grainy the surface is... it's not only about looks, grainy means that the paint particles are randomly stacked like rocks, when they should all form one compact layer. This means decreased resistance- there's a reason they vibrate concrete when pouring. I did the "fingernail test" and on the spots where the paint is smooth or almost smooth the fingernail leaves no marks, while on the spots where it's really grainy and not smooth there is definitely a mark left by the fingernail. According to the spec sheet, it still has a few days left before fully curing, so hopefully it will get at least "kind of durable".

I had 2 filters- one larger one (which also had a regulator) to be fit at the compressor outlet and one small one that went before the paint gun- due to some mismatch in my head (thought the large filter had quick release connectors) I ended up using only the small filter. It however turned out 100% clean in the end, and the air compressor only drained about half a teaspoon of water.

You did make wonder about it; it was about 28C and 60%RH, and used about 150l/0.15 m3 of air (estimated by knowing that the compressor refilled at about 50%, and remembering how often it started). So there were about 17g of water for each kilo of air; the air density was about 1.6kg/m3, so overall my paint job involved about 4g of water. Considering about 2g were drained, I could assume that 2g of water ended up mixed with the paint. That's about 0.5% of the whole paint+thinner mixture, so probably not a factor.

The hose was brand new; and let's be honest, this wasn't a "best effort". I'd say: 40% of fault was me- being in a poor mood and rushing the job- could have set the smallest pattern size and/or went slower with the gun, etc, 30% of fault was not using a regulator (only relying on the compressor knob) and having a too dry pattern, 15% not using a paper filter (forgot to order one, and didn't want to waste time searching for a coffee filter) and not mixing the paint+thinner in a separate cup - when cleaning the paint gun I noticed that the paint wasn't 100% homogeneous, 15% painting outdoor (and also a bit cloudy- should have used a flashlight to properly see all the grainy spots).
 
After all, the paint seems to have cured to an acceptable level in most places, though there are a few spots which will probably need some touching up.

I've managed to assemble the head. Next- I'll put the pistons inside the block.
 
I finally got all the pistons inside the block.

It took about 5-6h to manually sand down and enlarge the piston tool (the lathe guy didn't fully follow my specs).

Tomorrow I'm fitting the crank, however there's one thing- regarding the rod bolts,
-the 2007 "all versions" service manual says 15nm + 120 degrees
-the 2004 service manual says 15nm + 150 degrees except for CAL and 15nm + 120 degrees for CAL
-the R6 manual (same part number for the piston rod assy) says 15nm + 150 degress

Now, my bike is definitely not for California, and it's from 2004 so it should go 150 degrees, but what would you say?
 
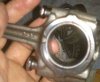
The rod bolts don't go in enough so that the rod nut will catch the threads...

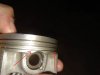
I'd tried to gently tap in the bolts with the pistons inside the engine, thinking that removing and reinserting the pistons might damage the rings. While doing so I pulled the #1 piston too much, and bent the lower oil ring. Then, the piston felt hard to move so I had to remove it, using a hammer. While removing, the oil ring got even more bent, and also left some marks on the pistons...

I could have sworn I'd ride this bike by Sunday... :(
 
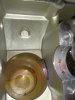
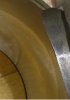
Here is the one of the two scoring marks on the cylinder, caused by this. The other marks is almost identical.
 

Attachments

  • photo_2018-09-10_20-06-46.jpg
    photo_2018-09-10_20-06-46.jpg
    87.8 KB · Views: 39
You didn't have the rod bolts in the rods BEFORE assembly?

This is the correct design, yes?: https://www.partzilla.com/catalog/yamaha/motorcycle/2004/fz6-fz600ss/crankshaft-piston (Not the Ca edition), rod bolt and nut, correct?

How can they NOT be long enough? I'm missing something here...

The crankshaft ISN'T in the block BEFORE rods and pistons?

As for rings and piston, we know what that means.

Can't really see anything in that picture..

Pretty much standard procedure is have the rod bolts already installed in the rods, put plastic tubing over the bolts to protect the crankshaft (and help aim them to the crankshaft).

Didn't read up on it but the crank is usually installed BEFORE the rods and pistons go in...


Removing the pistons shouldn't damage anything, just "a step backwards". Pull em, install the rod-bolts on the bench and you get a "do-over" :(

Hope your using lots of motor oil as you slip rings and pistons, etc into the block...
 
Last edited:
You didn't have the rod bolts in the rods BEFORE assembly?...... Pretty much standard procedure is have the rod bolts already installed in the rods

I did, but I didn't expect them to end up like in the picture. I'd say I'm stronger than average but still can't push them past that point. I haven't read anywhere that you're supposed to tap them in on a bench first...

As for rings and piston, we know what that means.
Not sure if it's worth getting new rings and piston, with the new condition of the cylinder.

Can't really see anything in that picture..
See attached a bigger crop- on the right side, there's a thin line. It's hard to tell on the pic, but it's deep enough to be felt by the finger, and there's two of those lines.
I've already had this https://www.600riders.com/forum/fz6...-abroad-urgent-help-please-18.html#post637572 on cyl #4- now, the new lines on cyl #1 are twice as deep, and run all the way from top to bottom.
I really wish that this bike was 3 kilos heavier, and had removable instead of plated cylinders...

What is the worst case scenario of using an engine with a cylinder scratched like that? Especially, what's the risk of sudden, catastrophic failure?

This engine has thrown me so many curved balls, it's unbelievable... I haven't had this many issues in over 15 years of "home mechanics" combined.

I'm thinking of filing down all protrusions from the piston and fitting the old oil rings... I really put in much effort to make it as new, spared no expenses, hoping it'd last at least 40k more kms, but now it's clear that's not gonna happen. So perhaps it's wisest to just cut my loses, try to make it work as is, and perhaps get a low mileage engine at some point...
 

Attachments

  • rod_fz6.jpg
    rod_fz6.jpg
    15.7 KB · Views: 27
  • cyl.jpg
    cyl.jpg
    34.9 KB · Views: 37
Well, that pic doesn't look that bad.. Yes you'll have some additional leak down, but up to 15% is acceptable. I don't see it being worse than that-also, what's your other choice, a new engine block? You can use that one...

As for the rod bolts, you should be able to press then in with a good vise SUPPORTING THE ROD safely W/O causing any damage.

I'd replace that piston if ANY DOUBT, the rings (if you can get individually). The oil ring, if that all that's damaged, and you know which one was in that cylinder, should be ok..

Your deep into the engine, don't cut corners now.

It should be good... I'd personally proceed as above.
 
It's hard to catch all angles in one pic but here it is

As for the rings- the lower oil one is completely bent, but the others are fine. I'm thinking of using one of the old oil rings (they seem in great shape).

I'm not looking to cut corners, but I want to make sure I'm not buying anything unnecessarily, given the fact that at best the cylinder will, as you said, "have some additional leak down".
 

Attachments

  • photo_2018-09-11_19-10-16.jpg
    photo_2018-09-11_19-10-16.jpg
    87.1 KB · Views: 30
Quote: "left some marks on the pistons"...

If the ring groove is not buggered up, (the width of the machined part where the oil ring goes), you should be fine.

Installing the old oil ring and measuring the gap between the ring (like you would on the compression rings) and the PISTON, should give you an idea if it's an issue. Compare to the rest of the piston in different locations..

And I hope using a hammer for installing pistons in the block, your using the wooden handle end of the tool.
 
Last edited:
Yup! In the very little free time I have I try to go out riding. In the mountains (aka where the fun is) it's now dropping to freezing overnight- it's not long before it's a safety concern during the day. Riding inside and around town should still be good for a month or so, so there's still a chance I'll be able to ride the FZ6 this year.


Here's a pic from last week:
 

Attachments

  • photo_2018-09-27_14-05-17.jpg
    photo_2018-09-27_14-05-17.jpg
    143.3 KB · Views: 29
Yes. Managed to "reduce" the cylinder scratches by about half using the scotchbrite pad, therefore I've decided to buy a new OEM piston and rings set.
 
Yes, got pistons 2 to 4 reinserted with the rod bolts fully settled in.

You were right- removing and reinserting the pistons didn't do any damage to the rings.

Now I'm waiting for the new parts to arrive.
 
Managed to take advantage of the 24C weather today (likely the last warm day of this year) and gave my bikes a good washing.

Spiders, webs, dust, rotten leaves- it really showed that the FZ6's been sitting for a long time, even though it was covered by it's mini bike shed.

Also washed the FZ6 oil pan- even using brake cleaner spray (which usually instantly blasts away grease)- it took almost an hour to scrub clean the exterior of the oil pan.

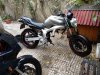
In the end I though "damn the FZ6 is a good looking bike" and I took this pic :)
 

Attachments

  • photo_2018-10-17_18-17-52.jpg
    photo_2018-10-17_18-17-52.jpg
    249.5 KB · Views: 51
I've cleaned the glue left by the masking tape on the head (remind me to never cheapen out on masking tape again!), washed the housing of the air filter and vacuumed the air filter (some dust got in while in storage), fit the gear selector, recharged the battery and tested the valves for sealing capacity using the upside down + liquid method (alcohol) and all valves seem to seal perfectly. So pretty much everything I could have done with the crank case open.

Now, another small complication: the bastards from partzilla left the yamabond on backorder and finally shipped everything on Friday. Now, on Monday, they got the yamabond but probably decided that it'd cost them too much to ship a new parcel with only the yamabond inside and do it for free, so they wrote me some BS claiming that the yamabond is hazardous material and can't be shipped internationally (contradicting the tech sheet and defying the question of "then how the hell did you get it from Japan to USA in the first place?"), so they'll refund me.

I'm still waiting for them to reply my last email but in case I won't get the yamabond (I know ThreeBond TB1215 is the same as yamabond 4/ hondabond 4, but it's a very little chance I'll manage to find either)- does anyone have any experience with using some "regular" red liquid gasket for sealing the crank case halves? Or I could have this https://www.permatex.com/products/uncategorized/permatex-motoseal-1-ultimate-gasket-maker-grey/ shipped in about 1 week. I've only used one Permatex product (valve lapping paste) but it was decent quality.
 
Back
Top