• Welcome to the Yamaha FZ6 Forums. Member registration disables ads and allows you to post and share. Register Here.

Error 33 breaking my bike abroad- urgent help please

I've put a lot of engines together and the band clamp works quick and easy if its sized right.
Like this one... Tho the wrong size, they ratchet and lock. https://www.summitracing.com/parts/oes-25037

There is no value in freezing the piston when its the rings keeping it from seating. Same is true of more oil. When the rings are properly collapsed, the piston will drop in. On that note, did you drop the new rings in the cylinder (Top and 2nd ring)? If YOU DID NOT, DO IT NOW before going further. If they are oversize for some reason this would explain a lot.
Put them in on edge and rotate them flat and use a piston to square them in the bore. Do SO AT THE TOP AND BOTTOM and measure the end gap and make certain it has some freedom to expand (an open gap per spec).

Also, how did you index the rings? Normally there is a specific pattern for the top, 2nd and oil rings orientation. Sometimes its a simple as 120 degrees apart but do NOT align the top ring with the exhaust port.

As for the scratch in the wall I would leave it. New rings seating in may be enough to take it out but its not worth opening up the whole cylinder from top to bottom 360 degrees for that. You'll loose more ring tension and open the ring gaps up for something that isn't hurting anything.

Good luck. And DO fit those new and old rings in the bore and measure the gap. This is MUST! If off, it could ruin the block!
 
I've put a lot of engines together and the band clamp works quick and easy if its sized right.
Like this one... Tho the wrong size, they ratchet and lock. https://www.summitracing.com/parts/oes-25037

There is no value in freezing the piston when its the rings keeping it from seating. Same is true of more oil. When the rings are properly collapsed, the piston will drop in. On that note, did you drop the new rings in the cylinder (Top and 2nd ring)? If YOU DID NOT, DO IT NOW before going further. If they are oversize for some reason this would explain a lot.
Put them in on edge and rotate them flat and use a piston to square them in the bore. Do SO AT THE TOP AND BOTTOM and measure the end gap and make certain it has some freedom to expand (an open gap per spec).

Also, how did you index the rings? Normally there is a specific pattern for the top, 2nd and oil rings orientation. Sometimes its a simple as 120 degrees apart but do NOT align the top ring with the exhaust port.

As for the scratch in the wall I would leave it. New rings seating in may be enough to take it out but its not worth opening up the whole cylinder from top to bottom 360 degrees for that. You'll loose more ring tension and open the ring gaps up for something that isn't hurting anything.

Good luck. And DO fit those new and old rings in the bore and measure the gap. This is MUST! If off, it could ruin the block!

Thank you for your input!

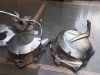
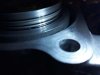
I've tried 2 different tools similar to that from your link and neither work. Until someone claims they used this kind of tool for this exact engine, I'm sure that this type tool is impossible to use on this engine due to the stupid chamfer. I've reattached the picture with the rings expanding in the chamfer, BELOW the head gasket plane (where the adjustable tool rests).

I did not try to measure the 1st 2 rings for end gaps while inserted. They are OEM Yamaha, made in Japan, standard size. I did manually compress them on while inserted on the piston and they did sit flush to the piston OD with a bit more end gap left, so they should have enough room while inside the cylinder.
More so, the piston didn't even get in past the oil rings, so that can't be the issue.
I will however measure that as soon as I finish painting the engine - right now it's fully tape masked and it took a few hours to do that, so the masking will come off only after fully painting.

The indexing was done (+- some degrees) according to the Yamaha shop manual.
 

Attachments

  • photo_2018-04-25_01-18-43.jpg
    photo_2018-04-25_01-18-43.jpg
    37.5 KB · Views: 34
That tiny tapper at the top of the bore is nothing. If compressed completely, the piston will drop in.
And ya, it is an absolute must to check end gap from a new bag or not. You have to know the facts. Its like a Go/ No - Go gauge. And the gap should meet spec when measured.

What size of pistons was that tool designed for? The quick clamp?

How's the new Bike?
 
The piston tools used were 40-90mm and 45-75mm, both new, while the piston is around 65,5mm. I am 99,999% sure the rings got fully compressed with both tools, and that the tools were fully seated to the cylinder block surface.

The chamfer at the top is not tiny- it's big enough to allow for at least 1,5mm expansion of the rings. The phenomena is best pictured here: https://www.techtips.ie/Pierburg/cylinder-chamfers-during-engine-reconditioning-work.pdf

I've tried at least 8 times with both tools, while this is not the first mechanical job I'm doing on a vehicle. I've also watched at least 15 different "piston insertion" videos just to make sure I wasn't by any chance missing any secret moves or chants required for the insertion. It's either that those tools don't work here, or I'm a complete idiot.

The new bike is great so far. I've started a thread here http://www.600riders.com/forum/fz6-...sus-honda-vtr-1000-f-firestorm-superhawk.html and I'll edit it after a bit more riding (will do a ~1000km trip the next weekend). So far I've only managed to make it through 2 tanks of gas, due to work and being away, however the bike was quite easy to (almost) get adapted to. It does not like lower speed cruising under 120kmh (city riding even less) or very slow turns, but on faster stuff it feels like home. And strangely, though the engine is much more jerky and lumpy, it's much easier to drive smoothly, perhaps due to the linear power delivery. Bonus feature- the angles make it impossible for GF to see the speedo.

I'm glad I didn't go with anything lower powered; at some point I was even considering a er6f (ninja 650) or sv650s- 70-75hp on a v-twin would have felt like complete crap after getting used to the +8000RPM rush of the FZ6. The VTR, as dynoed pre-purchase , has ~100bhp at 3500rpm and 122bph max. It still hasn't made me forget l4, but that's enough power to bring some amusement, regardless of the RPM.
 
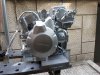
Just finished spraying the primer, pictures is one af the first coats.

Only thing that is a bit worrisome is that 10 minutes after the last coat the primer would come off after a light scrub with the fingernail exposing the bare aluminum. The surface was sanded down and wiped with alcohol before spraying. Hopefully it will fully cure by Tuesday when I intend to spray the actual paint, otherwise I'm screwed- I'll have to remove all that primer...
 

Attachments

  • photo_2018-06-15_16-59-46.jpg
    photo_2018-06-15_16-59-46.jpg
    74.6 KB · Views: 31
The primer did get harder, but still not as hard as I'd have liked.

I'm at my wits end with this bike, so I did the final (heat resistant) paint regardless. Hopefully it will now cure hard enough.

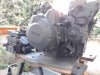
Here's a pic showing how it ended. Not perfect, with some scratches from stripping the old paint showing on the side covers - turns out this heat resistant paint was thinner than expected. Had I know beforehand, I'd have also done a final sanding with #400 grit.

Even so, IMO it now looks 10x better than before.

So with this painted, all that's left to do is to also paint the head (now it's half paint stripped), modify the piston tool and fit the internals and then finally mount the engine to the frame.
 

Attachments

  • photo_2018-06-19_23-24-27.jpg
    photo_2018-06-19_23-24-27.jpg
    167.6 KB · Views: 37
The planets are surely not aligning in order for this bike to finally get running :( :( :( . This is getting further and further complicated.

Now, after about 35h after painting, the paint is even easier to scrape off with the finger nail than the primer was.

Anyone got any ideas with this?

I could either:
1- just mount it as is, but it will barely hold till the 1st or second wash
2- also cover it with clear coat- this will surely make it stronger, but there's the risk that it will burn/discolor/get brown as the tech sheet for the clear coat states 110C max temp
3- strip it again and use a different paint - this might take at least 1 month
4- fully mount all cases back up, find a shop, have it painted there, get it back, reopen all engine parts, fit the internals, remount - this again would take over 1 month
 
The planets are surely not aligning in order for this bike to finally get running :( :( :( . This is getting further and further complicated.

Now, after about 35h after painting, the paint is even easier to scrape off with the finger nail than the primer was.

Anyone got any ideas with this?

I could either:
1- just mount it as is, but it will barely hold till the 1st or second wash
2- also cover it with clear coat- this will surely make it stronger, but there's the risk that it will burn/discolor/get brown as the tech sheet for the clear coat states 110C max temp
3- strip it again and use a different paint - this might take at least 1 month
4- fully mount all cases back up, find a shop, have it painted there, get it back, reopen all engine parts, fit the internals, remount - this again would take over 1 month
Painting is more complex than most people realize. Although alcohol is often used to clean products before many typesof adhesion are put to them, alcohol is not the best preparation material to remove all oils. In most cases sanding or creating abrasion for product to adhere to is a paramount step. The preparation of surfaces is of the utmost importance. Compatibility of different paints is another great consideration.
Temperature of the part that's being painted as well as the ambient temperature of the room play an important part. If the part is below the recommended temperature for the paint even if the air temperature is good, will result in moisture at the surface of the part being refinished Humidity is a main factor.
If your painting bare aluminum there are other things to consider and you'll need a different type primer.
Good luck with your refinishing!:)

Also many paint processes are oven cured for hardening or use a part A and part B for hardening.

Sent from Moto's Motorola
 
Last edited:
Everything was in accordance to the manufacturers indications, which I must have read and reread over 15 times. There was plenty of sanding (the support being glass like and not allowing adhesion is completely out of question), the surface was clean, the temperature was at most 2 degrees C over the suggested one, the primer was from the same brand as the paint, the exact product recommended in the paint's instructions. Also, the primer had aluminum listed as compatible.

Oven curing is only required where there are certain chemicals like some resins which will just never fully cure unless they are exposed to a certain temperature. As far as I know, body shops only do it to save time, with some even claiming that "natural drying" gives a deeper shine or something. What I've used is a off the shelf paint spray, intended for home use and nowhere did it say that it'll only oven cure.

I'm not "most people" and really did a lot of effort (over 30h) making sure the prep work was done as it should. Either I got a bad batch of paint, or it wasn't really compatible with aluminum as labeled, or it was affected by winter storage (though it never went below the suggested limit of 5C), but I must admit this really is frustrating. I've had spray paint applied over dusty filler and it stuck. I've even had spray paint dripping over dirty polished concrete and still sticking much better than it did on this engine.

All that work and it'll very likely still turn out as **** :( . Might have just as well sprayed over the old chipped and dirty paint, without wasting all that time. I knew right from the start that spray paint isn't the most resistant, and that this will take in more time than it's worth but damn, I've really wasted all that time for nothing. Converting only the paint related (wasted) hours to billable hours... I'd have at least three FZ6 engines right now. But in the end, it really is what it is...

More bad news- after some research it turns out there is no local body shop with full engines in their portfolio - at most there's the occasional top or intake cover on car engines, mostly done electrostatically, which really isn't an option as it'd fill the insides of the engine with hardened paint powder. So this only leaves out the first 3 options from my previous message. I'll take a decision tomorrow but I'll likely just give up and use it as is, at most with another layer of paint or clear coat.
 
**** it!

I'm repainting it!

Did a sample scrubbing with the 120 grit sand paper and I'm estimating it should take "only" 6-9 hours.

I think I'm done with this spray can BS, will start researching actual paint and electric paint guns (no room for a compressor).
 
I'd want to (it'd be easier), but if I did that that it'd be very hard to maneuver the engine around (heavy and hard to grip), and should there be another restrip necessary (at this point I'd expect ANYTHING) there's the risk of getting fine dust through the intake or exhaust. More so, I wouldn't want to seal the gaskets in paint.

ps: does anyone know what's the maximum temperature for the outside of this engine block?
 
ps: does anyone know what's the maximum temperature for the outside of this engine block?

87F outside right now and came back from a ride. After sitting about 5 minutes, I remembered and got some #'s for you.

Stator cover 158F
clutch cover 148F
CCT 162F
Head(RS), 168F
 
Last edited:
Thanks! Used an IR thermometer?

Converting t0 Celsius, the hottest one is 75C, probably it shouldn't get past 100C/210F, that's within the range for most "regular" paints.

This paint thing is deeper than it seems. After a few hours of research I've gotten nowhere. Even big brands like Standox have very little info posted online; it's either the industry keeping the "trade secrets" hidden, or they want to get their courses sold. I've sent multiple emails to local shops and manufacturers asking for heat specs and recommendations; the ones which have replied said "you should use heat resistant paint, and we only got that on spray can". Pretty much "we don't know ****". I've even asked one shop and their reply was "yeah... well... we've never done an engine block but I know a few guys who've used chimney paint on engines and it stuck".

Anyone reading this got any tips on painting? At least what type of primer, base coat and top coat to use (1K? 2K? Acrylic? Enamel? Solvent based? Water based?). Only thing that stops me from just ordering whatever car paint is the fact that on some (repainted) card I've seen discoloration on the hood in the engine area- can't tell if that was from the paint not taking the heat or just from poor application...
 
I used my lazer temp gun.

I've painted many car engines (mostly small block Chevy's) with a simply degrease, de-rust, wash.

Using off the shelf, ENGINE spray paint, I've applied it (no primer, light coats to start, etc) which lasted for years in my younger days.

I've also sanded and painted several FZ stator covers (O MPH tip overs, just some scrapes) and re-painted (NO primer, no clear coat) black without issue using Rustoleum Black. I sold two of them (sand and re-paint disclosed) on this site. The paint match was darn near dead on...NO ISSUES..
 
Car engines aren't quite the same; different materials (usually cast iron) and more porous, much less exposed, less visible.

After more learning via more research, and emails sent to different places, I finally got somewhere.
I managed to find some Italian "industrial heat resistant paint" (up to 250C) which hopefully will be in stock in my city. Sadly it turns out that the electric painters are not an option, so I will be ordering a AZ3 HT2 AIR GUNSA paint gun with a 1.3 nozzle. Got to this after looking at the popular devilbiss flg-g5, however the gunsa one needs less air/min, and some claim that it's narrower spray pattern should be more suitable for smaller parts. This means I'll still need a compressor. So first option is I rent (still searching), or buy a cheaper one and either sell it after use, or magically find a storage space for it.
 
The progress has been slow, but... I'm still pulling this forward.

What I've done:
-got the paint gun, compressor, accessories (hose, filters, regulator)
-ordered some quick release fittings (forgot about them until receiving the above)
-fully (re)stripped all covers
-(re)stripped the block about 60%
 

Attachments

  • photo_2018-07-15_15-07-38.jpg
    photo_2018-07-15_15-07-38.jpg
    54.2 KB · Views: 35
After about 15h of cleaning the previously applied (and never curing) spray paint I finally got the engine repainted, this time using proper equipment.

Bad news: turned out much, much worse than anticipated (a combination of orange peel and dry paint defects); no good in making excuses now but one could say that it was a combination of factors including having a bad day, having some missing parts (connectors to the air filter and regulator), and really wanting to get it done after about 45 hours of work logged (cleaning, striping, degreasing, spray can painting, restriping, redegreasing) and also having to finish this before the heatwave hit (announced to begin on Monday). Perhaps I should have waited till next week and used some extra thinner to compensate for the heat, but now it's done regardless.

Good news: The color is great (graphite gray) and most of the defects are on the side covers, which will be easy to just unscrew and repaint once everything is back on the bike and running. Also, so far it seems stronger than the spray can paint, so hopefully it will at least cure to a durable layer.
 

Attachments

  • photo_2018-08-03_19-27-24.jpg
    photo_2018-08-03_19-27-24.jpg
    126.2 KB · Views: 33
From here it looks good and few stair at out parts that close...

I'm not sure if this was a factor but humidity in the air is compressed and in the air so you need good water traps, filters, and an at the source in line desiccant dryer at the gun. Depending on the type of compressor, an oil separator is critical too.

Abstract factors are using unknown hoses that have been tainted with oil and water. All these things can derail your best effort at perfection.

I'm not saying you rented hoses but for example in a NONE paint automotive repair shop its common to use automatic oiler to lube your air tools. Hoses from this type of use should never be used to paint with.

And I'm guessing you know this but they make different reducers for different temperatures. Tho it gets expensive on these one off small projects.

Last little bit, other than the cylinder head near the exhaust port the temps likely never exceed 130°C (266°F)...

Good luck...
 
Back
Top