bigborer
Site Supporter
Looks good..
Did you get the pistons in the block?
Not yet- for now it's on hold as the no1 priority is fitting steel lines and cleaning the front brake pistons on the Honda, as I'll be doing a 9 day road trip, which it's self turns out to come with some little complications thanks to the butcher "mechanic" who replaced the seals for the previous owner and messed up some of the screws with some "ghetto ingenuity"- don't have the right hex key, or you used the wrong size and ****ed the screw cap? No worries- just hammer in a torx screwdriver and you're set! And why bother using rubber grease when a dab of brake fluid will make those pistons slide right in?
From here it looks good and few stair at out parts that close...
I'm not sure if this was a factor but humidity in the air is compressed and in the air so you need good water traps, filters, and an at the source in line desiccant dryer at the gun. Depending on the type of compressor, an oil separator is critical too.
Abstract factors are using unknown hoses that have been tainted with oil and water. All these things can derail your best effort at perfection.
I'm not saying you rented hoses but for example in a NONE paint automotive repair shop its common to use automatic oiler to lube your air tools. Hoses from this type of use should never be used to paint with.
And I'm guessing you know this but they make different reducers for different temperatures. Tho it gets expensive on these one off small projects.
Last little bit, other than the cylinder head near the exhaust port the temps likely never exceed 130°C (266°F)...
Good luck...
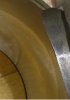
If you look at the highlights you can see how grainy the surface is... it's not only about looks, grainy means that the paint particles are randomly stacked like rocks, when they should all form one compact layer. This means decreased resistance- there's a reason they vibrate concrete when pouring. I did the "fingernail test" and on the spots where the paint is smooth or almost smooth the fingernail leaves no marks, while on the spots where it's really grainy and not smooth there is definitely a mark left by the fingernail. According to the spec sheet, it still has a few days left before fully curing, so hopefully it will get at least "kind of durable".
I had 2 filters- one larger one (which also had a regulator) to be fit at the compressor outlet and one small one that went before the paint gun- due to some mismatch in my head (thought the large filter had quick release connectors) I ended up using only the small filter. It however turned out 100% clean in the end, and the air compressor only drained about half a teaspoon of water.
You did make wonder about it; it was about 28C and 60%RH, and used about 150l/0.15 m3 of air (estimated by knowing that the compressor refilled at about 50%, and remembering how often it started). So there were about 17g of water for each kilo of air; the air density was about 1.6kg/m3, so overall my paint job involved about 4g of water. Considering about 2g were drained, I could assume that 2g of water ended up mixed with the paint. That's about 0.5% of the whole paint+thinner mixture, so probably not a factor.
The hose was brand new; and let's be honest, this wasn't a "best effort". I'd say: 40% of fault was me- being in a poor mood and rushing the job- could have set the smallest pattern size and/or went slower with the gun, etc, 30% of fault was not using a regulator (only relying on the compressor knob) and having a too dry pattern, 15% not using a paper filter (forgot to order one, and didn't want to waste time searching for a coffee filter) and not mixing the paint+thinner in a separate cup - when cleaning the paint gun I noticed that the paint wasn't 100% homogeneous, 15% painting outdoor (and also a bit cloudy- should have used a flashlight to properly see all the grainy spots).