• Welcome to the Yamaha FZ6 Forums. Member registration disables ads and allows you to post and share. Register Here.

Catastrophic engine damage/noise?


Well, they don't make oversize rod bearings. The rod, with the hammering is likely oval/damaged.

Remember, all that nasty metal sludge has been circulated thru out the engine. Might want to
pull some other caps (mains as well) and check for damage.

A machine shop MAY be able to clean up (polish) the crank, but that has to come out.
With that said, they've been some YT video's polishing up damaged journals.
Muratic acid, used carefully, can remove aluminum/(and I think) bearing transfer to the crank.

If you want to try that polishing (crank in engine), I guess you have nothing to lose.
Using that connecting rod is a BIG IF.... I gather the inside of that rod is scruffed up a bit...

Again, you can try some shade tree fixes, cheap enough (clean/polish crank), replace a rod bearing.

If they can save the crank (machine shop), full tear down, replace the rod and ascertain no other serious
damage wouldn't be terribly expensive but very time consuming...

.
 
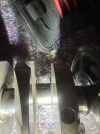
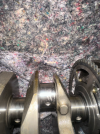
The crank is showing signs of spalling - a failure of the metal. If that is the case the crank failed due to an inherent defect, and that destroyed the bearing. The engine will require a complete tear down and a replacement crank. In other words, you need a replacement engine.
 
[/URL][/URL][/URL]

Well, they don't make oversize rod bearings. The rod, with the hammering is likely oval/damaged.

Remember, all that nasty metal sludge has been circulated thru out the engine. Might want to
pull some other caps (mains as well) and check for damage.

A machine shop MAY be able to clean up (polish) the crank, but that has to come out.
With that said, they've been some YT video's polishing up damaged journals.
Muratic acid, used carefully, can remove aluminum/(and I think) bearing transfer to the crank.

If you want to try that polishing (crank in engine), I guess you have nothing to lose.
Using that connecting rod is a BIG IF.... I gather the inside of that rod is scruffed up a bit...

Again, you can try some shade tree fixes, cheap enough (clean/polish crank), replace a rod bearing.

If they can save the crank (machine shop), full tear down, replace the rod and ascertain no other serious
damage wouldn't be terribly expensive but very time consuming...

.
To do it right will require the complete engine to be torn down and completely flushed of all those metal particles,imo. I myself would consider taking a close look at the oil filter in another FZ6 engine/transmission assembly,and taking compression tests of each cylinder,to swap into your bike. :)
 
Thanks for all your input guys. I’m quite tempted to strip down the engine and see if the damage goes beyond that particular rod/ rod bearing/ cylinder. It’s winter anyways and the bike is otherwise in very good condition.

I have no experience doing an engine rebuild, so if I were to take my time through the winter months to do it, would it be worth doing/ would I be capable of doing it? I’ve got a selection of tools, a few different torque wrenches, a micrometer, would get a vernier. Not sure what further I’d need.

It’s that or buy a used engine with double the mileage on it, and no real idea of how it’s been treated or the history of it, other than it looking good and having been compression tested before being sold to me.
 
Engine rebuilds are not complicated. The key(s) to success are to have the correct tools, follow the FSM, and be extremely organized by cleaning everything, bagging and tagging as you go and laying it out in a logical order.

You will also need to identify a trustworthy shop that will be able to assess the damage on the crank and properly turn/resurface it. Like I said above, it may be unrepairable.
 
Ahh ok, that’s good to hear. I’m used to following service manuals and instructions, using tools and to some degree measuring things - wind turbines are just big engines, in some respects at least.

I think the crank is probably beyond repair and may as well replace it with a good used one.

Is there any downside to just doing that rather than trying to get the current one machined?
 
To add to the above advice, If I'm doing any complicated maintenance, I always make sure I take a video of what I'm working on, saying "Ok, I'm working on [whatever] I'm going to take out these bolts here and remove that part..." so, when it comes to putting it all back together, I can watch the videos back in reverse order to make sure I don't miss anything or forget what goes where!
 
Hi all. I hope you've all had a good Christmas and all the best for 2026.

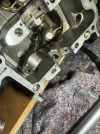
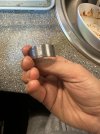
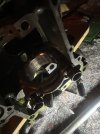
Now I've had a bit more time, I've removed the engine and started dismantling and now have the crank shaft out. I wanted to see if I could replace just the crank shaft without disturbing the top end, but it looks like I need to replace a piston rod on the bearing which failed. I checked a few of the other rod bearings and to me it looks like normal wear, although I'm not 100% so would like some second opinions?

From the crankcase I can somewhat view the cylinder wall and it seems the spun bearing hasn't caused any damage there, so hopefully I won't need to recondition the cylinder or replace the piston, although as I need to replace the rod, I'll have to open the top end up which is my next step.

Whilst I'm at this level, is there anything else I should be checking whilst I'm in there, or replacing? Currently my plan is to replace the crank shaft (I have one from another engine arriving soon), replace all rod bearings and main bearings, replace the piston rod which I feel has been damaged at the big end, and of course any gaskets, o-rings etc which I may have disturbed. All that and of course, giving all the engine internals a good clean and blow out with compressed air

Is this a good plan of action, and if I'm meticulous, could I hope to have a bike/ engine which will run for many many 10s of thousands of kms as long as I keep on top of the maintenance (which of course I would considering the lengths I'm going to)?

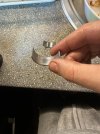
Also, I noticed on the bearings which are good there seems to be markings on those bearings, which match up with markings on the piston rods big end. I am guessing that is normal, but does that mean it'll be ok just to clean it up and replace the bearings without replacing the other piston rods?

Please share any other tips or thoughts you may have. Or if there is anything I may be missing.tempImageqwIfhM.pngtempImagem2c28z.pngtempImageC8epwA.png
 
Excellent progress. A few points:

1. You should be able to extract the piston assembly from the crankcase without removing the head. As you know, the repair will go much easier/faster with the less disassembly.
2. Any bearings that show groves or copper must be replaced.
3. Here is the hard one...the markings on the bearings (A, B, C, D, E) are the factory markings for installing bearings, I believe that A is the tightest clearance and E is the loosest. You can not simply go by these markings for bearing replacement, you have to measure the existing gap with a plastigage. The amount of "squeeze" on the plastigage (how wide the line becomes) will determine the correct bearings to choose. This is especially important given that you are using a replacement crank with unknown wear. Too tight of a gap will result in accelerated wear, and too loose of a gap will cause movement...and accelerated wear. If the goul is to have an engine that will last a long time, take the time to do it right and not skip this step.
 
Hi Gary, thanks for the quick response. I did have an idea about the plastigage measurement but didn't realise I'd have to do it to work out bearing size selection. Do you know of anywhere I can read on this further as I want to make sure I get it right.

Not disassembling the cylinder head would certainly be good. Is it possible to get the piston out from the bottom of the crankcase? From what I read, its only possible to get it out from the top so getting it out from the bottom is news to me.

Just had another look at it, and it doesn't look to me that I can pull the piston out from the bottom...
 
I wouldn't re-use those bearings, they all show signs of crap run thru em (scoring/lines, etc)..

Flushing ALL the sparkles out is a must.

The new crank, if any markings, you may want to get polished.

As it looks like the head is coming off, you can use the plastigage with the
new crank and rod bearings(installed on the rod(s) (and mains) to make sure your within spec.
Also, with the head off, you can verify no damage to the valves kissing the piston.

Might want to measure piston ring end gap (at least on that one)
and if worn, hone and replace ALL rings.. If cross hatch is good, end gap good,
I'd just clean em real good..

You got pretty much the really hard stuff done (the labor), I'd at least check the rest
for damage and not leave something questionable..

Tks for the updates, your doing great!!

.
 
Hey, thanks for the response.

I've just spent the best part of an hour and a half trying to get the connecting rod pin out after removing the two circlips holding it into the piston, but sadly no joy.

So I guess when I have time soon I'll have to remove cylinder head completely, and get the piston out that way. From the bottom the cylinder looks good so I'm hoping the rings will be good and it won't require honing. I don't have the tools for it, and have no idea what I'd be charged locally for someone to do it if it was needed.

Thanks for the tips and support. Definitely having a few moments where I feel like I'm in way over my head, but I'll just slow right down and try my best/ keep coming back to this forum in a panic asking for tips haha...
 
I have removed pistons from the crank area before, but not on a Yamaha. The bore is consistent from top to bottom so I don’t see a reason the piston assembly won’t slide out. Pull on the conrod and see what is keeping the piston from falling out. If it’s just the rings…go ahead and compress the rings. Get a photo if you have questions.

You may not need to hone the cylinders. If you see cross hatching on the cylinder walls there is no need to hone if you are using the same piston and rings. Be sure to clock the rings 120 degrees apart on reassembly.

The piston circlips should not be reused (they are single use). You will notice a notch on the side of the piston where the circlips go. Rotate the circlip so 1/4-inch (5-6mm) is exposed and grab it with needle nose plyers. Twist it towards the center. Only one needs to be removed, the other can stay right where it is.
 
Hi Gary. I think due to the construction of the bottom of the crank, (where you might be able to remove pistons on other machines), it's not possible to slide the piston through the the bottom which is a shame.

Also, I don't quite understand why I can't go by the system in the Haynes/FSM when deciding on bearing sizes? That leaves me in a bit of difficulty with knowing how to choose the bearings. I thought you use the plastigauge after you essentially 'dry fit' the new bearings to make sure the oil clearance is within spec?
 
Also, I don't quite understand why I can't go by the system in the Haynes/FSM when deciding on bearing sizes? That leaves me in a bit of difficulty with knowing how to choose the bearings. I thought you use the plastigauge after you essentially 'dry fit' the new bearings to make sure the oil clearance is within spec?

I don't know what the Haynes manual states so I would go by what the Yamaha manual shows.
It's pretty detailed in the set up and especially with a new crank, all old sizing (big rod end and mains)
doesn't matter.

What may work is installing the bearings you have, with the new crank, and plastigage the clearances.
**With the results from that, you can now replace with new bearings and make adjustments (more or less clearances).

I think I PMed you previously about the Yamaha shop manual..

.
 
Opps, replied to a post at the bottom of the first page, without noticing the following posts... oil pump is still a suspect in my mind:

Earlier response:

Won't last long with just a bearing swap. You might be able to find undersized bearings and a machine shop that could grind the crank down to match. That would be an acceptable solution.

I would really want to know why it failed before I spent money, theough.

Is the oil pump toast? I would replace it as part of a complete rebuild. How do the cylinders look? If there is scoring or aluminum transfer, (especially check the one with the spun rod bearing), then plan on doing the top end while you are at it. (Pistons, rings, maybe a slight overbore to clean up the walls.) They might be fine, but oiling failures can take them out as well.

Likely the bike sitting did not cause the problem. I just recovered one that sat outside under a tarp for 6 years. No internal issues at all.

Assuming there was no water/antifreeze in the oil, it almost has to be an oiling failure of some kind.

Just my 2cents for what it is worth. Good luck with whichever direction you go!
 
Last edited:
Rebuilding or replacing the oil pump is certainly a good “belt & suspenders” approach. As I noted in an early post, I see some spalling on the crank which would indicate a manufacturing defect. But I agree, if going this deep into a repair, know for sure the condition of the oil pump.
 
Thanks again for the responses. I'm awaiting a new (used) crankshaft to turn up, and a new (used) piston rod which held the failed rod bearing, and will be ordering all other rod bearings and main bearings once I know the sizings. I just had a quick visual check of the oil pump and it seems fine, but I'll strip it down if necessary and have a good look at the internals.

I'll be removing the head this week and will have a good clean up of all engine internals - If anyone has any tips for this I'm all ears.

Without measuring anything, after removing the valve cover all looks very good. I've removed the intake cam shaft and it looks almost new. I purchased a small ultrasonic cleaner for smaller parts. I think that whoever owned the bike barely changed the oil, and maybe never changed the coolant as it was dark green once I drained it. Is there anything else I could be checking to make sure whatever caused this the issue doesn't remain?

What I can see of the cylinders from the bottom of the crank case, the pistons are moving freely with a nice amount of suction (excuse my incorrect terminology), and I don't see any scoring or odd marks on any of the cylinder walls.

Ideally, I'd avoid removing the other three pistons as I don't want to create extra work if it means I'd have to hone the cylinders. As I'll have to remove the piston of cylinder 1(the failed rod bearing cylinder) if all looks fine, will it be a problem to use the same piston rings? I know TownsendsFJR1300 mentioned that I could re-use them if they measured fine and looked fine, I just want to make sure I don't mess anything up upon reassembly.

One thing I did notice inside the crankcase are a few minor imperfections which are from the factory. Is this normal? Almost like tiny bits of molten aluminium imperfections which weren't buffed out at the factory.

I'll keep updating this post as I go through each step, as I highly value your thoughts and tips. Thanks again.
 
Back
Top