Aftermarket exhaust with Givi side bags?

mdfb42

Junior Member
Joined
Jul 28, 2011
Messages
194
Reaction score
1
Points
0
Location
618 (IL)
Visit site
I was wanting to start looking to replace my stock exhaust with either Leo Vince, two brothers, or scorpion exhaust. The only issue is I have givi V35 side bags that came with the bike and was hesitant on aftermarket exhaust kits fitting with the side bags. Anyone that has experience with this issue please let me know what works (and doesn't work) so I don't drop some cash on something that won't work. Thanks.

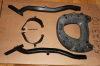
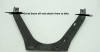
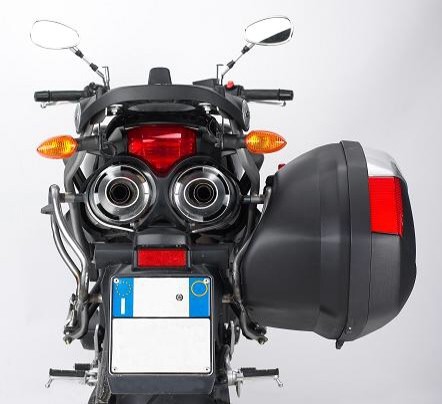
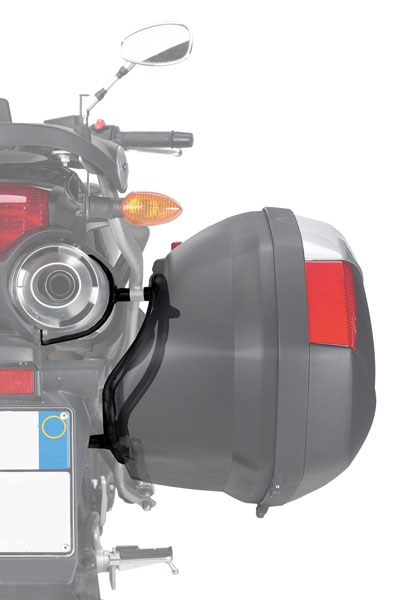
Added pics for reference
eqa5uve7.jpg
emynu7eg.jpg
 

Erci

Howie Mandel's evil twin
Moderator
Elite Member
Joined
Apr 28, 2009
Messages
7,229
Reaction score
126
Points
63
Location
Pittsford, VT
Visit site
All of the above will work with Givi V35 setup (Leo, Scorp, TB), BUT.. all will require just a little bit of minor tweaking... like extra spacers here and there, etc.

I used to run Leo Carbons with Givi rack. Just had to make my own spacer stack instead of the included, wide, 1-piece spacers.

Whichever pipe you go with, do a search here.. it should be covered for each one (I remember reading threads for each one).
 

drumbum

Junior Member
Joined
Feb 21, 2013
Messages
29
Reaction score
0
Points
0
Location
us
Visit site
a bit old, BUT here is something that will help. The picture is far more valuable than the text. This is what I did for my setup. total cost <$3

Went to the local home depot bought
- 1/4"x12" threaded... something.. Its basically just a long thread, not bolt/head on it. They have it in the same place you buy screws
- 1/4" nuts (at least 6, maybe 8)
- 1/4" washers (4 of these)
optional
- locktite

jufvvn.jpg


0. Optional- cut the 1/4"x12" threaded rod down. make sure theres at least enough to go the width of the bars. You can also do this AFTER you have everything else set up (or be like me and leave em full length)
1. Basically you thread two PAIRS of nuts onto the 1/4" threaded shaft with one washer per pair. These washers should be closest to the end of the shaft. The 2 nuts will be tightened against eachother in a "locking" configuration. This will prevent loosening
2. put it through the hole in the givi rack, both left and right sides
3. add a washer on the threaded shaft to go against the rack
4. add one nut to the outside of the washers.
You can also throw some locktite on the nuts, but be sure to get spacing right first!

You may need to play with the nuts on the in between the rack arms to get spacing just right. I set mine so the givi rack was as close to the cans as possible without touching them.

I've had mine this way for 35ooo+ miles, never needed any retightening (even without locktite, but it never hurts to have it), the bags feel completely solid (even when I over load em 0.0 ) great and cheap fix.
 

regder

Junior Member
Joined
May 3, 2008
Messages
515
Reaction score
5
Points
18
Location
Toronnto
Visit site
Holy crap, and here I thought I was the only one that did that ^

My setup was similar, except I used a bolt just the right size and some nuts. I probably had mine going for over 45k miles before selling the bike, never an issue.
 

Andar

Junior Member
Joined
Jan 22, 2014
Messages
46
Reaction score
0
Points
6
Location
Ontario - GTA
Visit site
a bit old, BUT here is something that will help. The picture is far more valuable than the text. This is what I did for my setup. total cost <$3

Went to the local home depot bought
- 1/4"x12" threaded... something.. Its basically just a long thread, not bolt/head on it. They have it in the same place you buy screws
- 1/4" nuts (at least 6, maybe 8)
- 1/4" washers (4 of these)
optional
- locktite

jufvvn.jpg


0. Optional- cut the 1/4"x12" threaded rod down. make sure theres at least enough to go the width of the bars. You can also do this AFTER you have everything else set up (or be like me and leave em full length)
1. Basically you thread two PAIRS of nuts onto the 1/4" threaded shaft with one washer per pair. These washers should be closest to the end of the shaft. The 2 nuts will be tightened against eachother in a "locking" configuration. This will prevent loosening
2. put it through the hole in the givi rack, both left and right sides
3. add a washer on the threaded shaft to go against the rack
4. add one nut to the outside of the washers.
You can also throw some locktite on the nuts, but be sure to get spacing right first!

You may need to play with the nuts on the in between the rack arms to get spacing just right. I set mine so the givi rack was as close to the cans as possible without touching them.

I've had mine this way for 35ooo+ miles, never needed any retightening (even without locktite, but it never hurts to have it), the bags feel completely solid (even when I over load em 0.0 ) great and cheap fix.


I know this thread is a few years old but I just did this with my Two Brothers exhaust and it worked.
All you need to do in addition to the above is grind down the mounting brackets so they don't hit the cans.
It's a pain in the ass to get the right amount but it's doable without reducing integrity.

You also may have to straighten out/bend the bracket so it fits better.

You also need to cut off the ends of the center inner fairing cover trim (I think that's the name of it) and keep the two ends.

Hopefully these pictures work.

jdzVE
 

Attachments

  • Givi grinding.png
    Givi grinding.png
    1.1 MB · Views: 46
  • givi grinding 2.png
    givi grinding 2.png
    171.6 KB · Views: 42
Top