• Welcome to the Yamaha FZ6 Forums. Member registration disables ads and allows you to post and share. Register Here.

Clutch cable maintenance?

grcamna7

Premium Member
Joined
Aug 24, 2025
Messages
250
Reaction score
98
Points
28
Location
Davis,Ca.
Visit site
I'm still running the original clutch cable for my 08' FZ6,but it's starting to drag a bit after 18 yrs.
I will be replacing it with my new OEM Yamaha cable.
Has anyone lubed their cable yet? The inner cable is coated with a protective sleeve and I don't want to damage it by using the incorrect type of lubricant,which might cause the inner sleeve to slip off the inner wire. Any recommendations ?
 
I remember @TownsendsFJR1300 once had a picture of a compromised clutch cable That looked like it had a nylon interior sleeve which would be pretty much inert to chemical reaction so you should be good in that sense. As always try to stay away from the standard WD40 water displacement lube. Their other products are great for specific applications.
The replacement cable has 2 parts with an adjustment barrel, midpoint in the assembly.
 
I remember @TownsendsFJR1300 once had a picture of a compromised clutch cable That looked like it had a nylon interior sleeve which would be pretty much inert to chemical reaction so you should be good in that sense. As always try to stay away from the standard WD40 water displacement lube. Their other products are great for specific applications.
The replacement cable has 2 parts with an adjustment barrel, midpoint in the assembly.
I was considering suspending the cable vertical,then dripping many drops of 30wt motor oil down into it over a 24hr period.
 
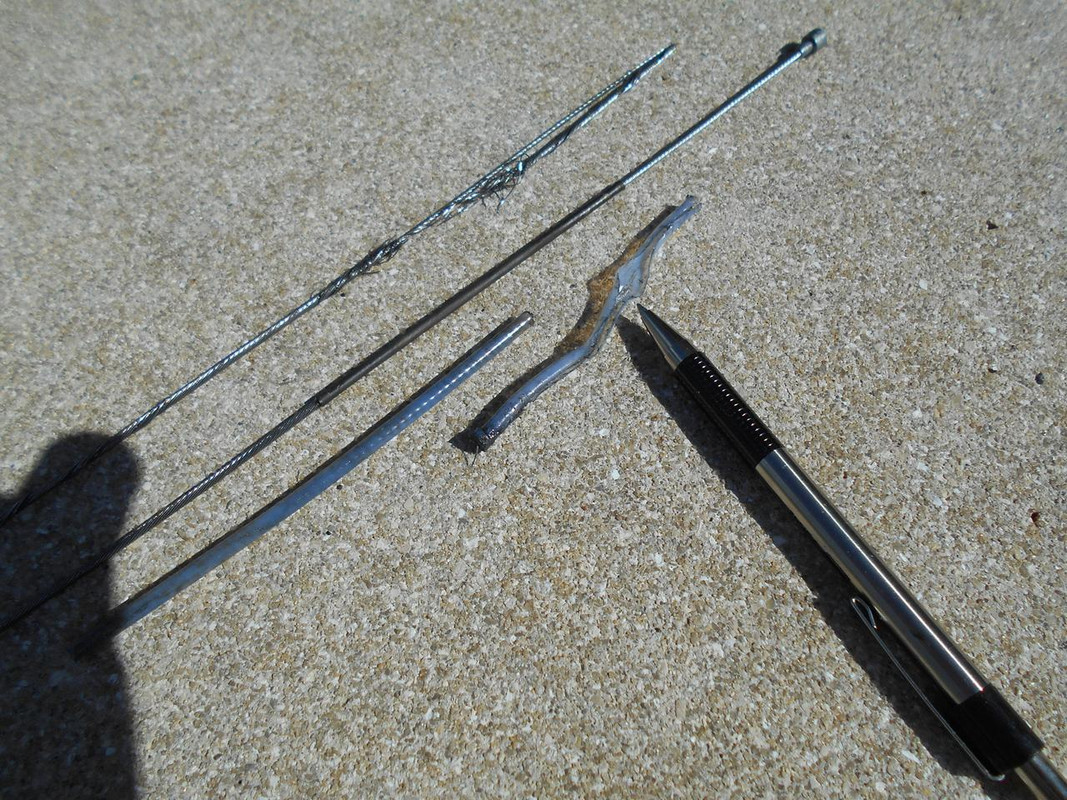
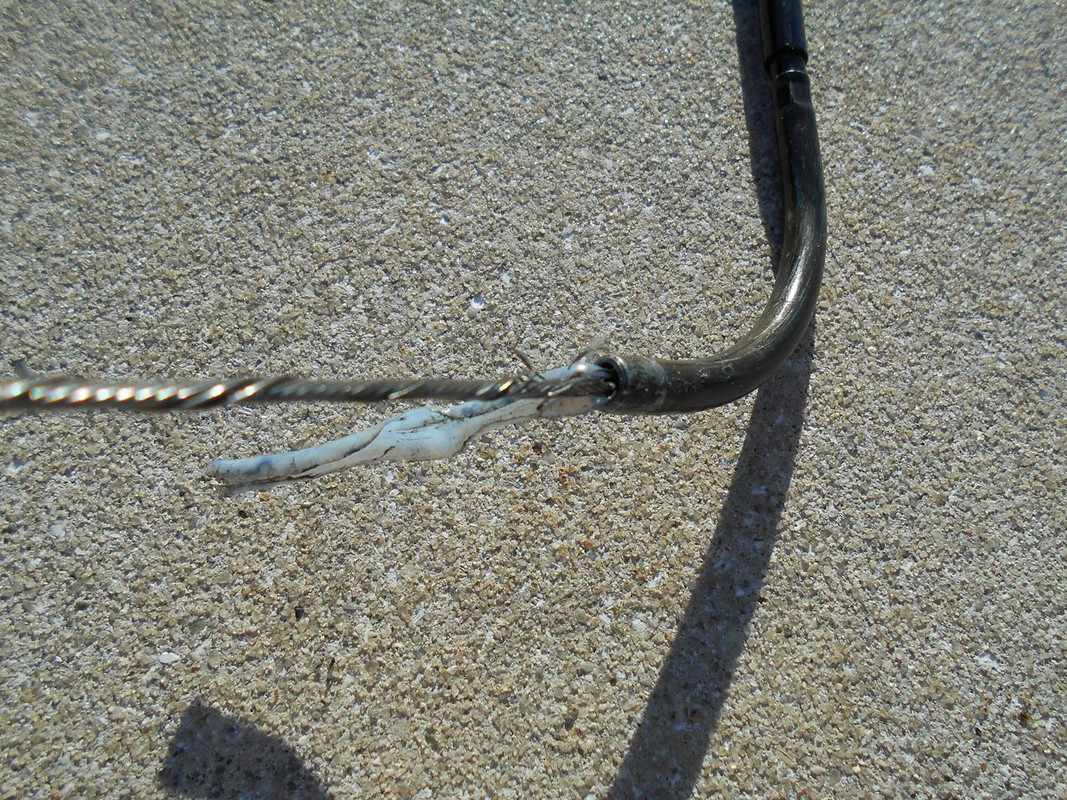
I suspect your due for a change. Below pic's are of my original failing:


If not fully stretched out, disconnect the cable on each end. Then, by hand, move it back and forth.
You'll very likely feel "un-even" pull (frayed cable not sliding).

I just changed my cable out again as I thought I felt something..
I use 30 wt engine oil squirted down the top of the cable with a syringe type needle and squeeze bottle.


Be advised, the air filter box has to to come out(down to the TBs, the battery
removed and the battery box loosened / pushed out of the way.

With the mid cable adjuster, adjust THAT part (other ends hooked up) before closing it up.
It WILL need adjustment out.

Last to note, the tool that clamps around the end of the cable and forces fluid thru(pressurized can)
doesn't work well at all as the adjuster (and just general design) leaks and doesn't allow fluid
to flow fully..

Every second or third chain lube, I lube the clutch cable-Over kill, maybe , but the cable is much easier to pull..


.
 
I suspect your due for a change. Below pic's are of my original failing:


If not fully stretched out, disconnect the cable on each end. Then, by hand, move it back and forth.
You'll very likely feel "un-even" pull (frayed cable not sliding).

I just changed my cable out again as I thought I felt something..
I use 30 wt engine oil squirted down the top of the cable with a syringe type needle and squeeze bottle.


Be advised, the air filter box has to to come out(down to the TBs, the battery
removed and the battery box loosened / pushed out of the way.

With the mid cable adjuster, adjust THAT part (other ends hooked up) before closing it up.
It WILL need adjustment out.

Last to note, the tool that clamps around the end of the cable and forces fluid thru(pressurized can)
doesn't work well at all as the adjuster (and just general design) leaks and doesn't allow fluid
to flow fully..

Every second or third chain lube, I lube the clutch cable-Over kill, maybe , but the cable is much easier to pull..
Scott,these pictures and description are Very Helpful;from what I can see,the top section seems to fall-apart the most,rather than the bottom(from the inline adjuster,downward)section degrading,from what I can see.. Do you notice the cable end on the bottom has a type of clear coating on the inner wires/cable? I was thinking that coating may help the lower section to endure for a longer time. :)
 
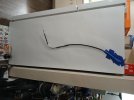
The picture above is my new cable hanging from the top of my refrigerator.
I use the oil can and lightly feed oil down the cable,as I work the cable in & out.
Why do my photos always upload sideways? 😕
 
When you come to put the new cable in, use tape or a cable tie to attach the lever end of the new cable to the clutch actuator arm end of the old one, because it will make it much easier to thread it through the gap between the frame and the engine on the left side!

Also, whilst you're doing it, it's a good time to do the MT-07 clutch actuator arm modification (if you've not already done it) because that makes the pull so much lighter and gives a longer friction zone too: https://www.beginnerbiker.com/2019/09/fz6-mini-mod-fixing-heavy-clutch/
 
When you come to put the new cable in, use tape or a cable tie to attach the lever end of the new cable to the clutch actuator arm end of the old one, because it will make it much easier to thread it through the gap between the frame and the engine on the left side!

Also, whilst you're doing it, it's a good time to do the MT-07 clutch actuator arm modification (if you've not already done it) because that makes the pull so much lighter and gives a longer friction zone too: https://www.beginnerbiker.com/2019/09/fz6-mini-mod-fixing-heavy-clutch/
Thanks Graham,I hadn't considered the MT-07 modification. :)
 
Scott,these pictures and description are Very Helpful;from what I can see,the top section seems to fall-apart the most,rather than the bottom(from the inline adjuster,downward)section degrading,from what I can see.. Yes, seems the top section is where it frayed.
Do you notice the cable end on the bottom has a type of clear coating on the inner wires/cable? I was thinking that coating may help the lower section to endure for a longer time. :)
Yes, there IS a coated section on the inner cable.

I felt something (both ends disconnected) , a very, very slight bind and decided to change the cable(I already had one).
Once replaced, I cut this one open to check for fraying. NOTHING... It was just that coating I felt.

To re-iterate Grcamna7, tape a piece of stranded wire to the upper end of the cable when installing.
Tape the cable to the OLD CABLE before pulling out TOWARDS THE AIR BOX area.

*Re-tape that wire end to the new cable to help pull thru and to remember exactly where it goes.

This helps a bunch when sneaking the new one thru the upper left side of the frame. If stock, they'll
be a zip tie from the factory that needs to be cut off(just above the throttle plate, upper left).
I did replace the zip tie, it keeps the clutch cable above the throttle plate.

As for the longer clutch arm, I have one and tried it. I didn't like it. It extended the engagement zone
but WAS EASIER to pull... With the new cable, it'll be SIGNIFICANTLY better and easier to pull by itself...

Keep it lubed up as well...

I'd hold off, at least for now the longer arm. That's easily do-able later.

Happy wrenching!

.
 
Last edited:
Yes, there IS a coated section on the inner cable.

I felt something (both ends disconnected) , a very, very slight bind and decided to change the cable(I already had one).
Once replaced, I cut this one open to check for fraying. NOTHING... It was just that coating I felt.

To re-iterate Grcamna7, tape a piece of stranded wire to the upper end of the cable when installing.
Tape the cable to the OLD CABLE before pulling out TOWARDS THE AIR BOX area.

*Re-tape that wire end to the new cable to help pull thru and to remember exactly where it goes.

This helps a bunch when sneaking the new one thru the upper right side of the frame. If stock, they'll
be a zip tie from the factory that needs to be cut off(just above the throttle plate, (upper left).
I did replace the zip tie, it keeps the clutch cable above the throttle plate.

As for the longer clutch arm, I have one and tried it. I didn't like it. It extended the engagement zone
but WAS EASIER to pull...
With the new cable, it'll be SIGNIFICANTLY better and easier to pull by itself...

Keep it lubed up as well...

I'd hold off, at least for now the longer arm. That's easily do-able later.

Happy wrenching!

.
Scott,how about I attach the top elbow section of the new cable using stranded wire at the bottom of the old cable on the engine,then pull the old cable upward,while pulling the new cable up to meet the clutch lever/handlebar ?
 
Attach tape/wire to UPPER part of the old cable.

**Make sure that zip tie is removed as it'll hold the cable.

Pull the old cable out TOWARDS the fuel tank.- Remove the tape / wire from the old clutch cable
Pull both ends of the old cable out from the middle of the left side of where the air filter sits..

With that out of the way, tape your wire to the top(clutch lever end) of the new cable.
Pull/push/sneak that thru the upper left of the frame. It'll be tight, make sure the battery box is at least partially
out of the way.

Your halfways there now.

Now you have to finagle the lower end back in the area above the starter, to the mount.
The curve, down there as well, WILL MAKE IT MORE DIFFICULT. Just try not to kink the new cable.
Go slow, and go the clearest route direct to the lower clutch cable mount..

Again, hook up both ends of the cable AND adjust the mid-section adjuster.
I leave about 3 turns OUT at the handlebar adjuster-So I can remove the cable later for lubrication.

There's a small plastic/rubber thingy attached to the frame, mid area with a hole in it.
I kept the clutch cable on the top side of that and replaced the zip tie.
That'll now be out of the way of everything and a nice smooth transition/path...


.
 
Attach tape/wire to UPPER part of the old cable.

**Make sure that zip tie is removed as it'll hold the cable.

Pull the old cable out TOWARDS the fuel tank.- Remove the tape / wire from the old clutch cable
Pull both ends of the old cable out from the middle of the left side of where the air filter sits..

With that out of the way, tape your wire to the top(clutch lever end) of the new cable.
Pull/push/sneak that thru the upper left of the frame. It'll be tight, make sure the battery box is at least partially
out of the way.

Your halfways there now.

Now you have to finagle the lower end back in the area above the starter, to the mount.
The curve, down there as well, WILL MAKE IT MORE DIFFICULT. Just try not to kink the new cable.
Go slow, and go the clearest route direct to the lower clutch cable mount..

Again, hook up both ends of the cable AND adjust the mid-section adjuster.
I leave about 3 turns OUT at the handlebar adjuster-So I can remove the cable later for lubrication.

There's a small plastic/rubber thingy attached to the frame, mid area with a hole in it.
I kept the clutch cable on the top side of that and replaced the zip tie.
That'll now be out of the way of everything and a nice smooth transition/path...


.
👍👍👍👍👍
 
Did you get it installed?

A bit easier to pull??

.
The weather outside(I have no garage)has been raining,and I've been fully investing my time into my only car's repair,the old 87 Volvo 244's brakes,when I get sunlight.
I've owned my 240 for 26 years,and it has had what seems to be original-looking? front calipers;I replaced them recently,but they went defective within 800 miles,so I had to enlist one of the neighbors every time to sit in the car :oops: and keep pumping the brakes:hours & days spent 😣
The car has had 6 original brake hoses for 508,000 miles;this,plus defective brake parts,turned into a big,dumb project which gave me fits for months. Many bottles of brake fluid have been pushed through the system.
I just received new rubber brake hoses and new,spare copper hard lines,which will be more bleeding.

I have been driving it 🥳 w/ no issues !(soaked the fittings with Liquid Wrench,in preparation,but have my torch as a back-up,just in case)for the past few days, :) so I will wait to do the rest of the job. 😐
I can finally drive the car,rather than work on it,for now !!! ☺️

Much of the USA has had snow,but my area rain,on and off all Winter.

I plan on working on the FZ6 soon. 🥳 and hoping for good weather.
My tools are all layed-out for the job,including the long wire.
I hope to be able to do the clutch cable without removing the airbox? 🤔

I know I should have replaced these Volvo brake parts years ago,but the originals were working.

I have a bit more brake work to do.
 

Attachments

  • 20260220_073251.jpg
    20260220_073251.jpg
    715.6 KB · Views: 8
Last edited:
I hope to be able to do the clutch cable without removing the airbox? 🤔
If it is indeed the original (factory) clutch cable, you will curse the gods should you try to replace it without removing the airbox. The cable is zip-tied to the frame, and there is absolutely no way to get it out without cutting that zip tie. And of course, the area in which that zip tie is located is only accessible by removing the airbox. It's not a ton of effort to remove the airbox, and it'll make the job much easier in the end. Also FYI, you don't need to replace the zip tie.
 
If it is indeed the original (factory) clutch cable, you will curse the gods should you try to replace it without removing the airbox. The cable is zip-tied to the frame, and there is absolutely no way to get it out without cutting that zip tie. And of course, the area in which that zip tie is located is only accessible by removing the airbox. It's not a ton of effort to remove the airbox, and it'll make the job much easier in the end. Also FYI, you don't need to replace the zip tie.
Thanks Veloce ☺️

Yes,it's the original clutch cable,as I bought it from the original owner's son,and he gave me a bit of history on it.
 
Last edited:
It's not a ton of effort to remove the airbox,

@grcamna7 -​


If you've not removed/ replaced the airbox before, make sure you've got a set of *long* allen key wrenches, because the bolts that hold it to the throttle bodies are buried deep underneath it. Loosen them off, but DO NOT remove them!

Also apply some Red Rubber Grease to the rubbers at the bottom of the airbox when you come to put it back on, because that will help it go on so much more easily.
 
I've changed the clutch cable both ways.

Yes one is more work, but actually easier removing the air box, etc...

I use just a very, very light coat of di-electric grease on the edge of the TB and air box boot,
Won't degrade the rubber boots what so ever..

.
 
Last edited:
Back
Top