Question on throttle body sync

Carlos840

Junior Member
Joined
Jul 8, 2013
Messages
734
Reaction score
8
Points
18
Location
Belgium
Visit site
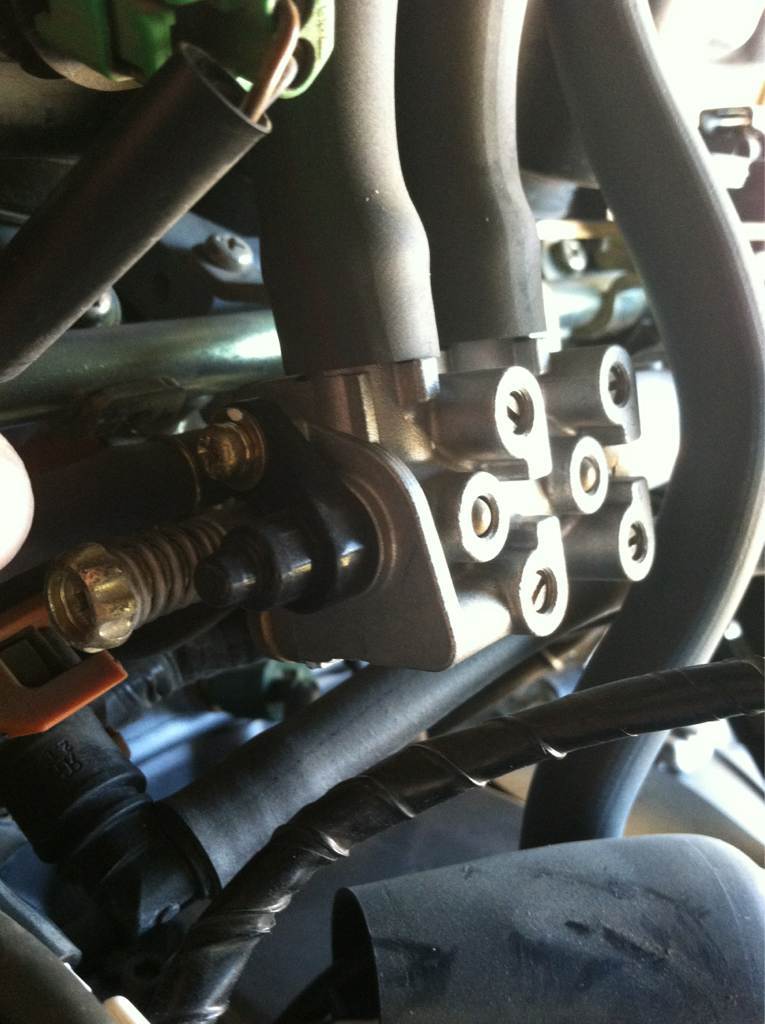
I thought the screw with the spring is the idle adjuster?

Different screws...

The one scott is talking about is under the adjustement block under the tank. It is a "don't touch" screw (unless you knwo what you are doing)

The idle screw is on the left side in between the tank and the frame and can be adjusted without lifting the tank.
 
Last edited:

redoliander

Junior Member
Joined
Apr 24, 2008
Messages
72
Reaction score
0
Points
0
Location
arizona
Visit site
atusanab.jpg


I've adjusted the screws here for the TB's and the screw with the spring for the idle. Is that correct?
 

TownsendsFJR1300

2007 FZ6
Site Supporter
Joined
Feb 7, 2009
Messages
12,531
Reaction score
1,176
Points
113
Location
Cape Coral, Florida, USA
Visit site
atusanab.jpg


I've adjusted the screws here for the TB's and the screw with the spring for the idle. Is that correct?

You are absolutly correct!!

That screw with the spring is the idle adjustment screw(part #38), no problem with adjusting that.

The other screw I refered to is LITERALLY INBETWEEN the TWO, SEPARATE throttle bodies(below picture).

Its not shown is the parts fisch but you can see the two TB's below (two openings for each TB, the adjuster screw (not shown) sync's the two, main butterfly, throttle shafts. You can barely see the spring on the side of the the #3 throttle body (to keep the adjustment taught between both shafts). You can also two castings, front and back, sticking out, holding everything together:


Last edited:

TownsendsFJR1300

2007 FZ6
Site Supporter
Joined
Feb 7, 2009
Messages
12,531
Reaction score
1,176
Points
113
Location
Cape Coral, Florida, USA
Visit site
Hi guys, this is a really interesting read.
Just a quick question....is it worth me buying a carbtuner and checking my bikes setup?

IMHO, thats what I invested in and feel its well worth the $. No fluids to spill, no calibrating the unit, extremly accurate and I can tell EXACTLY how far or (or not) I am.

You can make your own (I've made my own tools before) but, again IMHO, I want the best tool I can get for such a critical tuning tool...

I've synced several bikes (both FZ's and other bikes- two members here) and usually charge $25 with the owner watching how far off before and after... Comes in very handy after syncing a multiple carbed bike I just cleaned the carbs on for the best performance I can squeeze out of the engine.. It has LITERALLY paid for itself back in customers bikes..


The shop charges (at least down here- well over $125.00 a pop)..
 
Last edited:

Carlos840

Junior Member
Joined
Jul 8, 2013
Messages
734
Reaction score
8
Points
18
Location
Belgium
Visit site
Keep in mind you should not be touching no 1 (top left blue screw) either...

You adjust 2, 3 and 4 to 1, but leave 1 alone!

(although there are situations where you might need to touch No1 if the other ones run out of adjustment)
 
Last edited:

TownsendsFJR1300

2007 FZ6
Site Supporter
Joined
Feb 7, 2009
Messages
12,531
Reaction score
1,176
Points
113
Location
Cape Coral, Florida, USA
Visit site
Keep in mind you should not be touching no 1 (top left blue screw) either...

You adjust 2, 3 and 4 to 1, but leave 1 alone!

(although they are situations where you might need to touch No1 if the other ones run out of adjustment)

Plus 1 ^^^..


The only time you would open #1 up, is if you run out of adjustment in #2, 3 and 4 screws.

Its rare but does happen. If you don't have enough adjustment with the others)...

**3/4 to 1 TURN OUT (total) usually is good as a baseline should your #1 screw get misadjusted...
 
Last edited:

iviyth0s

Member
Elite Member
Joined
Aug 22, 2013
Messages
841
Reaction score
2
Points
0
Location
South/Central NJ
Visit site
Keep in mind you should not be touching no 1 (top left blue screw) either...

You adjust 2, 3 and 4 to 1, but leave 1 alone!

(although they are situations where you might need to touch No1 if the other ones run out of adjustment)

Plus 1 ^^^..

The only time you would open #1 up, is if you run out of adjustment in #2, 3 and 4 screws.
Shall I edit the picture?? It'd be hard to specify that, unless I just add another color and explanation.
 

Carlos840

Junior Member
Joined
Jul 8, 2013
Messages
734
Reaction score
8
Points
18
Location
Belgium
Visit site
Shall I edit the picture?? It'd be hard to specify that, unless I just add another color and explanation.

I would...

You don't want some dude to screw it up and then go " But, iviyth0s's picture said i could fiddle with number 1!"

I would just put it in red like the two others...

Odds are if someone happens to run out of adjustment he will google the problem and find the previous threads on how to do it properly...
 

TownsendsFJR1300

2007 FZ6
Site Supporter
Joined
Feb 7, 2009
Messages
12,531
Reaction score
1,176
Points
113
Location
Cape Coral, Florida, USA
Visit site
Naw, I'd leave it.

I just snapped some pic's and here's a shortcut piece of paper for myself when syning the FZ. (I'll put it on a stool next to me and makes it a little quicker doing the deed). A little crude but you get the idea. It also show's the pink lined vacuum lines which go to each cylinder and a clockwise turn (noted at the top), increases vacuum pulling the cylider (or fluid upwards). (should someone want to type up something a bit neater feel free).

The Morgan Carbtune comes with the black adapters shown below. I wasn't real happy with the limited, threaded connectors and sprung for the brass connectors.

Once the pic's open, click again and it'll enlarge.
 
Last edited:

TownsendsFJR1300

2007 FZ6
Site Supporter
Joined
Feb 7, 2009
Messages
12,531
Reaction score
1,176
Points
113
Location
Cape Coral, Florida, USA
Visit site
Shall I edit the picture?? It'd be hard to specify that, unless I just add another color and explanation.

If you could note on the pic the screw #'s, #1 the base (do not adjust except**) kinda of what I did (but without my chicken scratch).

Actually all this is in the manual (except for the base screw adjustment setting), but the shortcut, at least for me, keeps my laptop out of the way..(PDF manual). :thumbup:
 

TownsendsFJR1300

2007 FZ6
Site Supporter
Joined
Feb 7, 2009
Messages
12,531
Reaction score
1,176
Points
113
Location
Cape Coral, Florida, USA
Visit site
I would...

You don't want some dude to screw it up and then go " But, iviyth0s's picture said i could fiddle with number 1!"

I would just put it in red like the two others...

Odds are if someone happens to run out of adjustment he will google the problem and find the previous threads on how to do it properly...

I've posted the 3/4 to 1 turn out for a base adjustment, #1 screw, in several threads on the forum (should it need adjusting).

I currently have mine set at 3/4 out (I did screw with it without counting first :( years ago. ). I eventually got everything synced within 3mm's at idle and 4k RPM's.
 

Carlos840

Junior Member
Joined
Jul 8, 2013
Messages
734
Reaction score
8
Points
18
Location
Belgium
Visit site
If you could note on the pic the screw #'s, #1 the base (do not adjust except**) kinda of what I did (but without my chicken scratch).

Actually all this is in the manual (except for the base screw adjustment setting), but the shortcut, at least for me, keeps my laptop out of the way..(PDF manual). :thumbup:

If people read the manual and used the search function we would know about it...
 

redoliander

Junior Member
Joined
Apr 24, 2008
Messages
72
Reaction score
0
Points
0
Location
arizona
Visit site
Well I went ahead and bought a motion pro syncpro tool. I calibrated the tool then got it lined out at idle then again at 4000 rpm. Only took about 20 min. I just wish I had bought the tool in the first place. Next I'm going to use it on my FZR600 and my FZR1000. Thanks for all your help!


Sent from my iPhone using Tapatalk
 

TownsendsFJR1300

2007 FZ6
Site Supporter
Joined
Feb 7, 2009
Messages
12,531
Reaction score
1,176
Points
113
Location
Cape Coral, Florida, USA
Visit site
Well I went ahead and bought a motion pro syncpro tool. I calibrated the tool then got it lined out at idle then again at 4000 rpm. Only took about 20 min. I just wish I had bought the tool in the first place. Next I'm going to use it on my FZR600 and my FZR1000. Thanks for all your help!


Sent from my iPhone using Tapatalk

Were they out far?

If so, did it help with any vibs if you any excessive vibs)?
 

redoliander

Junior Member
Joined
Apr 24, 2008
Messages
72
Reaction score
0
Points
0
Location
arizona
Visit site
They really weren't that far off. On my homemade one it was horrible at 4000rpm but on the syncpro #2 needed a slight adjustment. I meant to take pics but of course I didn't.


Sent from my iPhone using Tapatalk
 

Nelly

International Liaison
Elite Member
Joined
Jul 8, 2007
Messages
8,945
Reaction score
125
Points
63
Location
Co Offaly, ROI
Visit site
They really weren't that far off. On my homemade one it was horrible at 4000rpm but on the syncpro #2 needed a slight adjustment. I meant to take pics but of course I didn't.


Sent from my iPhone using Tapatalk
With the homemade manometer if the connections are not 100% sealed you will get really bizarre level readings., On my mark one the seal wasn't good enough. My mark two model was much better and my TB are ~ 3-4mm of each other. I messed with my #1 screw to see what it was set at and like Scott it was 3/4 of a turn out.

Nelly
 

TownsendsFJR1300

2007 FZ6
Site Supporter
Joined
Feb 7, 2009
Messages
12,531
Reaction score
1,176
Points
113
Location
Cape Coral, Florida, USA
Visit site
With the homemade manometer if the connections are not 100% sealed you will get really bizarre level readings., On my mark one the seal wasn't good enough. My mark two model was much better and my TB are ~ 3-4mm of each other. I messed with my #1 screw to see what it was set at and like Scott it was 3/4 of a turn out.

Nelly

Neil, it was out 3/4 from the factory??? I ended up with that setting on my own after screwing with it (and NOT checking it before hand, duh). Glad to hear that!!!

And I agree, IMHO, for something so critical, I'd rather invest in a tool I KNOW will give me accurate results...
 

Nelly

International Liaison
Elite Member
Joined
Jul 8, 2007
Messages
8,945
Reaction score
125
Points
63
Location
Co Offaly, ROI
Visit site
Neil, it was out 3/4 from the factory??? I ended up with that setting on my own after screwing with it (and NOT checking it before hand, duh). Glad to hear that!!!

And I agree, IMHO, for something so critical, I'd rather invest in a tool I KNOW will give me accurate results...
I don't know if that's from factory Scott, I am the third owner of my bike. It's possible that it has been messed about with before? I haven't had any running issues other than once you synch the throttle bodies you do notice when they need to be done again.
I think that with the home made manometers a heavier oil is also key because the vacuum created is pretty strong, a heavier oil doesn't bounce around as much. It's also wise to get the vacuum valves to protect the engine from sucking in the contents of the line (which nearly happened to me on mk 1).
incidentally because of weathering I am not able to identify the pink line on #1 & #4. can I identify which line goes to each cylinder based on their length.
I answered my own question Re: Build your own Manometer for Throttle Body Sync!
I did mine today, Thanks very much for the "How to".
It was much better than the Haynes manual.
Just a couple of things to add.
1. I am using 10w 40 oil. I tried a lighter oil but found that the heavier oil was much more stable in the tubes.
2. Don't disconnect the manometer with the engine running. I nearly ended up with throttle bodies full of oil.
3. My vacuum tubes did not have the purple markings on ( probably worn of with age). #1 and #4 tubes are longer than # 2 & # 3 on my bike.


Nelly
 
Last edited:
Top