Khurley424
Junior Member
Hello! After quite a bit of searching I noticed that we don't have a single definitive thread to illustrate how to change the tensioner/install a manual cam chain tensioner. I'd like to help make a guide to help others get through this, but the problem is I'm not 100% sure what I'm doing myself, and understand how critical this tensioner is to the engine's well being.
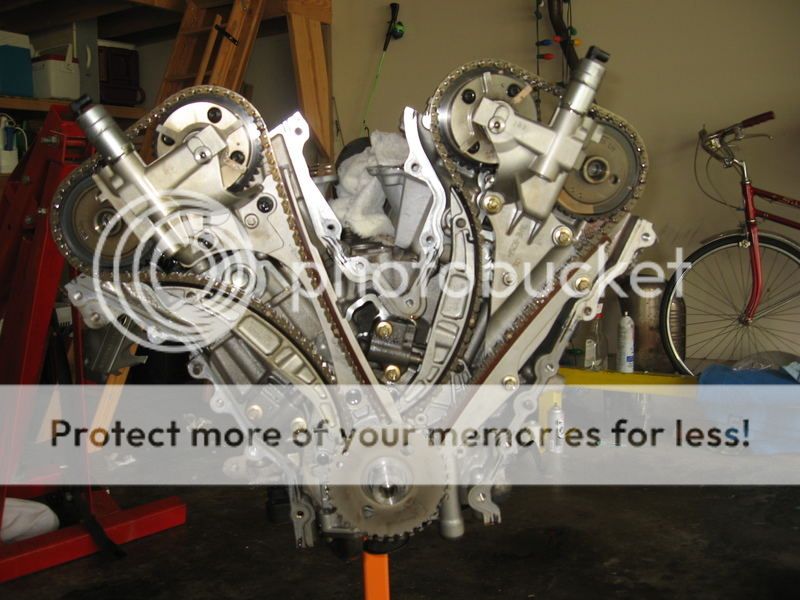
The first thing I want to ask about is making sure the engine is at top dead center as so that there is not any tension on the cam chain via the valve springs. Earlier today I removed the side cover to have a look, and I attached what that looks like in a picture. I see the T mark on the gold disc, but am confused as to what exactly that needs to be lined up with to find top dead center?
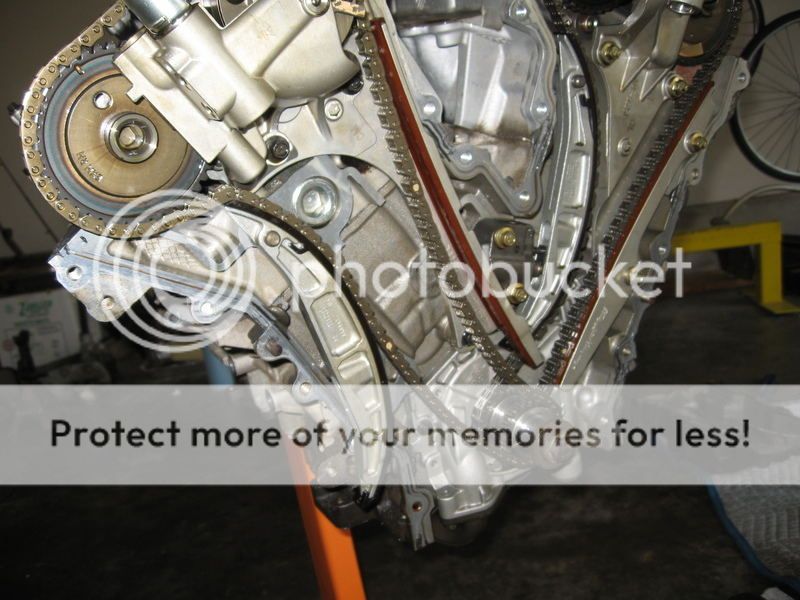
Secondly, do you need some kind of specialty Allen wrench to remove the timing chain tensioner? To my knowledge to take it out it is just the 2 5mm Allen bolts on either side of it, but the inside one is a bit burried. Ill attach another shot of that.
Finally, setting the proper tension. From what I read, one is supposed to have it backed all the way out as it is installed. Then you tighten the tensioner until you feel it make contact with the chain. Then you slowly roll the crank forward as you tighten the cct until you feel resistance, at which point you back the cct out 1/4 turn. Is this correct?
Thanks for the help guys!
The first thing I want to ask about is making sure the engine is at top dead center as so that there is not any tension on the cam chain via the valve springs. Earlier today I removed the side cover to have a look, and I attached what that looks like in a picture. I see the T mark on the gold disc, but am confused as to what exactly that needs to be lined up with to find top dead center?
Secondly, do you need some kind of specialty Allen wrench to remove the timing chain tensioner? To my knowledge to take it out it is just the 2 5mm Allen bolts on either side of it, but the inside one is a bit burried. Ill attach another shot of that.
Finally, setting the proper tension. From what I read, one is supposed to have it backed all the way out as it is installed. Then you tighten the tensioner until you feel it make contact with the chain. Then you slowly roll the crank forward as you tighten the cct until you feel resistance, at which point you back the cct out 1/4 turn. Is this correct?
Thanks for the help guys!