
• Welcome to the Yamaha FZ6 Forums. Member registration disables ads and allows you to post and share. Register Here.

Gas

gtosteve65

Member
Joined
Nov 4, 2015
Messages
93
Reaction score
0
Points
6
Location
Greenville, SC
Visit site
Hey everyone,
This is a question that I feel like I know the answer to but maybe someone has a better answer. I need to drain the gas out of my tank. Where is the easiest point to disconnect? As of now I'm looking at the bottom of the tank thinking that is it.
 
Hey everyone,
This is a question that I feel like I know the answer to but maybe someone has a better answer. I need to drain the gas out of my tank. Where is the easiest point to disconnect? As of now I'm looking at the bottom of the tank thinking that is it.

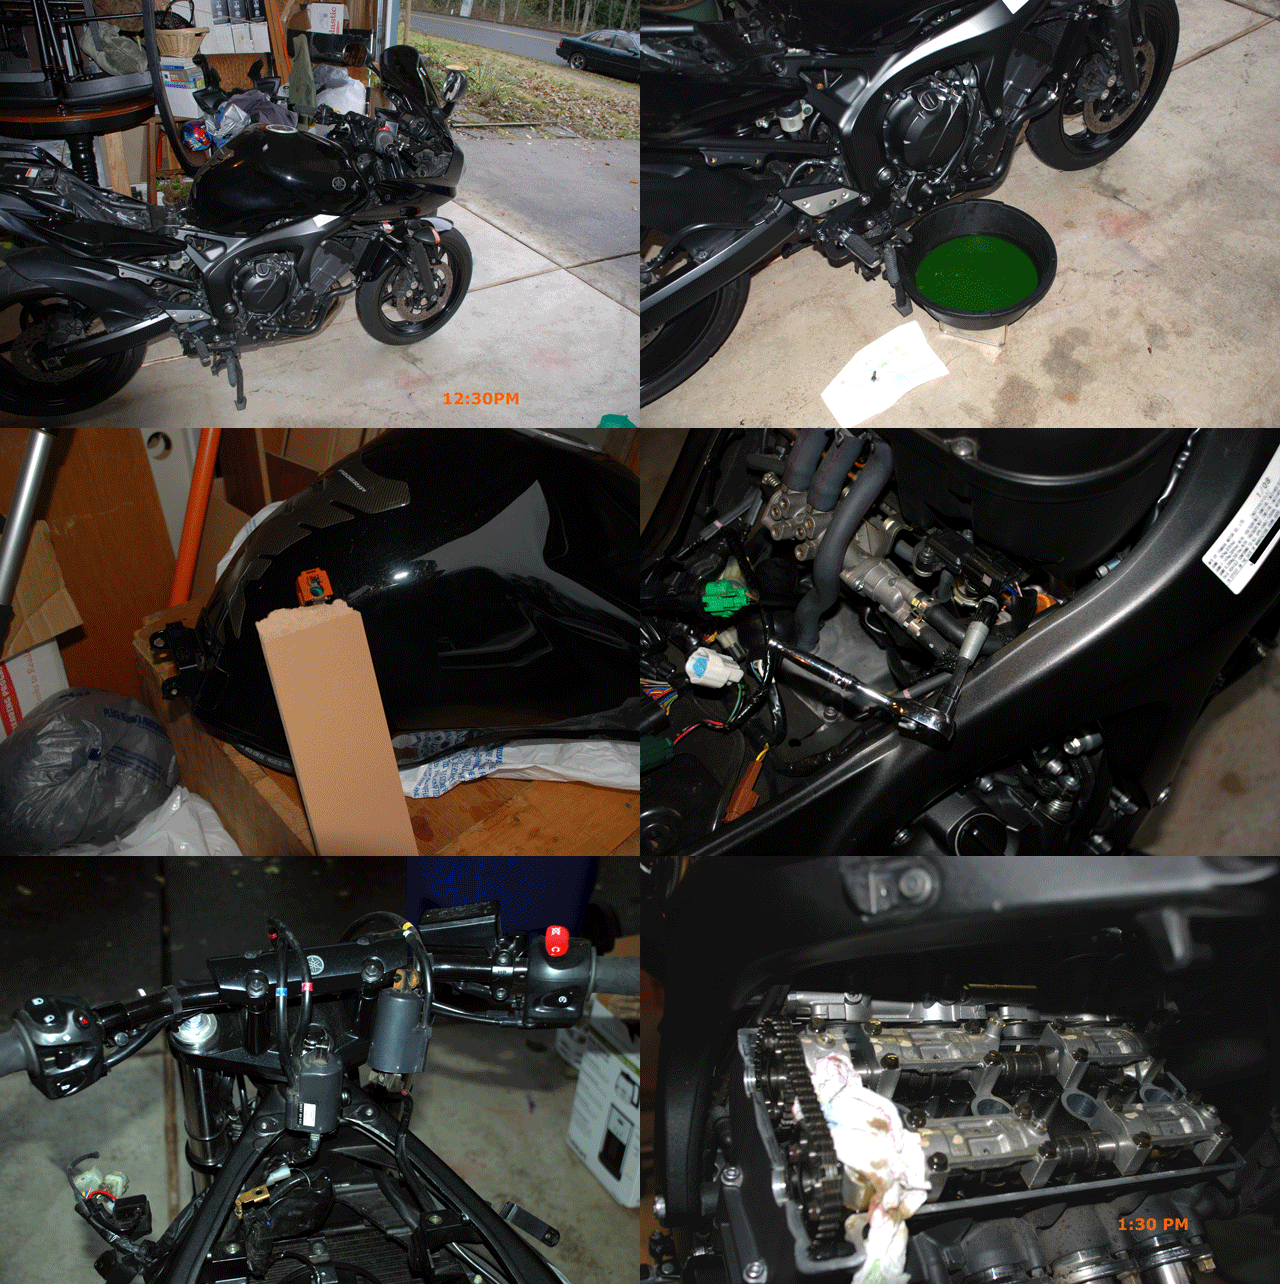
Fuel rail is my choice as it adds check valve to reduce fuel spill.
TearDown2ValveCheck_zpsdahpu6w4.gif


Pull the orange lock up, push the grey button and gentle pull.
 
You should have a fuel line disconnect, an overflow hose, a vent hose, an electrical plug for the fuel gauge and an electrical plug for the fuel pump. Most importantly follow safety guidelines when working with fuel. Keep area well ventilated and consider giving the bike an earth ground to eliminate any static buildup there may be.

These connections are at the underside of the tank. :)
 
You should have a fuel line disconnect, an overflow hose, a vent hose, an electrical plug for the fuel gauge and an electrical plug for the fuel pump. .

These connections are at the underside of the tank. :)

+1 ^^^^. There's no need to remove the air box, etc.

The disconnect is right at the pump itself.

BTW, should you remove the pump, the 0-ring seal is recommended to be replaced.


Everything is right there
 
The 0-ring is just a preventative maintenance thing?

Mainly need to do this because the bike is going to spend a day on its side. I'm probably about to draw a ton of hate from saying this, but its going to lay on its side for transportation as the ceiling height of the vehicle its going in isn't tall enough. I will be taking all the plastics off (especially the fairing), and laying it comfortably on top of a piece of heavily padded and blanketed plywood. It will have the frame sliders to keep it off the ground. Then covering it some more with blankets and then strapping it down. Its going to be making a 6 hour journey like that, so I wanted to get at least half gas out of the tank. I will ride a lot before to try and burn it off in the most fun way I know how, but just in case there is some remaining.

For all of you who just suffered a heart attack from reading that, just know I'm taking as much caution as possible.
 
The 0-ring replacement is recommended. I have re-used it before BUT if you don't pull the pump, its a moot point. (a member here had one leak far from home, I over-nighted him an old one to get home).

Should you pull the tank, I'd just flip it upside down, into a large funnel, into a large container.

**IMO, just get a siphon hose, with a very flexible hose and just suck the fuel out***. As long as the tank is mostly empty, you should be ok (especially if its leaning on a slider). And leave the tank on...

I'd probably screw a couple of small 3/4" pieces of plywood together to lean the slider on, thus the bike isn't over fully...

With pulling the fairing, you shouldn't have an issue.

Bikes get laid down all the time, yours simply won't get damaged!!
 
They make packets of self contained expanding foam. Deforming the bag, breaks and mixes the ingredients. As they mix they expand. It might work well if you time it properly and/or add some space between the sliders and van or what ever...

Once hard, remove the spacers and the load will be more evenly displaced over the chassis.
A shipping place may have them otherwise order a box online.
 
I was just looking into the expanding foam this morning! It seems like it may work well, my thought is 5 or more blankets + frame sliders and taking off all the painted parts on that side of the bike should be enough. And avoiding large bumps in the road.
I'll probably replace the O-ring since it sounds like a better safe than sorry type of thing.
 
Just tilt up the tank on the pivot and siphon w 3/8" vinyl hose... Done in 5"....

Undo the wires to lift that high...
The tear down in the image file was for valve adjustment...

Drain the coolant reservoir too.
 
Just tilt up the tank on the pivot and siphon w 3/8" vinyl hose... Done in 5"....
Undo the wires to lift that high...
.

+1^^, drain and leave the tank on, It won't hit the way you have it set up.


The PO of mine laid it all the way down, at 40 MPH, NO sliders and this is all the damage the tank got. I'm sure you'll be fine..
 
Be advised it's a cast frame and its design dictates equal load bearing forces are applied.

Meaning; if a single point like a frame slider is acting as a pivot and you tie it down on each end of the pivot you have loaded it in a manor that makes it vulnerable to stress fractures. So a harsh shock while stressed could damage it.

Support ALL AREAS EQUALLY and only apply ties to maintain position OR place the tie directly over the slider so the downward pull is not acting like teeter tattor trying to pull down the ends fighting over the pivot point (slider).

Make sense? A steel frame could handle this, this is more delicate.
 
The idea is to have it resting on more than just the frame slider. Ill find some areas to stick other things into. I was only planning on "strapping" it down to hold it in place. Tank will be staying on the bike, I don't want to deal with taking it off and all that fun stuff.
 
Back
Top