• Welcome to the Yamaha FZ6 Forums. Member registration disables ads and allows you to post and share. Register Here.

Any tips on using Mityvac for Brake bleeding?

Years ago I rigged up a home made brake bleeder mainly for motorcycles.
I bought a cheap fuel pump from an auto parts store. Added clear see through plastic hose that force fit on the bleeder valves, three feet intake and three feet discharge sides. Discharged to a plastic bottle.
I put electrical connections on the fuel pump so I can hook to my batter Tender wires connected to my battery on the bike.
I have used this set up on three different motorcycles and it works great.
I just hook everything up, add fluid as the fuel pump sucks out the old fluid.
It is easy, and I have never had a problem with air bubbles and such.
As a matter of fact, I used it yesterday.
New high temp fluid front and rear.
So easy its almost fun. :BLAA:
 
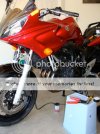
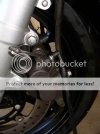
Well I just finished using my vacuum bleeder to change my brake fluid. I did not use a Mity-Vac but the cheaper version from Harbor Freight. It was pretty easy but I did have a hard time getting a good seal on the bleeder. The kit comes with some rubber fittings, but the smallest still leaked air a bit. I tried connecting the hose (both clear and rubber) directly, but the small fitting was best.
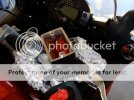
Photos below, but basically I put foil under the reservoir, in case I spilled, but found it was overkill. So I sucked out some old fluid with a turkey baster, then filled the reservoir with new Repsol Dot 4. [By the way the Repsol fluid was darker than the stock fluid as you can see in the photos.]
Then with everything connected, I pumped the vacuum handle, made a vacuum, then open the bleeder valve. Since there was some air leaking into where the bleeder and rubber fitting came together, I had to occasionally pump the handle to maintain a vacuum. I figured as long as I maintained vacuum, air should not enter the brake lines.
I just watched the fluid collect in the container and occasionally I would close the bleeder and stand up to refill the reservoir (always making sure it never became empty and allow air to enter).
Then I switched over over the other front brake and repeated the sequence. I closed everything, made sure the reservoir was full and put the cover back on. I checked the lever and it had a nice firm feel.
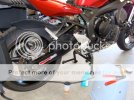
The rear was the same drill with reaching the rear reservoir a little more difficult. I did not have a chance to ride the bike yet, but it feels very solid.

frontbj.jpg

foilres.jpg

closeupbleed.jpg

rearbj.jpg
 
Do you mean to loosen the banjo bolts that go into the master cylinder?
Is that really a good idea?
Aren't they sealed by the crush washers?
Doesn't that technically mean that you would need new crush washers before re-tightening?

In theory, the crush washers are single use. In reality, if you don't shift them around, and didn't have them overtorqued to begin with, they'll reseal with no problem.

As evidence of this, I've bled the banjo bolts on any number of bikes and never had a problem.

Fred
 
god it looks so easy too.. but what about speed bleaders?? are they worth putting in if your going to take the time to upgrade to stainless lines anyways??

thanks for the picks man.. good idea with the tin foil... :thumbup:
 
Back
Top