• Welcome to the Yamaha FZ6 Forums. Member registration disables ads and allows you to post and share. Register Here.

Marc’s FZ6

Gary in NJ

Junior Member
Site Supporter
Joined
May 6, 2014
Messages
2,518
Reaction score
2,809
Points
113
Location
Amongst the Twisty Roads
Visit site
A few months back member EastcoastRN (Marc) noted that he had a project bike that he had not ridden in some time and being a new Dad he really didn’t have time to get the bike in sellable condition. Today I took a ride to Marc’s house with an empty trailer, and returned home with a full one.

First off it must be said that Marc is a super cool motorcyclist who like all of us older motorcyclists had to push aside a passion for the greater good of his family. I got to meet Marc’s wife and their adorable baby. I can remember those years and I know how much it probably hurt to let go of a motorcycle, but garage space is golden, and so is money.

So what’s in the trailer you ask.

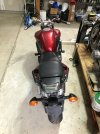
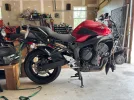
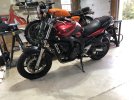
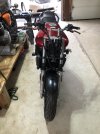
First off we have a 2006 FZ6 that I would rate in good condition. While it has spent the last few years in Marc’s garage, it has a history of being an outside bike. That’s why Marc was seeking help/advice on his corroded fuel tank and non-op fuel pump a few years back. Being an outside bike it has that general dirtiness to it. It shows some signs of being a learner bike with some scuffs and scratches, but nothing broken or bent. It’s largely original with the exception of adjustable levers and frame sliders and the sliders are clean. I don’t believe that this bike has ever been picked up from the pavement.
IMG_3273.jpegIMG_3272.jpegIMG_3274.jpeg

The only thing it really needs to be an operational motorcycle is tires (excellent tread wear but the front tire doesn't hold air) and the front end reassembled - honestly a solid Saturday (maybe 4 beer) endeavor. But anyone that knows me…knows I’m not about simply putting things back together.

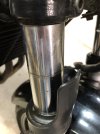
When I got the bike home I put some air in the tires and rode the bike in my driveway to make sure it shifts through all of the gears…well 5 of em at least…I can only go so fast on my driveway. The bike runs fantastic. I like the quietness of the OEM exhaust. First thing I remembered is how much I hate the OEM suspension. The fork seals are shot, so while I’m in there replacing the seals the forks will get the full GVE treatment.
IMG_3276.jpeg

With the forks upgraded I’ll have to address the shock. Member Cocoloco has inspired me to rebuild the OEM shock rather than spend Ohlins money.

Marc included an in-tack OEM fairing as well as an aftermarket naked kit. As much as I’d like to return the bike to stock there are two things that will keep me from doing that; 1 - I despise the airflow from the OEM fairing, and 2 - Marc wanted this bike to be a naked bike, so naked it is. Watch the For Sale section for a complete fairing kit.

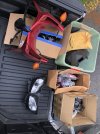
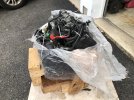
Speaking of extra parts - it was like Christmas morning today.
IMG_3269.jpeg

IMG_3270.jpeg

IMG_3271.jpeg
IMG_3277.jpeg

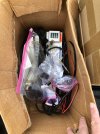
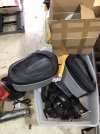
There are a lot of parts to go through. Without actually going through the boxes, here’s what I see

- The aforementioned OEM fairing, with lights, stays/brackets and hardware.
- AM Naked Kit - full kit
- An extra complete engine with a complete history. I shit you not, there is a stack of records an inch thick just for the spare engine
- Soft panniers
- An air box (could be the one that belongs on the bike)
- Carb/TB Sync (ProMotion liquid style)
- Battery Tender
- Fluids, sprays, hardware

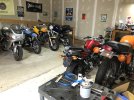
So I guess this is the beginning of a good project…and a build thread. I’m looking forward to reviving this bike. But I do have a few ahead of it.
IMG_3275.jpeg
 
Last edited:
I was patiently waiting for you to start this thread! Let's go can't wait to see you bring that bike to a mint condition! (let me know if you are selling that TB sync tool and how much). Good luck can't wait for more updates Gary!
 
It was a pleasure meeting you as well Gary! Thank you for the kind words. I am REALLY excited to see what you do with the bike and I am thrilled its in good hands. P.S. the spare air box in the photos was for a project that never came to fruition. The original airbox is installed and intact on the bike.
 
Two years later...

Well this project finally made it to the top of my list. I stuffed the bike into the corner of the garage while I worked on other projects (motorcycle and non-motorcycle related). Over this period of time I've been trying to figure out what would/could/should I do with a second FZ6. Track bike? Flip it? Loaner bike for friends that ride but don't own a bike? Give to son (30 years old former MX rider)?....I still don't know. I guess I'll just have to see what hole it fills in my moto life.

I wasn't even really ready to work on this machine. I had my Ducati up on the stand to replace a crank position sensor...and while I had it on the bench I thought I'd charge the battery. When I disconnected the charger, I placed it on the seat of the FZ6...and I noticed the SAE charge port dangling up by the forks on the FZ6...so I decided to plug it in. The green charge light said it was accepting a charge (which I didn't expect at all) so I left it for a few hours. After I returned from the shake-down ride on the Ducati I walked over to the FZ6, removed the charger...got the key...and it fired right up...on 2+ year old gas - like it was run just yesterday. Yamaha really makes great motorcycles. Project on.

After a good bath and blast from the pressure washer it was time to address issue number one, a flat front tire. I filled it up with air and noted it was holding well. When I went to check the pressure, the tire deflated in about 10 seconds...the tire stem was cut/mangled. A trip to Ron at Washington Cycle Works had that repaired in short order for $23 (including a rebalance). About the tires...

The tires are Michelin Pilot Power 2CT. The rear has a date code of 2010 and the front 2011. Yes, I know that alarms are going off in your head right now...but hear me out. One: just because the date codes are from 14-15 years ago doesn't mean that they have been on the bike for 14-15 years. Tires don't really begin to age until they go through heat cycles and get exposed to UV light. Two: Marc had these tires installed - which means the tires have been garage kept (low UV exposure). Three: I have no idea what I'm doing with this bike - so these tires stay on until the bike has a purpose (and it will get tires for that purpose). I'd say that the tread wear is in the range of 20-25%...so they are going to get some more miles.

I have some parts on order; 1. Racetech Gold Valve Emulators & Linear Springs. I hate...no...despise the OEM forks. So this is a minimum modification for this bike whether I put 10 miles or 10,000 miles on it. 2. Adjustable Fork Caps (in red to match the bike). It makes suspension adjustment so much easier...and if suspension adjustment is hard...it just doesn't get done. 3. Fork Seals and Wipers. And since the tire is off and the forks have to come off...it's a good place to start.

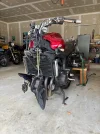
When removing the front wheel, there isn't enough weight biased towards the rear to keep the front end of the bike in the air. You either have to place something heavy on the back of the seat, or tie it down. I prefer the tie it down method.

IMG_4598.webpIMG_4587.webp

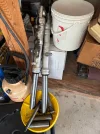
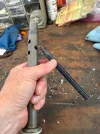
When removing the forks for service it's a good practice to loosen the top triple clamp pinch bolts, and then crack the fork caps a half turn or so. It's much easier to loosen the caps while secured in the lower t-clamp. I also try to loosen the lower damping rod bolt before removing the cap and spring because the tension inside the fork *might* hold the damping rod still while removing the bolt. It's a 50:50 shot that it works...and this time it didn't. With the forks drained and the spring, washer and spacer removed, it's time to go to work on the damping rod. I made a tool using a handle from a window squeegee - modifying it with some cut up inner tube and a zip-tie. This gets jammed into the top of the damping rod. Under force this will keep the damping rod from turning and the damping rod bolt is "easily" removed - but only after a few choice words are spoken.

IMG_4589.webp

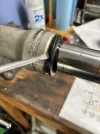
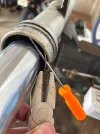
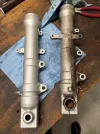
Once the damping rod is out it's time to split the forks. Remove the plastic protector/shield from the fork, the wiper and the spring clip that holds the seal in place. With the spring clip removed and the lower fork tube in a vice (clamped to the brake caliper mounts) use the upper tube as a slide hammer to remove the seal and the remaining components of the fork.

IMG_4591.webpIMG_4592.webpIMG_4588.webp

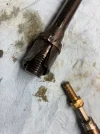
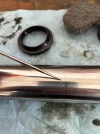
I noticed a ring of crud on the upper tube. This was polished smooth with some oil and steel wool.

IMG_4593.webp

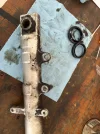
The lower tubes were covered in nearly 20 years of grease and road crud. A few years back I made a vapor blaster (https://www.600riders.com/threads/my-other-short-winter-project.59988/#post-649487) and this is just another great reason to have this tool.

IMG_4594.webpIMG_4596.webp

I should have all of my parts in-hand by the end of the week. With the forks back together I'll take a look at the brakes and grease the head bearings...and hopefully have the bike back on two wheels soon. I'll post some photos of the GVE modification (but that is well covered in my CB900 rebuild thread) and reassembly of the forks with the new seals.
 
Last edited:
The tires are Michelin Pilot Power 2CT. The rear has a date code of 2010 and the front 2011. Yes, I know that alarms are going off in your head right now...but hear me out. One: just because the date codes are from 14-15 years ago doesn't mean that they have been on the bike for 14-15 years. Tires don't really begin to age until they go through heat cycles and get exposed to UV light. Two: Marc had these tires installed - which means the tires have been garage kept (low UV exposure). Three: I have no idea what I'm doing with this bike - so these tires stay on until the bike has a purpose (and it will get tires for that purpose). I'd say that the tread wear is in the range of 20-25%...so they are going to get some more miles.

When removing the front wheel, there isn't enough weight biased towards the rear to keep the front end of the bike in the air. You either have to place something heavy on the back of the seat, or tie it down. I prefer the tie it down method.

Good thread and some useful suggestions, I use an old broom handle to hold the damper rod in place to undo the bolt, but adding some old inner tube rubber to the end should help hold it in place better 👍

A couple of things:

1) A friend was working out in Qatar and got a puncture on his car, so got someone to put on a new tyre that had been stored in the garage, so out of the sun.

He was driving along their equivalent of a motorway and it suddenly blew with no warning (fortunately desert roads have lots of run off area!)

It turned out from the DOT number that the "new" tyre was about 10 years old!

It's your choice, but personally, I would *not* risk my safety on 15 year old tyres...

2) Regarding taking the front wheel off, I just push down on the back of the bike and slide some blocks of wood underneath the bottom of the down pipes to keep the front wheel off the round until I can remove it, at which point the rear has enough weight to stop the front from dropping forward again.
 
Long delay waiting for parts to arrive (specifically a single outer bushing). While I waited on parts I modified the damping rod to work with the Gold Valve Emulators. This involves drilling out the existing holes in the lower rod to 5/16”, and adding 4 more. This renders the damping rod as simply a holder for the GVE.

IMG_4608.webp

It’s important to debur the holes…not easy to do on the inside of the rod…unless you have an inside deburing tool. One of those very satisfying tools to use.

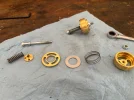
If you’ve never seen a GVE and wondered what they are, this photo shows one disassembled

IMG_4615.webp

The spring on the bolt holds tension on the valve to keep it in a normally closed position. There are 3 holes drilled in the top plate (second item from the left) that allow oil flow for slow-speed events. For fast-rate or high volume events oil pushes against the washer (center) and opens the valve to allow oil flow as determine by the preload on the spring (the spring on the shaft). The spring between the washer and the valve body (far right) is the return spring that keeps the washer against the flow plate. Simple, and it works great.

With the valves set up (3 turns preload) and the forks reassembled the forks go together quickly.

IMG_4638.webp

RaceTech suggests using 15w fork oil with an air gap of 130mm (5-1/8”). I used these starting settings on my other FZ and ended up tuning to an air gap of 140mm (5-1/2”). The air gap determines how much useable travel the forks will provide. Ideally you want to use 85-90% of available travel. At the suggestion of a friend who is a good suspension tuner I used 20w oil on this bike to slow the rebound damping a bit and reused the 140mm air gap that works well on my other FZ. I think the removal of the fairing eliminates enough weight that the larger air gap is needed to achieve 90% fork travel.
 
Last edited:
The brakes on this bike were not safe. First red flag was when I was removing the caliper on the right side. I put my socket on the 12mm bolt for the bracket…and the caliper body fell off the bracket…and I hadn’t even turned the socket yet!

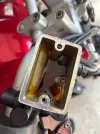
Also, everything on the front end was coated in brake fluid and road grime. Something was leaking. Opening the reservoir I saw that it was mostly empty, and filled with sludge.

IMG_4648.webp

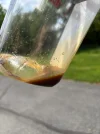
Emptying the lines I got this

IMG_4649.webp

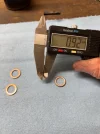
Not good. So I rebuilt the calipers. But I don’t think the seals were bad…I think it was the banjo bolt crush washers. It looks like the banjo bolts had been torqued too tight and/or reused too many times. New washers are 1mm thick and all four were around 0.92-0.93mm.

IMG_4645.webp

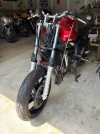
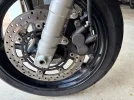
With everything cleaned up and reinstalled the front end of the bike is coming together.

IMG_4647.webp
 
Another red flag…the bike came with bar risers…I don’t like them so I removed the risers. The socket bolts were torqued to less than 10 ft-lbs…they were just above finger tight. The spec is 17 ft-lbs.

This, coupled with the poor assembly of the brake caliper, will make me go a little deeper in reviewing past work.
 
Long delay waiting for parts to arrive (specifically a single outer bushing). While I waited on parts I modified the damping rod to work with the Gold Valve Emulators. This involves drilling out the existing holes in the lower rod to 5/16”, and adding 4 more. This renders the damping rod as simply a holder for the GVE
I was surprised to read the Race Tech info that said the GVE can be used in a fork up to 4mm larger than the kit is spec'd for, but I don't know much fork guts.
Until I read that, I had been scratching my head over why they list a kit for our 43mm forks that is normally used in 41mm fork bikes.
I doubt that I will ever need them enough to justify the cost, but adjustable fork caps may be in my future.
 
Adjustable fork caps make setting sag very easy. But once sag is set, it’s set (assuming it was done correctly and you don’t have to recheck your work). Unless you are the type of person who regularly gains and loses weight, there’s no need to add them especially if your sag is already set up. I add them when I rebuild forks because I’m going to have to go through the process of setting sag, so I might as well make the process easier.
 
This bike has been done, but not finished for about a month. I’ve been waiting for OEM connectors to arrive from Eastern Beaver. EB ships from their warehouse in Japan, so I waited over a month for the gray and black connectors for the turn signals. Without those connectors in place I couldn’t put in place the 3 M6 bolts that hold the light assembly in place.

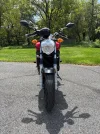
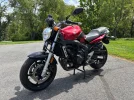
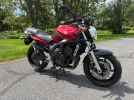
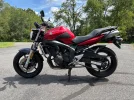
I just came back from another shakedown ride. This FZ6 is like every other…a great bike. But after a full tank of riding it I do have some observations:

I must be getting old, because I like the OEM exhaust. It’s very quiet. I might be done with putting aftermarket exhausts on bikes…except…

I can feel the weight difference between this ‘06 FZ and my blue one. My ‘05 has an aftermarket exhaust, fender eliminator, lithium battery and a few other odds and ends to make it about 25-30 pounds lighter than stock (the removed fairing being the big weight savings) and probably another 10-15 pounds lighter than this ‘06. The weight is all up high on the bike and it does feel a little lethargic compared to my ‘05. But that slow feeling could also be…

The tires on this bike, while old, have a much flatter profile than the Dunlop Q’s. The Dunlop’s are sport tires and the Michelin’s on this bike are a budget touring profile. I don’t like em. As I was riding the bike I was thinking “these bars must be shorter/cut because it takes a lot of effort to get this bike to turn.” Nope, bars are the same…tires suck.

RaceTech GVE for the win…again. I tried a few things different on this conversion and I will be incorporating those on my ‘05. I used 20wt fork oil, and kept the air gap at 140mm. Rides better.

Braided stainless steel teflon brake lines make an incredible difference in brake feel and brake force. My 05 has em, and this 06 does not. It’s an inexpensive upgrade that pays huge dividends.

Here is the one that surprised me the most. The OEM shock is ok. Now when I upgraded the shock on my ‘05 to an Ohlins, my shock was worn - so the difference in ride quality and overall performance was noticeable. But if I’m being honest (and I am) I would not spend the money on an aftermarket shock unless the original is worn. Since they can’t be rebuilt, and a replacement is likely to be just as worn, an aftermarket shock makes sense. But I wouldn’t remove a functional OEM unit for a $600+ aftermarket unit.

I’m going to be putting this bike up for sale. I just don’t need another FZ6, for any purpose. In fact my ‘05 hardly got ridden at all this summer…and I like my FZ. I brought a 1998 Ducati ST2 back to life and have been really enjoying it. The ride and handling is both luxurious and sporting at the same time. I also like having the OEM removable luggage. Turns out I like sport touring motorcycles. Like I said, I’m getting (or have gotten) old.

IMG_4733.webpIMG_4734.webpIMG_4735.webpIMG_4736.webp
 
Last edited:
You did a GREAT job with it...

Looking back, the fairing was in a box and you did the Naked conversion, correct?

I really like the headlight assembly/set up...

Were those E Bay parts, etc for that mod?

.
 
Thanks for the links, got em saved...

Question, with the BD43 mod, I guess you'd use just the RS headlight outlet?
Also, I see only 2 wires for each directional- Guess it eliminates the "running" filament of the ft directionals?


No plan on going naked BUT, should/when the bike gets dropped, parts aren't available
from Yamaha (support bracket, plastic, etc, it will be going naked...

.
 
Back
Top