CCHOUSEKY
Kentucky Wildcat Fanatic
I absolutely couldn't be more impressed with either OSO2K or the setback plates he's so graciously designed and had fabricated for the members here. I sent payment for the plates on Thursday morning (2 days ago) and received the plates today. Amazingly fast shipping!
And the plates...well, these things are works of art. Seriously, if you didn't know any better, you'd think these were made by a huge corporation with tons of R&D money. They're perfect, look great, and work even better.
I read a ton of info on the best way to install them (thanks to Hellgate, afpreppie04, and Mattcosta7 for doing a bunch of legwork so it's easier on the rest of us.)
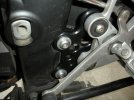
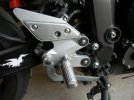
The brake side, as previously stated, is easy. I went Hellgate's route and used 2 washers between the setback plates and rearsets in order to move them out just a bit wider (not that it's needed on that side, but I wanted both sides close to the same.) I also turned the stock washers around so the rearsets would "hard mount" to the setback plates and not use the rubber mounting method used by the factory.
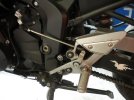
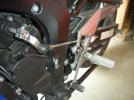
I was worried about the shift side, but after doing all that reading, it turned out to be a breeze. I ended up using 3 washers between the plates and rearsets on this side to give me just enough room for the shift rod to clear the frame. Unfortunately, it was still a little too close for my liking, so I used yet another of Hellgate's ideas and added a washer to the end of the shift lever where it connects to the rearsets. This worked perfectly and now the shift rod clears both the rearsets and the frame easily.
After a little adjustment, I've got them set perfectly. Unfortunately, I didn't get to take them for a spin, but hopefully I'll get to do that tomorrow or Monday. I think I'm gonna love them!
Now, on to the pictures!
Right after the setback plates arrived:
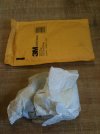
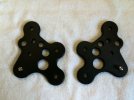
And how they look coming out of the package:
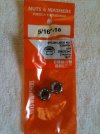
Nylock nuts I used on the installation, between the setback plates and rearsets:
And the button head bolts I used...these look much better than standard bolts:
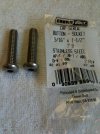
The stuff needed for installation. A note here...I ended up needing 15 washers (not the 10 you see here). 1 on each mount point of the setback plate and the frame (4), 2 each on the brake side between the plate and the rearsets (4), 3 each on the shift side between the setback plate and rearsets (6), and the 1 on the shifter itself.
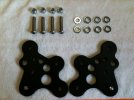
A shot showing the difference between the pegs with the setback plate installed (right side) and stock (left side):
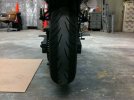
Brake side after installation:
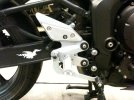
Shift side after installation:
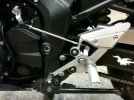
Sorry about the quality of the shots. I had to use my iPhone because I ran off without my camera. I'll see if I can't get some better shots with the camera later.
If anyone has any questions, feel free to ask, and thank you again to everyone who's done a writeup on these and to OSO2K for providing such a quality piece!
And the plates...well, these things are works of art. Seriously, if you didn't know any better, you'd think these were made by a huge corporation with tons of R&D money. They're perfect, look great, and work even better.
I read a ton of info on the best way to install them (thanks to Hellgate, afpreppie04, and Mattcosta7 for doing a bunch of legwork so it's easier on the rest of us.)
The brake side, as previously stated, is easy. I went Hellgate's route and used 2 washers between the setback plates and rearsets in order to move them out just a bit wider (not that it's needed on that side, but I wanted both sides close to the same.) I also turned the stock washers around so the rearsets would "hard mount" to the setback plates and not use the rubber mounting method used by the factory.
I was worried about the shift side, but after doing all that reading, it turned out to be a breeze. I ended up using 3 washers between the plates and rearsets on this side to give me just enough room for the shift rod to clear the frame. Unfortunately, it was still a little too close for my liking, so I used yet another of Hellgate's ideas and added a washer to the end of the shift lever where it connects to the rearsets. This worked perfectly and now the shift rod clears both the rearsets and the frame easily.
After a little adjustment, I've got them set perfectly. Unfortunately, I didn't get to take them for a spin, but hopefully I'll get to do that tomorrow or Monday. I think I'm gonna love them!
Now, on to the pictures!
Right after the setback plates arrived:
And how they look coming out of the package:
Nylock nuts I used on the installation, between the setback plates and rearsets:
And the button head bolts I used...these look much better than standard bolts:
The stuff needed for installation. A note here...I ended up needing 15 washers (not the 10 you see here). 1 on each mount point of the setback plate and the frame (4), 2 each on the brake side between the plate and the rearsets (4), 3 each on the shift side between the setback plate and rearsets (6), and the 1 on the shifter itself.
A shot showing the difference between the pegs with the setback plate installed (right side) and stock (left side):
Brake side after installation:
Shift side after installation:
Sorry about the quality of the shots. I had to use my iPhone because I ran off without my camera. I'll see if I can't get some better shots with the camera later.
If anyone has any questions, feel free to ask, and thank you again to everyone who's done a writeup on these and to OSO2K for providing such a quality piece!


 5 Hour Energy in the six-pack is helpful.