How to install a 12v power source for dummies like me!!

clrd_2_lnd

Junior Member
Joined
May 15, 2009
Messages
75
Reaction score
2
Points
0
Location
Palmdale, CA
Visit site
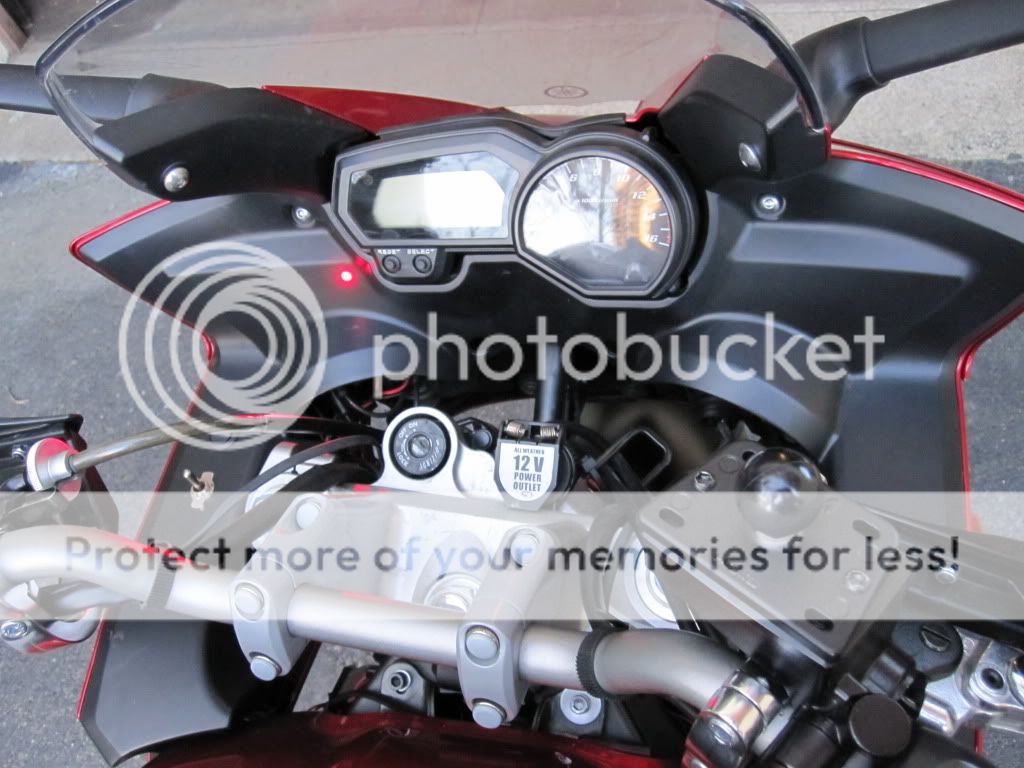
Did the 12v power source thing finally and it came out great, have to thank Stryken for the idea of where to mount and how to mount it, dude it is solid there just like you said, it's as good as if the factory put it there!
Pic 1 - 12v power socket from walmart, some type of screw that is long enough to go through the support in front, I used a screw that had a metric allen head on it and a lock washer with a big washer to keep it from slipping into the large hole in the support.
Pic 2 - Socket has to be all weather.
Pic 3 - Drilled a hole just a hair smaller than the screw.
Pic 4 - Tap the hole with the screw.
Pic 5 - ""
Pic 6 - Put it where you want it, make sure you have clearence from everything in there, like the forks horn ect.
Pic 7 - What it looks like on the otherside.
Pic 8 - Top view.
Pic 9 - Raise the tank.
Pic 10 - 4 things to take off before you can raise the tank all the way, 2 wire connections and 2 fuel type connections.
 

clrd_2_lnd

Junior Member
Joined
May 15, 2009
Messages
75
Reaction score
2
Points
0
Location
Palmdale, CA
Visit site
Pic 11, 12 - hold the tank up with something this is how I did it.
Pic 13 - View of what you will see, top of battery.
Pic 14, 15 - Remove the 2 screws on the wire Assembly on top of the battery, the 2 closest to the air box, remove the wire connection, then place the 2 on each side of the tank.
Pic 16 - Should look like this.
Pic 17 - Don't forget to put the fuse in the all weather in-line fuse holder for the pos wire., I used a 10a but should of used a 5a, because that is all I need for what I'm using it for, GPS and Iphone charger, I didn't go back and change the fuse to a 5a because my chargers for each have fuses in them already, will change to 5a if it blows some day.
Pic 18 - Wiring the in-line fuse to pos wire.
Pic 19 - Heat shrink tubing on all connections to help keep water out, don't forget to put the tubing on before you make the connection.
Pic 20 - Battery connection for pos wire, used 1/4 inch ring connector.
I also used the ATM type fuse because it is smaller and it helped later getting it through the frame, if you use the ATC type fuse you will have to run the wire into the frame first then finish wiring the in-line fuse holder and battery connector for the pos wire.
 

clrd_2_lnd

Junior Member
Joined
May 15, 2009
Messages
75
Reaction score
2
Points
0
Location
Palmdale, CA
Visit site
Pic 21 - Finished wiring.
Pic 22 - I zipped tied the wires every x number of inches to keep them tougher inside of the heat resistant plastic tubing.
Pic 23 - Put the wiring into the tubing, I then zipped tied the tubing every x number of inches again.
Pic 24 - Mount the socket where you want it and put the plastics on again and make sure you are clear of everything.
Pic 25, 26 - I put each charger into the socket to be sure it was going to fit fine with the plastics on.
Pic 27, 28, 29 - Run the wiring around the fairing and zip tie it to whatever to keep it in place, there is a wire harness you can use on the left side halfway to the tank to help.
Pic 30 - Run it through the hole in the frame.
 
Last edited:

clrd_2_lnd

Junior Member
Joined
May 15, 2009
Messages
75
Reaction score
2
Points
0
Location
Palmdale, CA
Visit site
Pic 31 - Wire through the frame, I had more then I needed so I tucked it into the space in front of the battery, connect it to the battery and closed it up, you are done!!
Pic 32 - Top view of finished product.
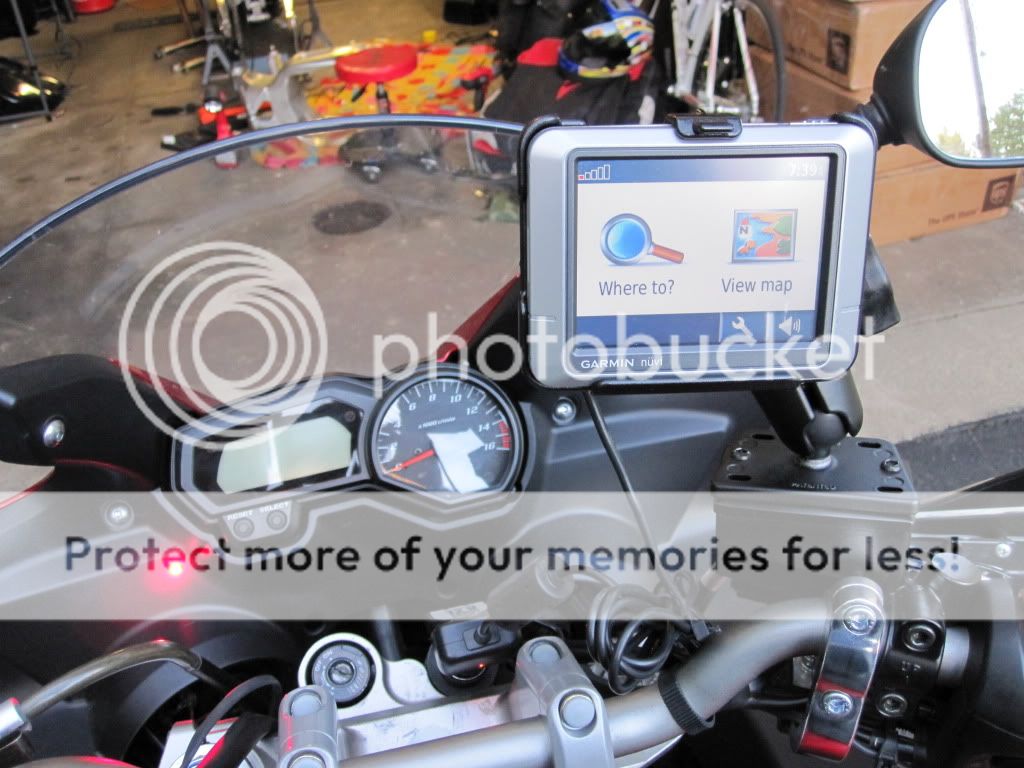
Pic 33 - Working GPS.
Pic 34 - What it looks like from the side, you can't really see the socket unless your looking for it in the fairing.
So I put all of these pics and info up so just about anyone can do this, I hope, hope it is useful to many.
 
Last edited:

clrd_2_lnd

Junior Member
Joined
May 15, 2009
Messages
75
Reaction score
2
Points
0
Location
Palmdale, CA
Visit site
Got the Ram mount thought I would show finished product, after a test ride I moved the handle bar mount to the top of the bar instead of the side as shown in the pic.
 

(none)

Not even here
Joined
Jun 9, 2009
Messages
181
Reaction score
4
Points
0
Location
cincinnati
Visit site
Great job. Very similar to the way i hooked mine up, although i didn't even think of mounting it down there. Wish i would have thought of that, it looks like a good idea.

4-6-20107-36-13PM_0021.jpg

4-6-20107-38-55PM_0027.jpg
 

REDHAWK22

aka willie
Joined
Feb 22, 2011
Messages
191
Reaction score
1
Points
0
Location
Bay Area, California
Visit site
Got the Ram mount thought I would show finished product, after a test ride I moved the handle bar mount to the top of the bar instead of the side as shown in the pic.

Can you pls tell me where and what are all the parts that I need to mount my GPS (Garmin Nuvi). I also have a Kodak Zi8 that I want to use for my rides, but I don't where and what parts I need. PLS. Help Dummy (me).
 

clrd_2_lnd

Junior Member
Joined
May 15, 2009
Messages
75
Reaction score
2
Points
0
Location
Palmdale, CA
Visit site
Go to the ram mount website click on motorcycle mounts and then use the motorcycle mount wizard it will take you through the steps, my gps battery will not hold a charge so I need to leave it plugged in and the cord use to vibrate out at high rmp's so if tour gps keeps shutting off use a rubberband at the bottom to hold the cord in place, I almost went out and got a new gps untill I tried this, thought the vibrations were to much for it.
 

04fizzer

Member
Joined
Sep 18, 2008
Messages
1,231
Reaction score
6
Points
0
Location
Fairport, NY
Visit site
I've got the same plug, but never actually mounted it. I wired it up to plug into the SAE plug for the battery tender, but used pretty short wires to do it. Looks like some modifications are in order for this Spring to "permanently" mount mine.
 

AngelFZ

Junior Member
Joined
Apr 1, 2010
Messages
1,089
Reaction score
29
Points
0
Location
Cocoa, FL - USA
Visit site
Thanks a lot for all the details/pictures.

This is something pending I have on my list "to do"


Sent from my iPhone using Tapatalk
 

stealthyman

Junior Member
Joined
Aug 17, 2009
Messages
76
Reaction score
1
Points
0
Location
Burbank, CA
Visit site
The cigarette lighter socket sure has been around for a long time. My 2007 Ford has two of them, but no lighter. They work fine for the various things I plug into them, but it seems to me that they are too large in size for what they do.

When I get around to installing a 12V connector on my FZ6, I think I will look into something smaller. That will require modifying the plug on whatever I plug in, but that only needs to be done once.

I've used these connectors on DC power supplies and they are working out well: Anderson Powerpoles:
 

amerchant

Junior Member
Joined
Sep 8, 2011
Messages
7
Reaction score
0
Points
0
Location
Maple Ridge, BC
Visit site
Great write up! a must do on my list. i have a few questions though. I saw the pictures and read your post, i sort of understand all the parts needed, but it wasnt all that clear. im new to wiring and electricals and all that, but where can i get an inline fuse, and what fuse do i put in? is it the 10A/5A? and the wire guage? i have some 14 guage left from the dual head light mod, can this be used as well? the rest of it is more or less understandable. any help is greatly appreciated! thanks in advance!:BLAA:
 

DavisFZ6

Junior Member
Joined
Feb 6, 2011
Messages
42
Reaction score
2
Points
0
Location
Northern Italy
Visit site
You can get an inline fuse at walmart or any auto store most likely. 14 Guage and 10amp should be fine.

Used my charger for the first time last week, charged my iphone on the way to work.
 

Motogiro

Vrrroooooom!
Staff member
Moderator
Elite Member
Site Supporter
Joined
May 8, 2008
Messages
14,992
Reaction score
1,157
Points
113
Location
San Diego, Ca.
Visit site
I use this type of inline fuse for my accessory relays. Try to use the ATO or ATM type in line and not the other type unless it is really high quality. The cyclindrical assembly type have a much higher mechanical fail rate than the push in type. Especially on our bikes with higher vibration.

This!
FH-31825-7-2T.jpg


Not this!
$(KGrHqZ,!lgE2ELmWwy,BNilErnCGw~~0_1.JPG
 
Top