Anyone have a slight clicking feeling at low speed in 1-2nd gear?

twobob1

Member
Joined
Feb 6, 2018
Messages
100
Reaction score
1
Points
16
Location
London UK
Visit site
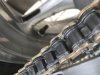
I received the chain and sprockets today, jt sprockets and did chain was meant to have a free joining tool but it was not included....will have to wait for a response.

Noticed on the d.i.d chain instructions it says typical chain sag - 20-25mm....thats what my bike was setup for so obviously the guy before went with that. Isn't it meant to be 40-45mm?

Also my nut at the moment has no locking thing on it it seems, shall I put the new official Yamaha nut part I just got with tab locking thing on? I think its the s1 locking design. All this s1 and s2 is so annoying I wish they had kept it the same.
IMG_7509.jpgIMG_7510.jpg
 
Last edited:

TownsendsFJR1300

2007 FZ6
Site Supporter
Joined
Feb 7, 2009
Messages
12,531
Reaction score
1,176
Points
113
Location
Cape Coral, Florida, USA
Visit site
If you look at the outside end of the large nut, you'll see it's tapered down a BUNCH. Once the nut is torqued down on the output shaft, you simply "peen" THAT EDGE down into the "flats" of the output shaft.

I asked earlier if you had an owners manual or shop manual, I take it you do not. If not, PM me with an e-mail address and I can get help.

The FZ6 has a VERY loose chain adjustment, (thus why I said the shop doesn't even do it correctly earlier).
From the Owners Manual for the S1 bike:

(It is NOT a mis-print and hopefully you'll follow the spec's)

_______________________________________________________________________


(Admin, this pic is timed out to disappear in 3 days).
 
Last edited:

darius

Never stop exploring
Joined
May 26, 2012
Messages
1,155
Reaction score
19
Points
0
Location
Above California
Visit site
Read the owner's manual. It tells you exactly how to measure and set the chain tension and many other essentials. You want ~2" of total movement for the FZ6. It's based on swing-arm movement. If it's too tight, you get noise, premature wear and shifting issues or worse.

From the manual:

Drive chain slack:
45.0–55.0 mm (1.77–2.17 in)

Drive chain slack
The drive chain slack should be
checked before each ride and adjusted
if necessary.
EAU22792
To check the drive chain slack
1. Place the motorcycle on the centerstand.
2. Shift the transmission into the neutral
position.
3. Spin the rear wheel several times
to locate the tightest portion of the
drive chain.
4. Measure the drive chain slack as
shown.
5. If the drive chain slack is incorrect,
adjust it as follows.
EAU34311
To adjust the drive chain slack
1. Loosen the axle nut and the locknut
on each side of the swingarm.
2. To tighten the drive chain, turn the
adjusting bolt on each side of the
swingarm in direction (a). To loosen
the drive chain, turn the adjusting
bolt on each side of the
swingarm in direction (b), and then
push the rear wheel forward.
NOTE:
Using the alignment marks on each
side of the swingarm, make sure that
both chain pullers are in the same position
for proper wheel alignment.
 

Gary in NJ

Junior Member
Site Supporter
Joined
May 6, 2014
Messages
1,978
Reaction score
1,927
Points
113
Location
Amoungst the Twisty Roads
Visit site
Here's the physics of it;

As the swingarm moves up, the slack in the drive chain is removed. With 40-50mm of chain slack the swingarm is free to move its full range. If the chain is too tight, swingarm movement is restricted by the available chain slack. Once the chain is tightened, the swingarm stops moving. This effects ride quality, handling and chain wear.

I've made a few custom motorcycles where there wasn't an available spec for chain slack. As a result I had to conduct my own swingarm survey to determine the correct slack. You'd be surprised how abruptly the swingarm stops to move when it is chain restricted.
 
Last edited:

twobob1

Member
Joined
Feb 6, 2018
Messages
100
Reaction score
1
Points
16
Location
London UK
Visit site
Sorry, I have a Haynes manual. Guessing thats not the correct one. would appreciate the proper one thank you.
 

twobob1

Member
Joined
Feb 6, 2018
Messages
100
Reaction score
1
Points
16
Location
London UK
Visit site
IMG_7570.jpgIMG_7570.jpg

I think my front sprocket nut has been welded?

I cranked quite hard on the breaker bar and couldn't get it to budge. Had the bike in neutral and a fibreglass axe handle in between the wheel and swing arm was worried something might break or warp if I went any harder. The actual sprockets don't look to bad at all compared to the new ones, all the teeth are exactly like the new ones only a bit of wear underneath the front sprocket teeth on the actual sidewall.....wondering if I should be even replacing at all or if I'm needlessly doing it as was told they were replaced not too long ago. the chain stretch is about 4.5cm I did a proper measurement so it seems only slightly off.

The front sprocket nut replacement I have has the old style nut underneath that you peen over to act as a lock but someone said on the s2 model the (one I have) its a different nut locking system and on mine there is no such nut and it appears to have been welded... SO I have the wrong nut and nut locker to replace it with and I can't even get the old one off...

Does it look to have been welded slightly?
Im thinking I should just leave it I don't want to break my bike, things like this worry me. Thinking I should have booked it in and paid 200 more for original parts and experts.
 
Last edited:

TownsendsFJR1300

2007 FZ6
Site Supporter
Joined
Feb 7, 2009
Messages
12,531
Reaction score
1,176
Points
113
Location
Cape Coral, Florida, USA
Visit site
That sprocket is badly worn, period.

And your correct, someone welded the end.

It looks like an S2 nut with the end beveled down (able to be peened to the shaft).

Either take a Dremel to the weld or quicker (but be slow and careful) is a metal grinding wheel(no larger than 4" diameter) and slowly grind the weld away... Take off just what you have to..

The nut will come off with the weld gone, promise. But the weld IS holding it on.

Un-less you grind the entire shaft off it's not a hard "fix". Practice on a piece of metal first to get the feel of the grinder or Dremel.

Once the sprocket is removed, clean up the weld area. If the flattened tab spot is buggered up, simply re-flatten it with the grinder...

You can use either nut and also RED Loctite for added insurance... It won't go anywhere.


BTW, had it gone to the shop, they would do the same thing (^^^), and charge you accordingly (maybe 15 minutes tops grinding that tack weld off) , OR tell you the output shaft needs replacement for say $2,000.00
 
Last edited:

Gary in NJ

Junior Member
Site Supporter
Joined
May 6, 2014
Messages
1,978
Reaction score
1,927
Points
113
Location
Amoungst the Twisty Roads
Visit site
Grind the weld off, but only enough to remove the nut. Only use a 6-point socket. Do not attempt to remove it with a 12-point. Scott is correct, that sprocket is worn and NEEDS to be replaced.
 

twobob1

Member
Joined
Feb 6, 2018
Messages
100
Reaction score
1
Points
16
Location
London UK
Visit site
Ok guys I got it off, it wasn't welded it was a piece of dirt :ban: ? lol

Anyway I decided to reuse the original nut and I tightened it to the correct torque plus a tiny bit more and used loctite thread locker. It was blue but it did say for permanent joins it was a different make than loctite.

Anyway the only thing now is I squashed the chain link too tight and the o rings are buggered. There was no measurement on the instructions as to how tight to do it..I had callipers but was trying to compare it to the chain I took off which was exactly the same.

How can I go about replacing the link? I do not have a chain remover tool, (I have a cheap bicycle one) could I grind the peened ends off the link and try pushing them out? I really don't want to pay 50-100 pound for a chain remover tool but am guessing I need to.

Can I even get the link out without damaging my new chain? Also tips for not squashing the o rings? its very tedious keep taking the tool off and wondering if its the right thickness. I thought "just one more tighten" and it squashed them too much.

Also is there a specific way the chain has to go i.e. a drive direction?

Thanks guys, I'm a little way closer to getting this done.

I took the bike out for a slow ride, seems like everything is fine, have ordered a cheap chain remover tool meant to have good reviews and also the genuine replacement link.

Any tips for replacing the link would be great.

Also how tight do the nuts inside the axle swingers have to be,(the ones that stop and determine the wheel alignment moving before you tighten the axle nut) do you tighten them both tight?
 
Last edited:

Gary in NJ

Junior Member
Site Supporter
Joined
May 6, 2014
Messages
1,978
Reaction score
1,927
Points
113
Location
Amoungst the Twisty Roads
Visit site
Simply grind the the rivet head off until it's flush with the link plate and punch the shaft through. You're gonna have to purchase a new master link. Like we said in earlier posts, small turns on the rivet tools make large changes. The rivet is good when it looks like the rivets on the cooresponding links.

The chain is non-directional.

Regarding the the tightness of the alignment nuts, they don't get torqued. Make your chain slack adjustment and then tighten the lock nut against the alignment nut.
 

TownsendsFJR1300

2007 FZ6
Site Supporter
Joined
Feb 7, 2009
Messages
12,531
Reaction score
1,176
Points
113
Location
Cape Coral, Florida, USA
Visit site
Plus one on the above.

Here is a link that should have come with your chain, chain tool:

http://www.didchain.com/PDF/DID Chain Tool Inst_150.pdf

It gives specifics WHEN TO STOP with the riveter with actual numbers.

**FLARE DEMENSIONS are towards the end.

Your should be only doing this once, yes it's tedious, but GO SLOW and measure often (or you get a "do-over")

Just snug the axle adjuster lock nuts..

Make sure there's 0-ring grease in / on the new master link too.
 

twobob1

Member
Joined
Feb 6, 2018
Messages
100
Reaction score
1
Points
16
Location
London UK
Visit site
Thanks, I had the flare dimensions ok when I did it but the pressing of the plate onto the chain link there is no set width of where to stop hence my crushed o rings, you only need to go 1 mm over to crush them. They presume you are using the d.i.d chain tool which I am not I'm using an Italian made one that does not stop, you have to stop when you think and its a complete guess. Im just going to measure the average chainlink width and go with that as long as the o rings don't look squished, otherwise its another tenner down the drain...
 

TownsendsFJR1300

2007 FZ6
Site Supporter
Joined
Feb 7, 2009
Messages
12,531
Reaction score
1,176
Points
113
Location
Cape Coral, Florida, USA
Visit site
Yes I do have the DID tool, BUT, don't worry about the LINK WIDTH, PERIOD..

Assemble as you did before, once the rivet tool starts doing it's job the ML plate isn't going anywhere.

Squash and MEASURE the RIVET WIDTH FLARE ONLY, again, go slow, measure often.. You have the rivet width spec's now.


BTW, the DID tool I have (KM501E), I didn't know it would stop on it's own. I snuck up on the spec's and realized it was 'bottomed out" with no more to go.

Only used it twice on my current chain and previous DID chain (I mentioned earlier the x-rings failed and DID replaced it way outside warranty)

https://www.denniskirk.com/product/media/media-viewer?skuId=283488&mediaType=image&mediaId=81685

 
Last edited:

twobob1

Member
Joined
Feb 6, 2018
Messages
100
Reaction score
1
Points
16
Location
London UK
Visit site
On my tool there are two steps, pressing the plate onto the link together - which you can easily overdo with my tool.

Second step is a different screw that you insert to flair with. I measured the flare widths on both studs bang on when I did it - that wasn't the issue. The issue was I had initially overdone squashing the plate onto the link and damaged the o rings by squeezing them too tight.

the green lines I have no problem flaring, the red arrow shows I have no specs telling me this measurement, And with my tool its guessing.

aa.jpg
 

Attachments

  • IMG_7573.jpg
    IMG_7573.jpg
    89.3 KB · Views: 19
Last edited:

bigborer

Site Supporter
Joined
Feb 16, 2017
Messages
447
Reaction score
78
Points
28
Location
EU
Visit site
Wow I'm still amazed when I see this kind of "ghetto engineering".

Well... at least there's no accidental sprocket loosening making the chain break the crankcase (seen that one too).

I'd advice against using an angle grinder- better stay with a dremel or a drill with one of those thin grinding stone bit ends.
 

TownsendsFJR1300

2007 FZ6
Site Supporter
Joined
Feb 7, 2009
Messages
12,531
Reaction score
1,176
Points
113
Location
Cape Coral, Florida, USA
Visit site
There is NO spec's for the chain LINK width. Please re-read the PDF, it's NOT necessary

Simply get the side plate on then tighten (back and forth to each rivet) until your at spec's.

Once the rivets are at spec, STOP... Your done... The rivet width sets how far in the ML, outside plate is.

If you simply push the plate (not riveted yet), on too far, gently pry it out with an appropriate screw driver in the ,middle of the link..(Don't damage the O-rings).
 
Top