
Dennis in NH
Member
Tools:
Drill and some drill bits (metal capable) about ~1/8" and smaller; I believe final size is about 1/8"
Socket wrench (or any wrench that works in tight spaces)
8mm socket, 10mm, socket, 12mm socket
Medium length thin flat tip screwdriver
Small size phillips screwdriver
5mm allen wrench, 8mm allen wrench
FZ1 bar part # 2D1-26111-01-00 cost me $41.99 from the dealer and took 4 business days to deliver.
Note: this mod is relatively easy and although the instructions seem long, there's really not that much to it; I wrote this all down mainly because I'm one of those people that likes to read about stuff to know what I'm getting into before embarking upon it.
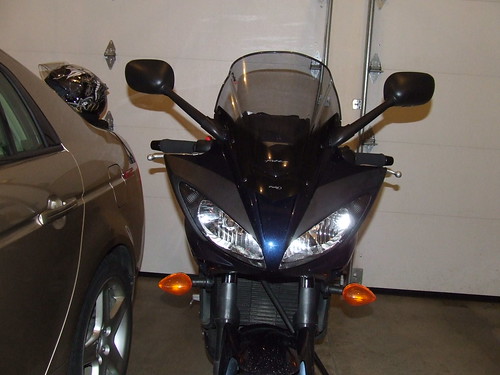
Here's a note on verbiage so you know what to what I'm referring: When sitting on the bike looking at the stock handlebar, on the left, there is a bar end, rubber grip, black plastic turn signal housing, then the clamp for the clutch handle. On the right, there is a bar end, black plastic throttle housing, clamp that holds the brake master cylinder (it holds the brake fluid).
Start by getting the bike stable so it won't fall when you're in there wrenching and coaxing a grip off.
Use 8mm allen wrench to get the bar ends off (lefty loosey); in my case, they had rust on the threads so I also cleaned them with wd-40. This is optional -- but for the anal among us, this is required.
The next major step, and the hardest, is to remove the left grip. You cannot remove the turn signal housing and clutch lever unless the left grip is removed. This grip is held on by glue and we will use the flat tip screwdriver to gently pry it off. Before you can do this effectively, you need to move the turn signal housing and the clutch handle (moving is no biggie since they will eventually come off so you can put them onto the FZ1 bar later).
Use a short phillips screwdriver to remove the two bottom screws from turn signal housing. You will remove 2 screws: the long one goes into the hole that is towards the front of the bike and the smaller one goes into the hole facing the rear of the bike -- this is in reference to when the turn-signal housing is mounted from the factory. This information will become useful upon reassembly.
Remove the clutch switch wires by pushing the tab (so it will go through the square hole) and pulling gently. I remove this so that I can let the turn signal housing dangle without stressing the wires.
Use an 8mm socket wrench and remove the 8mm headed bolt to loosen the clutch lever clamp. Once loose, move the clamp and clutch lever closer toward the center of the handlebars. This will give you more room to maneuver your screwdriver to pry the left grip off.
I loosened the handle bar holder in the center by unbolting (kind of halfway) the four 10mm bolts that hold the handlebar in place. I then moved the handle bar to the left to get room so I can get the clutch lever out of my way.
At this point, you now have room to maneuver your flat tip screwdriver. Take the flat tip screwdriver and insert it between the grip and handlebar. Using the handlebar as a fulcrum, push/pull on the screwdriver gently to loosen/break the glue that holds the grip onto the handlebar. Do this one section at a time and going around the grip on both sides -- the side where the bar end inserts and the opposite side (so you don't have to stick the screwdriver quite so far down the grip). This took me maybe 5-10 minutes -- take your time and do this gently as you want to preserve the left grip for use on the FZ1 bar. Don't rush and don't tire yourself out; use the screwdriver and bar as a nice lever. For me, this took some effort but not enough to tire me at all.
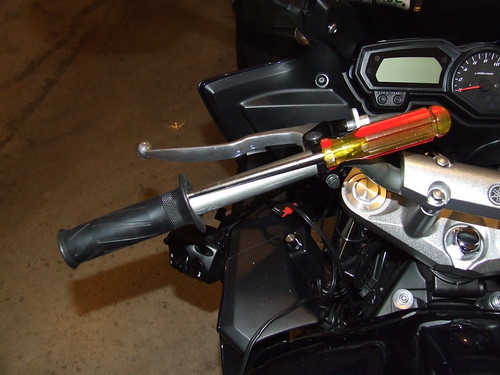
When enough glue is broken, you can slide the grip off by twisting and pulling -- firmly but not enough to tip the bike!
At this point, the hardest part of this job is done -- I suggest taking a short break.
Now that the left grip is off, you can slide the clutch lever clamp down and off the left side of the handlebar. At this point, I fully unbolted and removed the four 10mm bolts and removed the handlebar cover. I needed to move the bar to the right to easily get the clamp off. Once off, I let it dangle.
Now, we focus on the right side. Use a 5mm allen wrench to remove the 2 allen bolts holding the master cylinder in place. There will be the 2 allen bolts and a metal collar you can put aside for reassembly later. I then let the master cylinder dangle on the side.
Remove the 2 brake wires from their holes so that you won't put stress on them when you let the brake dangle. The 2 brake wires are covered in flexible semi-clear plastic and slide onto slotted connectors; make note of which one goes where for reassembly time (specifically, the one colored blue faces the rider in seated position).
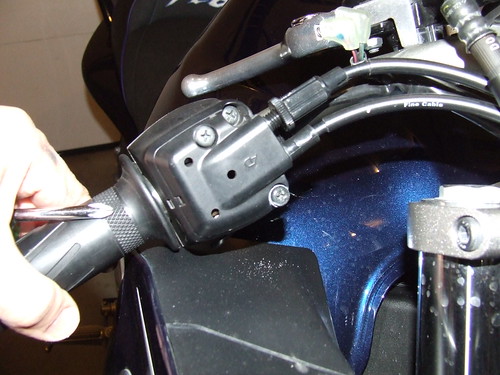
The next step is to remove the throttle housing and throttle grip. The throttle housing is held in place by three screws (on the bottom) and by a protruding tab that inserts into a small hole in the OEM bar; without this protruding tab, the throttle grip will slide when you twist the throttle grip. Using the phillips screwdriver, remove 3 screws (on the bottom) holding the throttle housing together and onto the bar. I tried to keep the 2 throttle cables and throttle sleeve intact so that I can easily install them on the FZ1 bar with minimal assembly.
Tip: Although I removed the 3 screws, I did this again and found that you can actually undue the screws just enough to disengage the protruding tab) to be able to pull the throttle assembly off but keep the screws on; this will prevent you from having to keep track of what
screw goes where as each screw is of a different size.
Once the screw are loosened or removed, remove the throttle grip by gently pulling the throttle housing apart -- just enough to disengage the protrusion that goes into the hole on the bar then slide the throttle assembly off of the bar and set the bar aside. Note: My OEM bar had a lot of rust where it was under the throttle grip -- clean this if you want with wd-40 or something else.
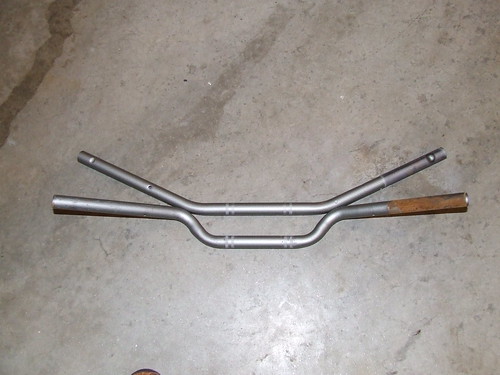
The next step is to mount the throttle housing onto the FZ1 bar. The only problem is that although there is a hole in the FZ1 bar, the hole is in the wrong place. I found that the new one needed to be about 90 degrees counter clockwise and about 7/16" (maybe about 1/2 ") toward the throttle bar end from the one already there. This is where the drill comes in. Mark where you want to make your new hole. Starting with a small drill bit, drill a pilot hole; continue with consecutively larger drill bits until it reaches the size of the hole already there. This sounds involved but it really isn't. I think if you're a tiny bit off, it won't really matter -- just measure and don't be too far off.
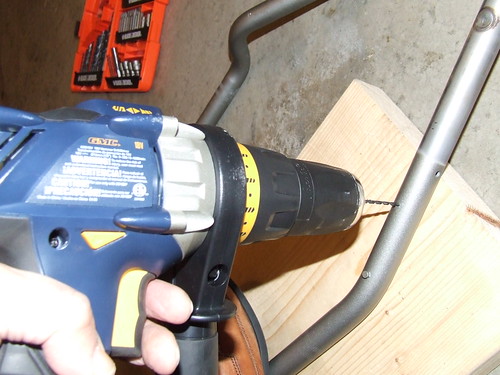
Once your hole is drilled, slide the throttle assembly onto the FZ1 bar and test the fit. If it doesn't fit, re-drill. I think the final drill bit was about 1/8" wide; it is the same size as the hole already drilled. If it fits, reassemble the throttle assembly by putting back the 3 phillips screws.
Now reassembly everything else in roughly the reverse order. Remember to reconnect the clutch wires and brake wires; before tightening the bars into position, be sure to place the bars at full lock on both sides and ensure there is clearance so you don't slam the bars in to the side of the tank. Once reassembled, mount the bike (I did on the center stand) and adjust the brake and clutch angle for optimal fit.
Total time was maybe an hour (with taking pictures and making verbal recordings of what I did). I took another half hour putting back my Ram Mount and adjusting the brake and clutch angle.
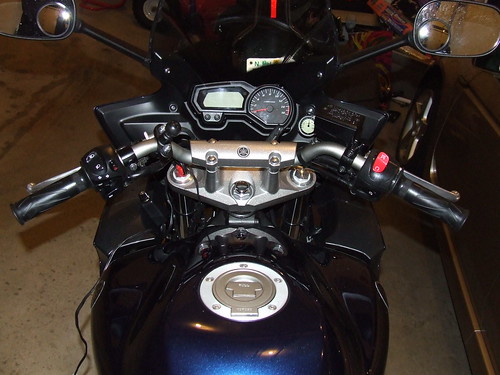
Here's an extra pic of what I did before the FZ1 bars came (to tide me over for a while). Essentially, I rotated the FZ6 OEM bars way back to almost inverted so that I can get the feel of having clipons that angled downward. It felt pretty good and I was tempted to skip the FZ1 bars altogether. The only problem was that the turn signal and high beam switch positions were just a little too weird for me.
Anyway, I've had a few weeks with the FZ1 bars and really like the bike this way -- less of an upright touring position and more sporty aggressive feel in the corners.
Dennis
Drill and some drill bits (metal capable) about ~1/8" and smaller; I believe final size is about 1/8"
Socket wrench (or any wrench that works in tight spaces)
8mm socket, 10mm, socket, 12mm socket
Medium length thin flat tip screwdriver
Small size phillips screwdriver
5mm allen wrench, 8mm allen wrench
FZ1 bar part # 2D1-26111-01-00 cost me $41.99 from the dealer and took 4 business days to deliver.
Note: this mod is relatively easy and although the instructions seem long, there's really not that much to it; I wrote this all down mainly because I'm one of those people that likes to read about stuff to know what I'm getting into before embarking upon it.
Here's a note on verbiage so you know what to what I'm referring: When sitting on the bike looking at the stock handlebar, on the left, there is a bar end, rubber grip, black plastic turn signal housing, then the clamp for the clutch handle. On the right, there is a bar end, black plastic throttle housing, clamp that holds the brake master cylinder (it holds the brake fluid).
Start by getting the bike stable so it won't fall when you're in there wrenching and coaxing a grip off.
Use 8mm allen wrench to get the bar ends off (lefty loosey); in my case, they had rust on the threads so I also cleaned them with wd-40. This is optional -- but for the anal among us, this is required.
The next major step, and the hardest, is to remove the left grip. You cannot remove the turn signal housing and clutch lever unless the left grip is removed. This grip is held on by glue and we will use the flat tip screwdriver to gently pry it off. Before you can do this effectively, you need to move the turn signal housing and the clutch handle (moving is no biggie since they will eventually come off so you can put them onto the FZ1 bar later).
Use a short phillips screwdriver to remove the two bottom screws from turn signal housing. You will remove 2 screws: the long one goes into the hole that is towards the front of the bike and the smaller one goes into the hole facing the rear of the bike -- this is in reference to when the turn-signal housing is mounted from the factory. This information will become useful upon reassembly.
Remove the clutch switch wires by pushing the tab (so it will go through the square hole) and pulling gently. I remove this so that I can let the turn signal housing dangle without stressing the wires.
Use an 8mm socket wrench and remove the 8mm headed bolt to loosen the clutch lever clamp. Once loose, move the clamp and clutch lever closer toward the center of the handlebars. This will give you more room to maneuver your screwdriver to pry the left grip off.
I loosened the handle bar holder in the center by unbolting (kind of halfway) the four 10mm bolts that hold the handlebar in place. I then moved the handle bar to the left to get room so I can get the clutch lever out of my way.
At this point, you now have room to maneuver your flat tip screwdriver. Take the flat tip screwdriver and insert it between the grip and handlebar. Using the handlebar as a fulcrum, push/pull on the screwdriver gently to loosen/break the glue that holds the grip onto the handlebar. Do this one section at a time and going around the grip on both sides -- the side where the bar end inserts and the opposite side (so you don't have to stick the screwdriver quite so far down the grip). This took me maybe 5-10 minutes -- take your time and do this gently as you want to preserve the left grip for use on the FZ1 bar. Don't rush and don't tire yourself out; use the screwdriver and bar as a nice lever. For me, this took some effort but not enough to tire me at all.
When enough glue is broken, you can slide the grip off by twisting and pulling -- firmly but not enough to tip the bike!
At this point, the hardest part of this job is done -- I suggest taking a short break.
Now that the left grip is off, you can slide the clutch lever clamp down and off the left side of the handlebar. At this point, I fully unbolted and removed the four 10mm bolts and removed the handlebar cover. I needed to move the bar to the right to easily get the clamp off. Once off, I let it dangle.
Now, we focus on the right side. Use a 5mm allen wrench to remove the 2 allen bolts holding the master cylinder in place. There will be the 2 allen bolts and a metal collar you can put aside for reassembly later. I then let the master cylinder dangle on the side.
Remove the 2 brake wires from their holes so that you won't put stress on them when you let the brake dangle. The 2 brake wires are covered in flexible semi-clear plastic and slide onto slotted connectors; make note of which one goes where for reassembly time (specifically, the one colored blue faces the rider in seated position).
The next step is to remove the throttle housing and throttle grip. The throttle housing is held in place by three screws (on the bottom) and by a protruding tab that inserts into a small hole in the OEM bar; without this protruding tab, the throttle grip will slide when you twist the throttle grip. Using the phillips screwdriver, remove 3 screws (on the bottom) holding the throttle housing together and onto the bar. I tried to keep the 2 throttle cables and throttle sleeve intact so that I can easily install them on the FZ1 bar with minimal assembly.
Tip: Although I removed the 3 screws, I did this again and found that you can actually undue the screws just enough to disengage the protruding tab) to be able to pull the throttle assembly off but keep the screws on; this will prevent you from having to keep track of what
screw goes where as each screw is of a different size.
Once the screw are loosened or removed, remove the throttle grip by gently pulling the throttle housing apart -- just enough to disengage the protrusion that goes into the hole on the bar then slide the throttle assembly off of the bar and set the bar aside. Note: My OEM bar had a lot of rust where it was under the throttle grip -- clean this if you want with wd-40 or something else.
The next step is to mount the throttle housing onto the FZ1 bar. The only problem is that although there is a hole in the FZ1 bar, the hole is in the wrong place. I found that the new one needed to be about 90 degrees counter clockwise and about 7/16" (maybe about 1/2 ") toward the throttle bar end from the one already there. This is where the drill comes in. Mark where you want to make your new hole. Starting with a small drill bit, drill a pilot hole; continue with consecutively larger drill bits until it reaches the size of the hole already there. This sounds involved but it really isn't. I think if you're a tiny bit off, it won't really matter -- just measure and don't be too far off.
Once your hole is drilled, slide the throttle assembly onto the FZ1 bar and test the fit. If it doesn't fit, re-drill. I think the final drill bit was about 1/8" wide; it is the same size as the hole already drilled. If it fits, reassemble the throttle assembly by putting back the 3 phillips screws.
Now reassembly everything else in roughly the reverse order. Remember to reconnect the clutch wires and brake wires; before tightening the bars into position, be sure to place the bars at full lock on both sides and ensure there is clearance so you don't slam the bars in to the side of the tank. Once reassembled, mount the bike (I did on the center stand) and adjust the brake and clutch angle for optimal fit.
Total time was maybe an hour (with taking pictures and making verbal recordings of what I did). I took another half hour putting back my Ram Mount and adjusting the brake and clutch angle.
Here's an extra pic of what I did before the FZ1 bars came (to tide me over for a while). Essentially, I rotated the FZ6 OEM bars way back to almost inverted so that I can get the feel of having clipons that angled downward. It felt pretty good and I was tempted to skip the FZ1 bars altogether. The only problem was that the turn signal and high beam switch positions were just a little too weird for me.
Anyway, I've had a few weeks with the FZ1 bars and really like the bike this way -- less of an upright touring position and more sporty aggressive feel in the corners.
Dennis
