Race tech spring Spring rate

atticuss66

Junior Member
Joined
Jun 1, 2013
Messages
40
Reaction score
4
Points
8
Location
Bolton on.
Visit site
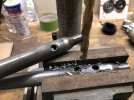
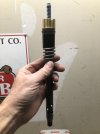
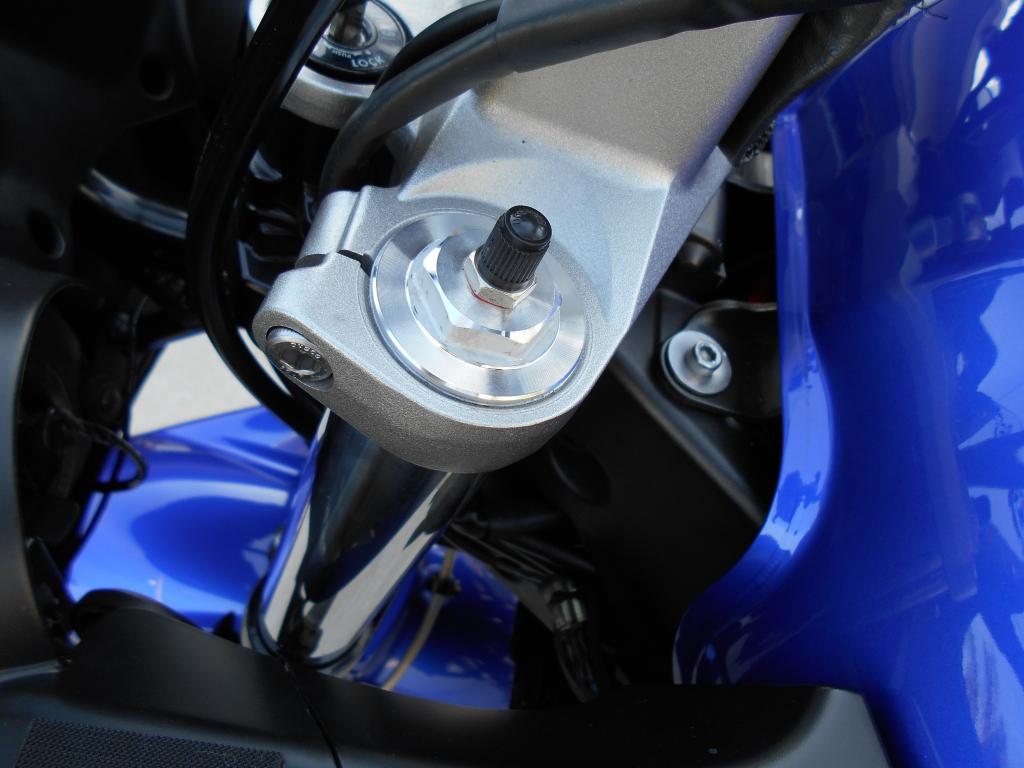
My left fork started to leak so this would says to round offbe a good time to do a a whole new front suspension rebuild. Gold valves and new Race Techs but just wondering on the spring rate would be best, My weight varies from 190 tp 197 and the calculator says round off to .90. Ive read it's better to go alittle lighter .85 as the springs can be alittle harsh. Maybe it won't make a big difference anyway. Any recommedatios???
 

Gary in NJ

Junior Member
Site Supporter
Joined
May 6, 2014
Messages
1,978
Reaction score
1,927
Points
113
Location
Amoungst the Twisty Roads
Visit site
I always suggest to round down with spring selection, but at nearly 200 lbs I would suggest staying with a 0.90 kg/mm rate fork spring. If you have dreams of getting down to 180 pounds then you might consider the 0.85 rate springs.
 

atticuss66

Junior Member
Joined
Jun 1, 2013
Messages
40
Reaction score
4
Points
8
Location
Bolton on.
Visit site
Dreams indeed. The 180 pound days are over. Thanks for the reply Gary, Hopefully the install goes smoothly....never worked with forks before but much over due.
 

Gary in NJ

Junior Member
Site Supporter
Joined
May 6, 2014
Messages
1,978
Reaction score
1,927
Points
113
Location
Amoungst the Twisty Roads
Visit site
It’s a fairly straightforward job. I’ve modified a lot of forks over the years, here are a few pointers to make it go easier;

1. After you loosen the top triple clamp bolts (and before you loosen the lower one), crack the fork caps loose by 1/4 turn. By doing this you are using the lower t-clamp as a holding vice.

2. After the fork is removed, and before you remove the fork cap, remove the bolt for the damping rod. Otherwise you’ll need a special tool to keep the damping rod from spinning (the special tool can be a broom stick :) )

3. Mark the locations for the 3/8” damping rod bypass holes with a sharpie and use a punch. A 3/8 bit likes to walk off that small curved surface. A new bit helps a lot. Make sure you debur both sides of each hole…the inner ones are a PIA. I actually have a “speed deburring” tool for that, but a round file will work.

4. You do not need to split the forks to do the job, but if you are not sure of the condition of the seals and bushing, now is a good time for inspection.

5. Whatever brand 15wt fork oil you choose- stick with that. The weight isn't consistent from brand to brand.

If you get stuck or confused by the directions, be sure to ask for help...this is a job I think I could do with my eyes closed.
 
Last edited:

atticuss66

Junior Member
Joined
Jun 1, 2013
Messages
40
Reaction score
4
Points
8
Location
Bolton on.
Visit site
Ya for sure ,if I have any questons I will ask for sure. I ordered new seals and bushings ( left fork fork is leaking) and ordered a adjustable fork cap from Amazon. Should have ordered the caps sooner....could be delivered as late as early June.
 

atticuss66

Junior Member
Joined
Jun 1, 2013
Messages
40
Reaction score
4
Points
8
Location
Bolton on.
Visit site
Received my adjustable fork caps but ordered the wrong ones....43mm suzuki. Won't fit the FZ6...back to China they go. I guess I could order the correct ones and adjust prelaod again. Just wondering how many holes do I drill on the dampenig rod?? 3 per rod or 6? Racetech says 5/16ths in size.
 

Gary in NJ

Junior Member
Site Supporter
Joined
May 6, 2014
Messages
1,978
Reaction score
1,927
Points
113
Location
Amoungst the Twisty Roads
Visit site
The size of the holes can be 5/16 or 3/8. It’s a total of six holes. The purpose of the holes is to render the damping rod useless, allowing the valve emulator to provide rate-based damping.

These photos from a mid-80’s Honda a recently did might help. This application had a 1” spacer to reduce fork travel.
 

Attachments

  • 07E1D0A0-4C77-4302-98EE-BE6217830188.jpeg
    07E1D0A0-4C77-4302-98EE-BE6217830188.jpeg
    2.4 MB · Views: 6
  • 093D7E3A-8A8A-40E0-B543-FC3EAF8894BF.jpeg
    093D7E3A-8A8A-40E0-B543-FC3EAF8894BF.jpeg
    1.1 MB · Views: 6

atticuss66

Junior Member
Joined
Jun 1, 2013
Messages
40
Reaction score
4
Points
8
Location
Bolton on.
Visit site
Received my springs and gve's yesterday. The set-up sheet says blue springs 2 3/4 turns with 10mm preload and 130mm airgap at 15wt oil.
Just got to put everything in and measure for preload, I guess our factory spacer will be too short.
 

Gary in NJ

Junior Member
Site Supporter
Joined
May 6, 2014
Messages
1,978
Reaction score
1,927
Points
113
Location
Amoungst the Twisty Roads
Visit site
I found that 140mm air gap worked better for me, but everyone has their own preferences. 130 is an excellent starting point.

Get some pvc from your favorite home store to use as a spacer. If it’s close, just get some washers.
 

atticuss66

Junior Member
Joined
Jun 1, 2013
Messages
40
Reaction score
4
Points
8
Location
Bolton on.
Visit site
The springs came with a metal tube...I can just cut it to length. Would 140 mm air gap be less harsh?? Better rebound??
Ouch...your Devils got smoked last ngt.
 

Gary in NJ

Junior Member
Site Supporter
Joined
May 6, 2014
Messages
1,978
Reaction score
1,927
Points
113
Location
Amoungst the Twisty Roads
Visit site
the threaded portion of the fork cap is about 15mm (measure to confirm). So if you think about it, the length of the spacer should be about 5mm below the top of the extended fork tube. The truth is, it doesn’t matter if it’s exactly 10mm because as soon as you get the bike together you’ll be making adjustments to set your sag.

When making adjustments for sag, remove one cap at a time to add a spacer/washer or extract the spacer to cut. This way the bike doesn’t fall on its face.

Also, don’t set sag until you’ve ridden the bike for 25-50 miles. This way you’ll know what you want out of your sag figures. This also helps the new parts to settle.

And finally, after you set race sag, note your static sag - it should be around 10-15mm. I like about 35mm of race sag for a street bike.

I did a good write up on setting sag a few years ago. Search for it there is good info in there.
 

atticuss66

Junior Member
Joined
Jun 1, 2013
Messages
40
Reaction score
4
Points
8
Location
Bolton on.
Visit site
Thanks again...wish I had ordered the right adjustable fork caps. I guess the adjustables would make adjusting sag alot easier. I'll look up sag write up.
 

Gary in NJ

Junior Member
Site Supporter
Joined
May 6, 2014
Messages
1,978
Reaction score
1,927
Points
113
Location
Amoungst the Twisty Roads
Visit site
Here is the suspension write-up I mentioned above:


It speaks more to a GVE installation than sag. Here is how I set sag:

1) Make sure that the suspension is in good condition. This includes the bearing in the swingarm and ensuring that everything is well greased. If your suspension can't freely move through it's full range of motion you can't set sag.
2) Get a helper. The helper should be someone who is interested in the process and it's outcome. Setting sag is an iterative process. If the helper is in a rush or doesn't give a crap (looking at you wife) - get another one...helper...maybe wife :)
3) Get a second helper - OR - do your measurements next to a work bench or ladder where you can steady yourself on the bike while the helper takes measurements. If you can't steady yourself on the bike, you will need a 2nd helper.
4) Have your "usual" riding gear on. Setting sag is all about weight...and if your riding weight isn't right - then the sag will be off
5) Lets start with the fork. . With the bike on the center stand and the front wheel off the ground, measure the distance between the top of the fork wiper to the bottom of the lower triple clamp. Write down this value because everything you do next flows from this value. Lets call this the Baseline
6) Get a zip tie and place it on one of the fork legs. It should be tight enough that it doesn't move on its own up and down the fork leg, yet loose enough that it doesn't crush the wiper. This will be your measuring device.
7) Time for action. Get on the bike and compress the front forks a few times. Sit on the bike in a riding position. Go ahead and move around a bit - lean forward and backward...let the bike bounce a bit. Now get your weight off the bike and have the helper measure the distance from the ziptie to the bottom of the lower triple clamp. Note the value. Subtract this value from the Baseline - this is your race sag. Repeat this step at least three different times - you will get a different reading every time. Average all of your results - this is a good indication of your sag.

So what's a good number? Lets say that you measured 5.50" (139.7mm) from the fork wiper to the bottom of the triple clamp. Now the zip tie is sitting at (or the average measurement) 4.50" (114.3mm). That means that you used 1" (25.4mm) for sag. That represents 19.5% of fork travel used for sag. Our goal is to use 25% to 30% of available fork travel for sag (street riding). Since we have 5.10" (129.5mm) of travel, our goal is use between 1-1/4" to 1-1/2" (32.5mm to 39mm) for sag.

So what do we do with these results? In the example above we have 25mm of sag, but we want 35mm. In this case we will need to remove 10mm from our spacer. If we had measured 45mm of sag, we would have to add 10mm to our spacer by adding washers or cutting a new spacer from PVC pipe. Remove one fork cap at a time to make your spacer adjustment. After the fork cap is replaced you can make the adjustment on the other fork - this helps to keep the oil in the forks and the bike from falling on its face. Once you have the spacer adjusted, you then repeat step 7 above. If you don't like the results - add or subtract as necessary.

After you are happy with your race sag, steady the bike without putting weight on the forks and measure the distance of the wiper to the bottom of the triple clamp. The result should be about 3/8" to 5/8" (10mm-15mm) less than the Baseline value. This is your static sag. If the value is greater than 15mm, it is an indication that the fork spring rate is too high, and if less than 10mm it is an indication that the fork spring rate is not high enough.

Don't forget about the shock. The same values apply for the shock as the fork because both have 5.10" of travel. The only adjustment here is the preload collar on the shock. Being a "ramp style" adjuster, the OEM shock leaves little in the way of adjustment. Get it as close as you can. Some pointers for setting sag at the the shock:

a) Measure from the axle nut to a random spot on the rear fairing. Place a piece of masking/painters tape on the fairing and put a (+) on the tape - this way you are making consistent measurements.
b) The shock will not provide as consistent a result as the forks - so you may need to take a few extra measurements for your average.
 

Chris09fz6

New Member
Joined
Jun 4, 2021
Messages
17
Reaction score
13
Points
3
Location
Vermont
Visit site
Here is the suspension write-up I mentioned above:


It speaks more to a GVE installation than sag. Here is how I set sag:

1) Make sure that the suspension is in good condition. This includes the bearing in the swingarm and ensuring that everything is well greased. If your suspension can't freely move through it's full range of motion you can't set sag.
2) Get a helper. The helper should be someone who is interested in the process and it's outcome. Setting sag is an iterative process. If the helper is in a rush or doesn't give a crap (looking at you wife) - get another one...helper...maybe wife :)
3) Get a second helper - OR - do your measurements next to a work bench or ladder where you can steady yourself on the bike while the helper takes measurements. If you can't steady yourself on the bike, you will need a 2nd helper.
4) Have your "usual" riding gear on. Setting sag is all about weight...and if your riding weight isn't right - then the sag will be off
5) Lets start with the fork. . With the bike on the center stand and the front wheel off the ground, measure the distance between the top of the fork wiper to the bottom of the lower triple clamp. Write down this value because everything you do next flows from this value. Lets call this the Baseline
6) Get a zip tie and place it on one of the fork legs. It should be tight enough that it doesn't move on its own up and down the fork leg, yet loose enough that it doesn't crush the wiper. This will be your measuring device.
7) Time for action. Get on the bike and compress the front forks a few times. Sit on the bike in a riding position. Go ahead and move around a bit - lean forward and backward...let the bike bounce a bit. Now get your weight off the bike and have the helper measure the distance from the ziptie to the bottom of the lower triple clamp. Note the value. Subtract this value from the Baseline - this is your race sag. Repeat this step at least three different times - you will get a different reading every time. Average all of your results - this is a good indication of your sag.

So what's a good number? Lets say that you measured 5.50" (139.7mm) from the fork wiper to the bottom of the triple clamp. Now the zip tie is sitting at (or the average measurement) 4.50" (114.3mm). That means that you used 1" (25.4mm) for sag. That represents 19.5% of fork travel used for sag. Our goal is to use 25% to 30% of available fork travel for sag (street riding). Since we have 5.10" (129.5mm) of travel, our goal is use between 1-1/4" to 1-1/2" (32.5mm to 39mm) for sag.

So what do we do with these results? In the example above we have 25mm of sag, but we want 35mm. In this case we will need to remove 10mm from our spacer. If we had measured 45mm of sag, we would have to add 10mm to our spacer by adding washers or cutting a new spacer from PVC pipe. Remove one fork cap at a time to make your spacer adjustment. After the fork cap is replaced you can make the adjustment on the other fork - this helps to keep the oil in the forks and the bike from falling on its face. Once you have the spacer adjusted, you then repeat step 7 above. If you don't like the results - add or subtract as necessary.

After you are happy with your race sag, steady the bike without putting weight on the forks and measure the distance of the wiper to the bottom of the triple clamp. The result should be about 3/8" to 5/8" (10mm-15mm) less than the Baseline value. This is your static sag. If the value is greater than 15mm, it is an indication that the fork spring rate is too high, and if less than 10mm it is an indication that the fork spring rate is not high enough.

Don't forget about the shock. The same values apply for the shock as the fork because both have 5.10" of travel. The only adjustment here is the preload collar on the shock. Being a "ramp style" adjuster, the OEM shock leaves little in the way of adjustment. Get it as close as you can. Some pointers for setting sag at the the shock:

a) Measure from the axle nut to a random spot on the rear fairing. Place a piece of masking/painters tape on the fairing and put a (+) on the tape - this way you are making consistent measurements.
b) The shock will not provide as consistent a result as the forks - so you may need to take a few extra measurements for your average.
This is very good info. I did springs and gve's before this season started but haven't actually done the sag, partially due to laziness and partially due to no helper lol. I will say though, front brake dive is almost non-existent now which is 100x better and the bike seems more planted in the corners. I got .95s which are probably a bit weak for me right now but I plan to shed some pounds so it should be fine at some point. Either way it's miles ahead of the stock springs. Rear I set to 5 from the 3 it was on and it definitely doesn't bottom out nearly as often (or at all) as it did when on 3. I'm about 250lbs right now, for reference. When I do check/set the sag, I got adjustable fork caps I'm going to swap in which should make life easier lol.
 

atticuss66

Junior Member
Joined
Jun 1, 2013
Messages
40
Reaction score
4
Points
8
Location
Bolton on.
Visit site
Here is the suspension write-up I mentioned above:


It speaks more to a GVE installation than sag. Here is how I set sag:

1) Make sure that the suspension is in good condition. This includes the bearing in the swingarm and ensuring that everything is well greased. If your suspension can't freely move through it's full range of motion you can't set sag.
2) Get a helper. The helper should be someone who is interested in the process and it's outcome. Setting sag is an iterative process. If the helper is in a rush or doesn't give a crap (looking at you wife) - get another one...helper...maybe wife :)
3) Get a second helper - OR - do your measurements next to a work bench or ladder where you can steady yourself on the bike while the helper takes measurements. If you can't steady yourself on the bike, you will need a 2nd helper.
4) Have your "usual" riding gear on. Setting sag is all about weight...and if your riding weight isn't right - then the sag will be off
5) Lets start with the fork. . With the bike on the center stand and the front wheel off the ground, measure the distance between the top of the fork wiper to the bottom of the lower triple clamp. Write down this value because everything you do next flows from this value. Lets call this the Baseline
6) Get a zip tie and place it on one of the fork legs. It should be tight enough that it doesn't move on its own up and down the fork leg, yet loose enough that it doesn't crush the wiper. This will be your measuring device.
7) Time for action. Get on the bike and compress the front forks a few times. Sit on the bike in a riding position. Go ahead and move around a bit - lean forward and backward...let the bike bounce a bit. Now get your weight off the bike and have the helper measure the distance from the ziptie to the bottom of the lower triple clamp. Note the value. Subtract this value from the Baseline - this is your race sag. Repeat this step at least three different times - you will get a different reading every time. Average all of your results - this is a good indication of your sag.

So what's a good number? Lets say that you measured 5.50" (139.7mm) from the fork wiper to the bottom of the triple clamp. Now the zip tie is sitting at (or the average measurement) 4.50" (114.3mm). That means that you used 1" (25.4mm) for sag. That represents 19.5% of fork travel used for sag. Our goal is to use 25% to 30% of available fork travel for sag (street riding). Since we have 5.10" (129.5mm) of travel, our goal is use between 1-1/4" to 1-1/2" (32.5mm to 39mm) for sag.

So what do we do with these results? In the example above we have 25mm of sag, but we want 35mm. In this case we will need to remove 10mm from our spacer. If we had measured 45mm of sag, we would have to add 10mm to our spacer by adding washers or cutting a new spacer from PVC pipe. Remove one fork cap at a time to make your spacer adjustment. After the fork cap is replaced you can make the adjustment on the other fork - this helps to keep the oil in the forks and the bike from falling on its face. Once you have the spacer adjusted, you then repeat step 7 above. If you don't like the results - add or subtract as necessary.

After you are happy with your race sag, steady the bike without putting weight on the forks and measure the distance of the wiper to the bottom of the triple clamp. The result should be about 3/8" to 5/8" (10mm-15mm) less than the Baseline value. This is your static sag. If the value is greater than 15mm, it is an indication that the fork spring rate is too high, and if less than 10mm it is an indication that the fork spring rate is not high enough.

Don't forget about the shock. The same values apply for the shock as the fork because both have 5.10" of travel. The only adjustment here is the preload collar on the shock. Being a "ramp style" adjuster, the OEM shock leaves little in the way of adjustment. Get it as close as you can. Some pointers for setting sag at the the shock:

a) Measure from the axle nut to a random spot on the rear fairing. Place a piece of masking/painters tape on the fairing and put a (+) on the tape - this way you are making consistent measurements.
b) The shock will not provide as consistent a result as the forks - so you may need to take a few extra measurements for your average.
great info...thanks for the info....I'll be digging into this shortly...adjustable caps would make this easier.
 

atticuss66

Junior Member
Joined
Jun 1, 2013
Messages
40
Reaction score
4
Points
8
Location
Bolton on.
Visit site
Finally got everything installed. Went for a good spin and wow quite a difference. A combination of new rubber and the fork rebuild , bike feels more planted and better control,less dive and most importanrly no more leaking fork oil on my rotor:):):)
 
Top