How to replace your head bearings

bd43

Moderator
Staff member
Elite Member
Joined
Aug 24, 2007
Messages
889
Reaction score
79
Points
28
Location
Alberta, Canada (GMT-7)
Visit site
The new season is just upon us and after 12,000km on the bike I thought it was a good time to replace the head bearings as some riders here have experienced worn out bearings after a year of riding. As many have suggested, I order up as set of All Balls 22-1004 as recommended by All Ball's website for my 2007 FZ6.
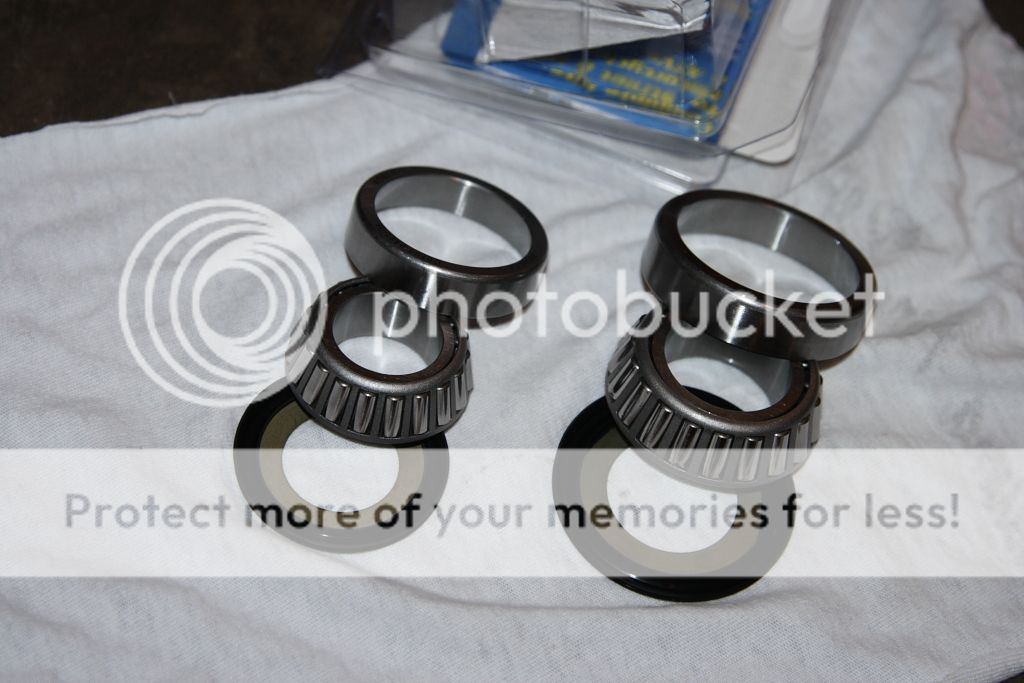
dp_090412_05.jpg


So this is what comes in the package, two sets of seals, upper and lower roller bearings with tapered outer bearing races.
dp_090412_04.jpg


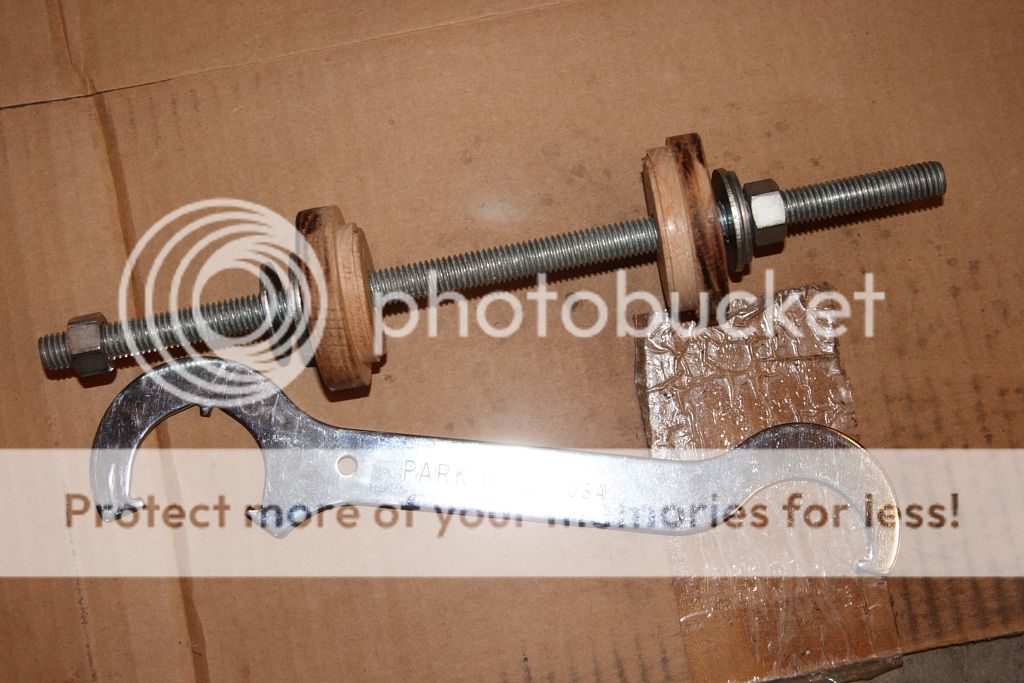
Some things you will need are a drawbolt arrangement and some kind of a spanner wrench. Both of these I aready have because I service and build my mountain bikes, same stuff, bigger on the FZ6.

In preparation of this epic undertaking, you need to remove the fairing to get at the the fork crowns, etc.
dp_090412_01.jpg


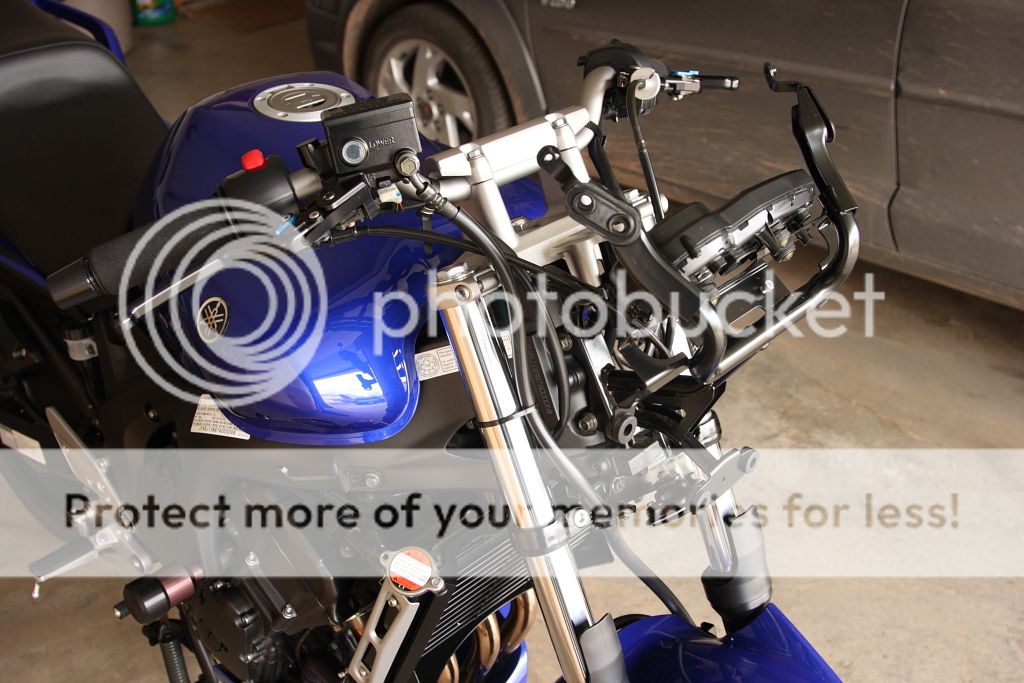
The horn was removed from the brake line mount via a single bolt on the lower crown. Then the brake line mount was removed from the lower crown via 2 bolts.
dp_090412_02.jpg


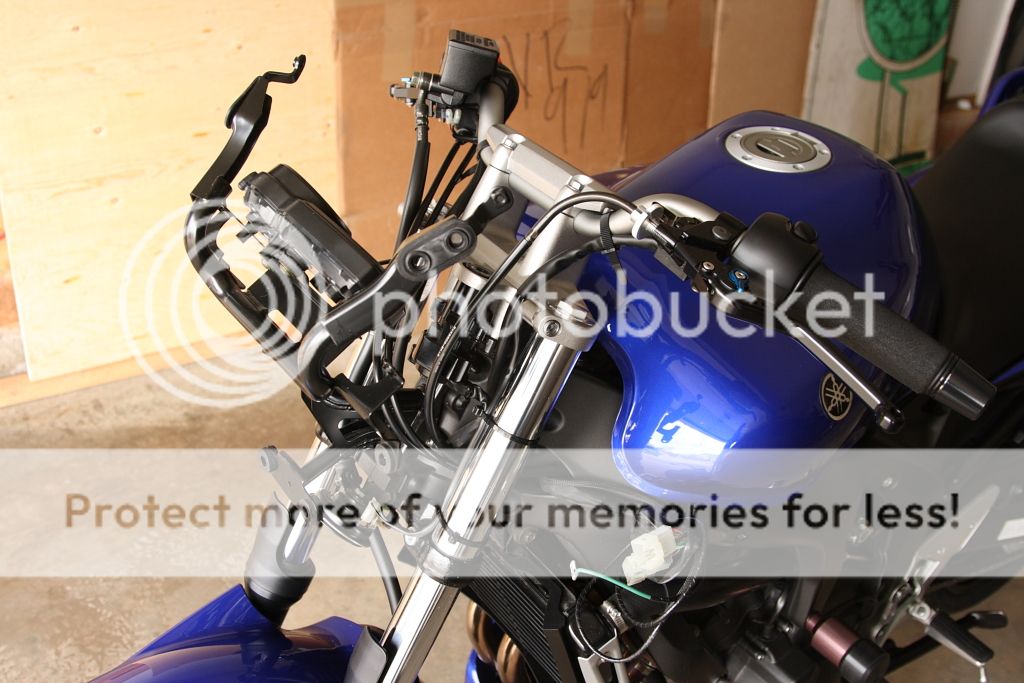
Reference to how the cables and all were tied down from factory so I could put it all back together the same way.
dp_090412_03.jpg


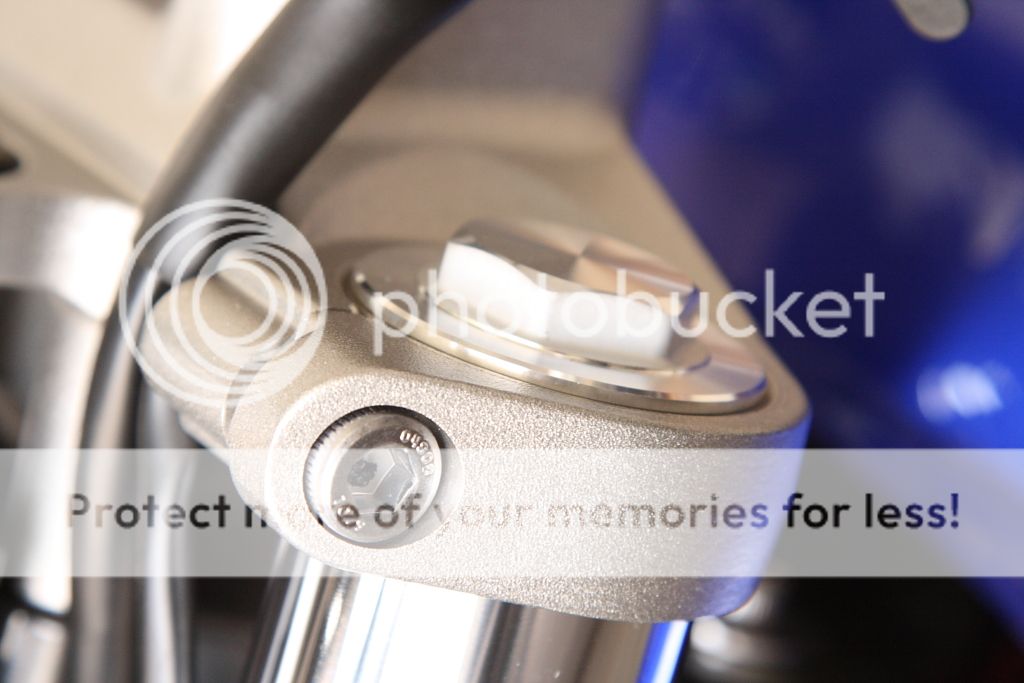
A reference shot on how much of the stanchion leg extends above the top crown before I rip it all apart.

I have both the Haynes and Yamaha Service manuals and can without a doubt say that the Haynes is way more detailed when it comes to this kind of service work. The removal of the steering stem begins on page 5.12 in the Haynes manual so I am not going to go into detail other than to explain some of the problems I encountered and solutions to overcoming them.

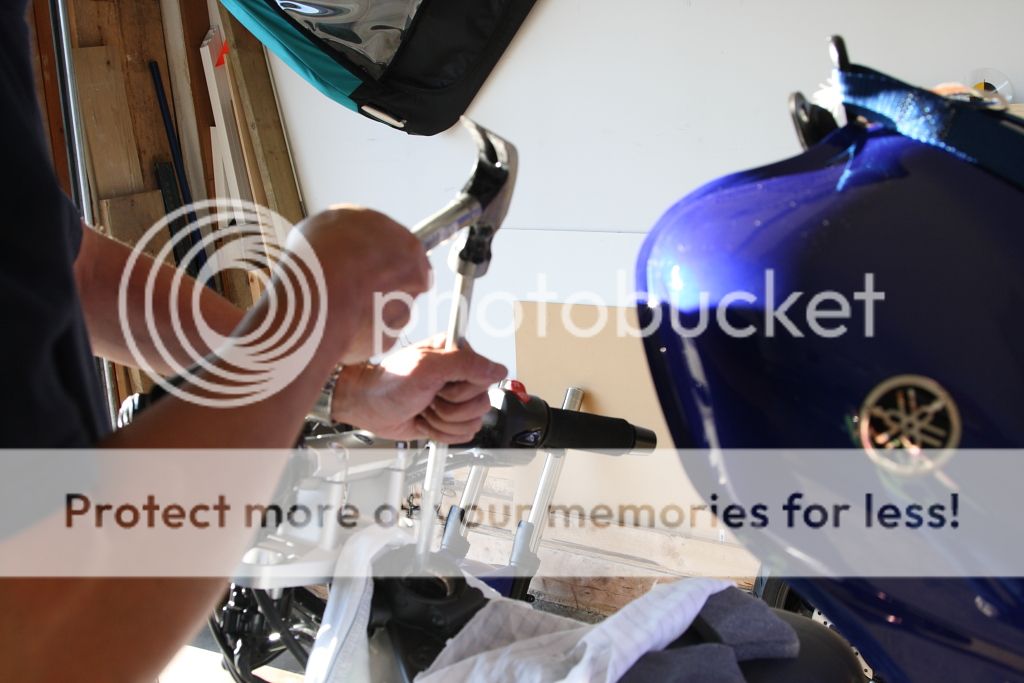
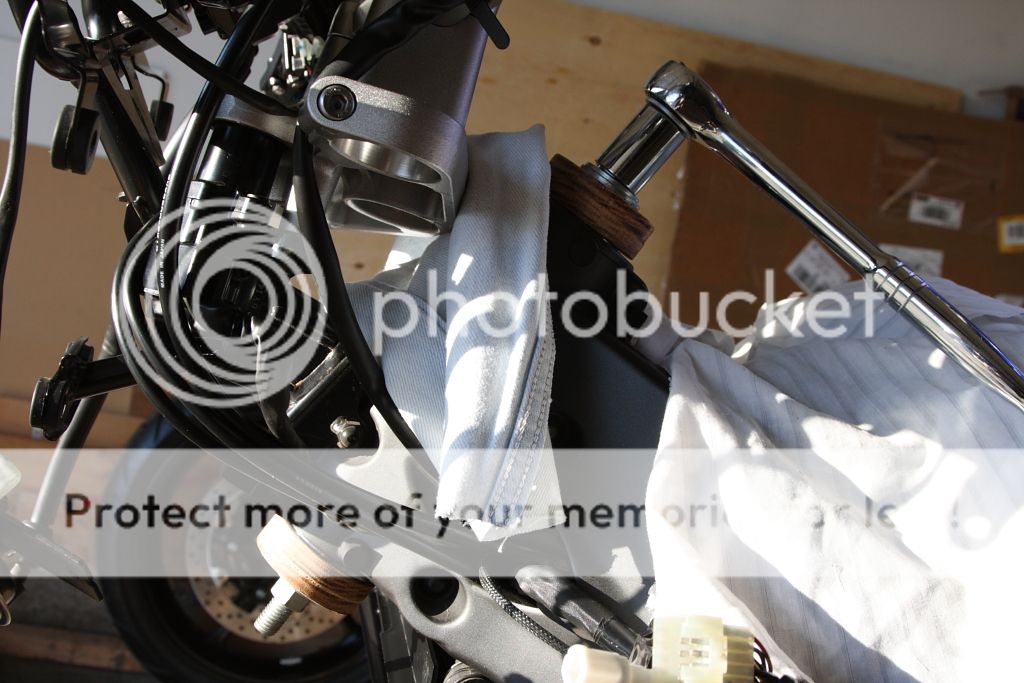
With the handle bar removed to the side, you will need a 27mm or 1-1/16" socket to remove the steering stem nut. At this point I have removed the front brake calipers from the fork legs so that I can remove the front tire. The caliper and lines are unclipped from the front fender and tied off to the frame so there is no stressing on the brake lines. All the tie wraps are cut and the horn and brake line mount is detached from the crown. The pinch bolts are loosened from the upper and lower crown and the forks are slid out from the bottom.
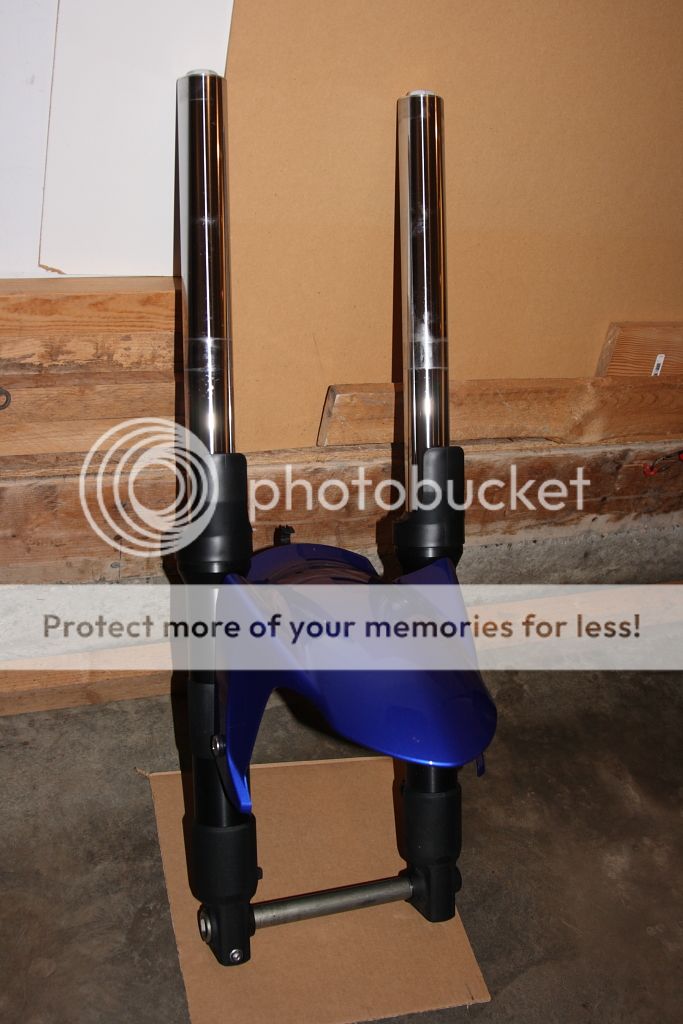
dp_090412_06.jpg


The axle is placed back in and the fork assembly is left off to the side.

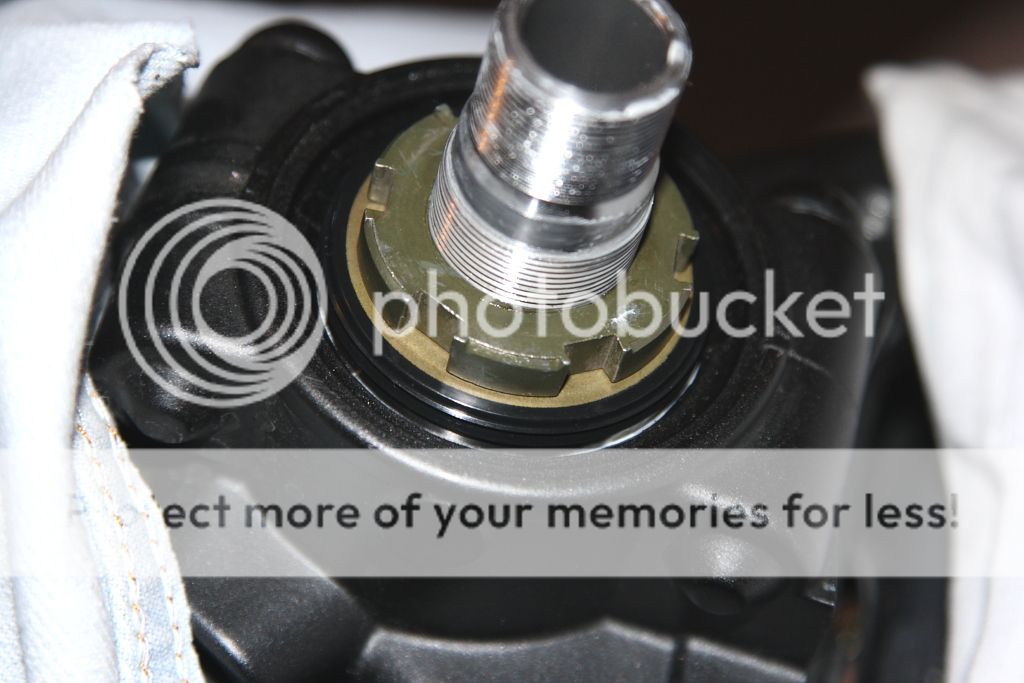
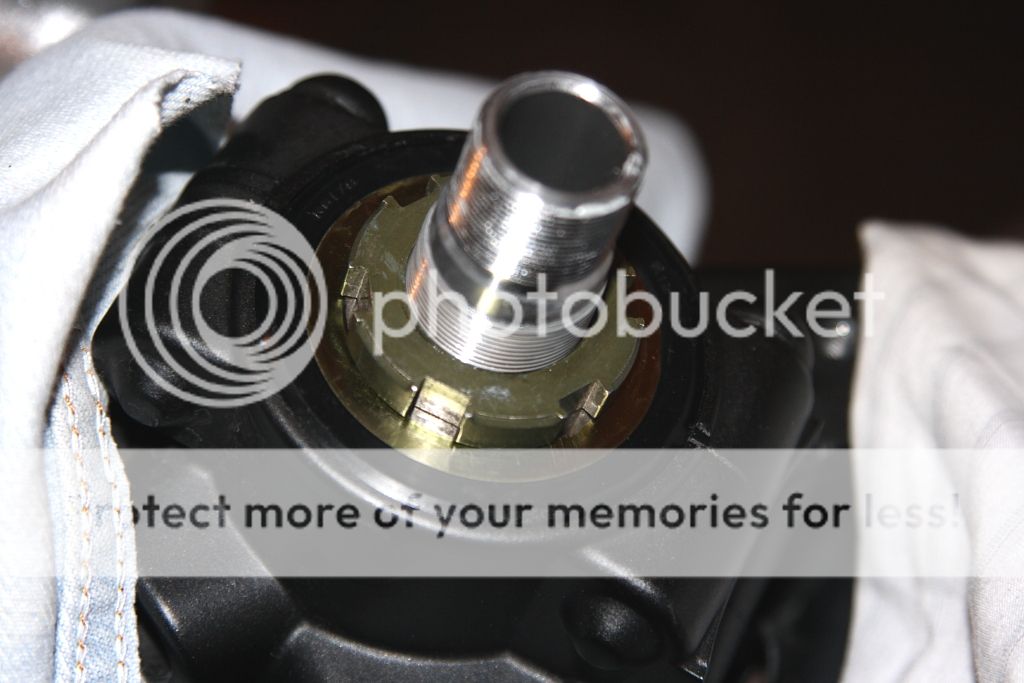
Lifting the upper crown off the steering stem, you can now see the lock washer and adjuster nuts. Remove the lock washer and with the spanner wrench loosen and remove both adjuster nuts. The steering stem will now slide out from the bottom.
 
Last edited:

bd43

Moderator
Staff member
Elite Member
Joined
Aug 24, 2007
Messages
889
Reaction score
79
Points
28
Location
Alberta, Canada (GMT-7)
Visit site
continued....

dp_090412_07.jpg


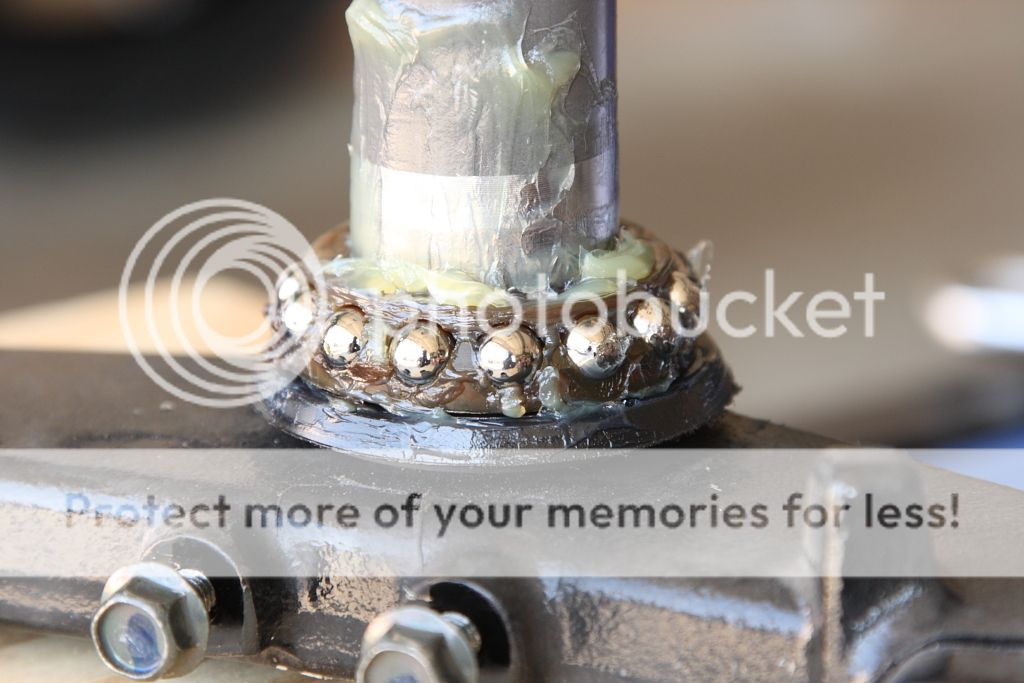
Here's what my lower bearing looked like upon removal. It's perfectly fine, WTF? Top bearings were good and the inner and outer races for both were also intact, but since I already bought the All Balls, I was determined to do the replacement as roller bearings are better in this type of application.

dp_090412_08.jpg


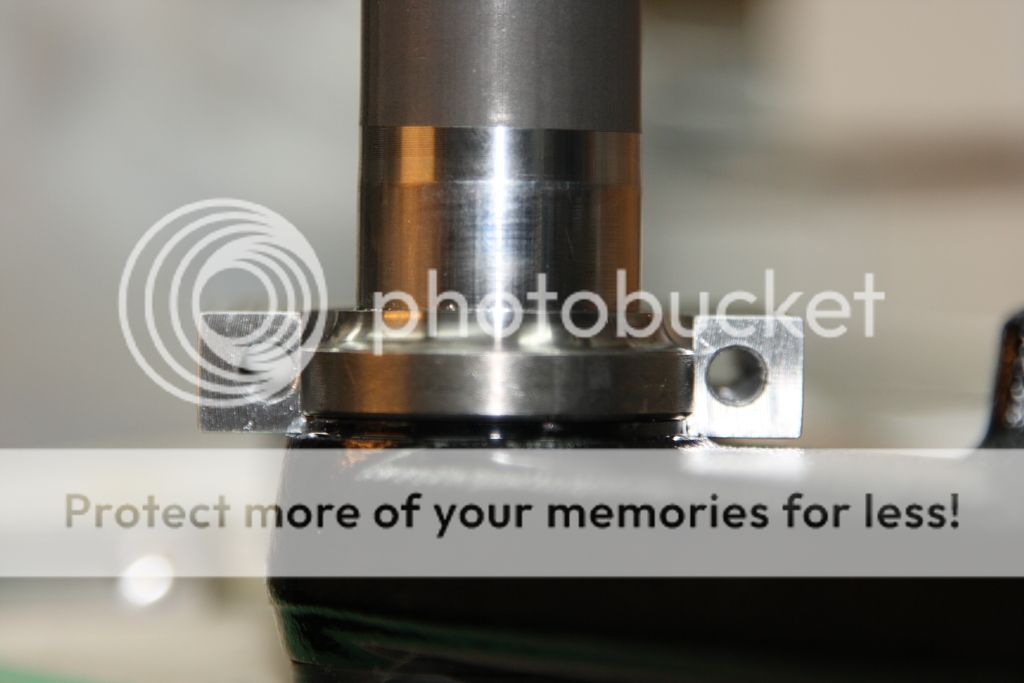
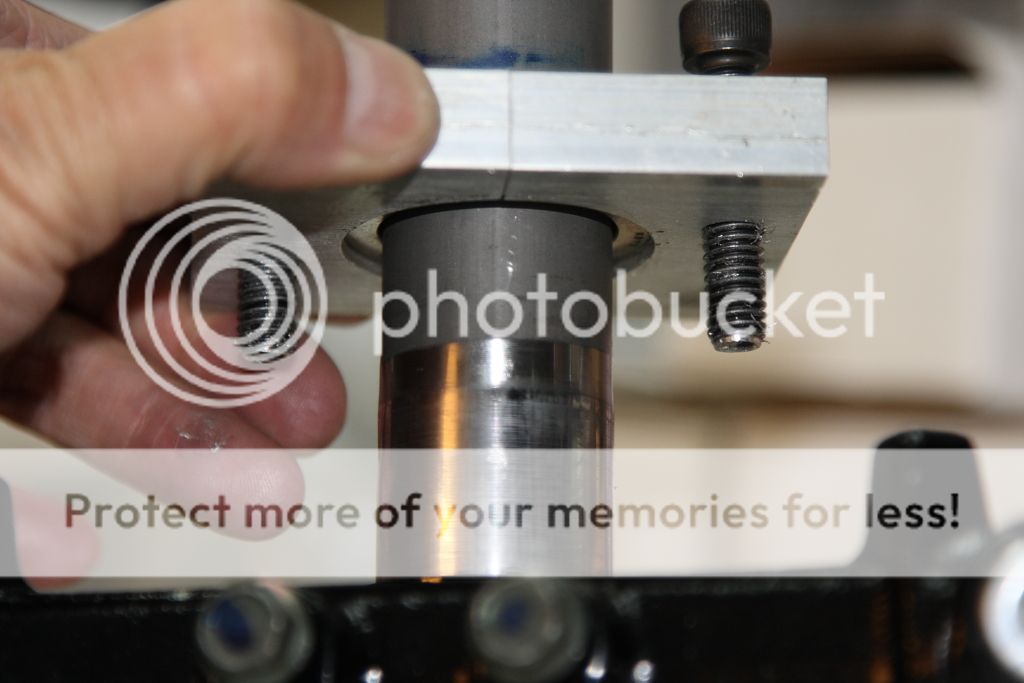
This is the toughest part of this removal and install of the head bearings; that is to remove the lower inner race from the steering stem. The Haynes manual indicates to tap the race with a suitable drift to increase the gap under the race so that pry bars can then be used to further lift the race off the stem. Only a small portion of the race is exposed to allow some tapping and without the gap there is no way to get any amount of meat under there to try and pry the race upward. I called my local service shop to see if they had special tools to remove and insgtall the race; just plain oh hammer and chissels. Great because I would have paid them to do it if they had proper tools. So, I had to machine a suitable puller for the race. Here you can see how one half of the puller will get underneath the race.

dp_090412_09.jpg


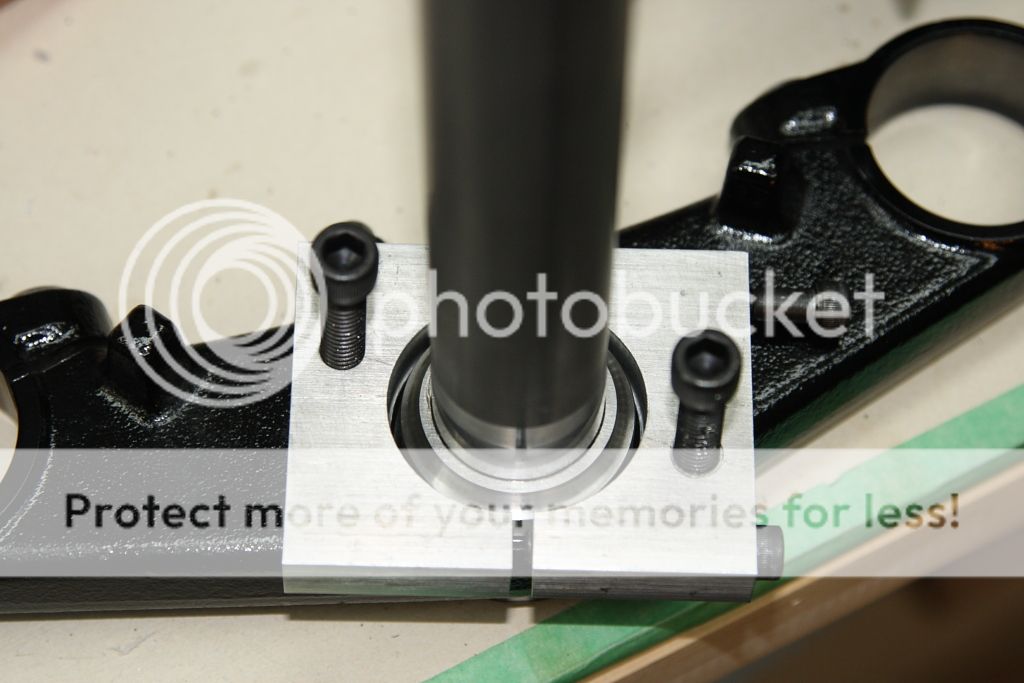
The two halves are joined together by #12 cap screws on the sides. I added two 1/4" cap screws extending from the top to act to draw the assemble away from the bottom crown.

dp_090412_10.jpg


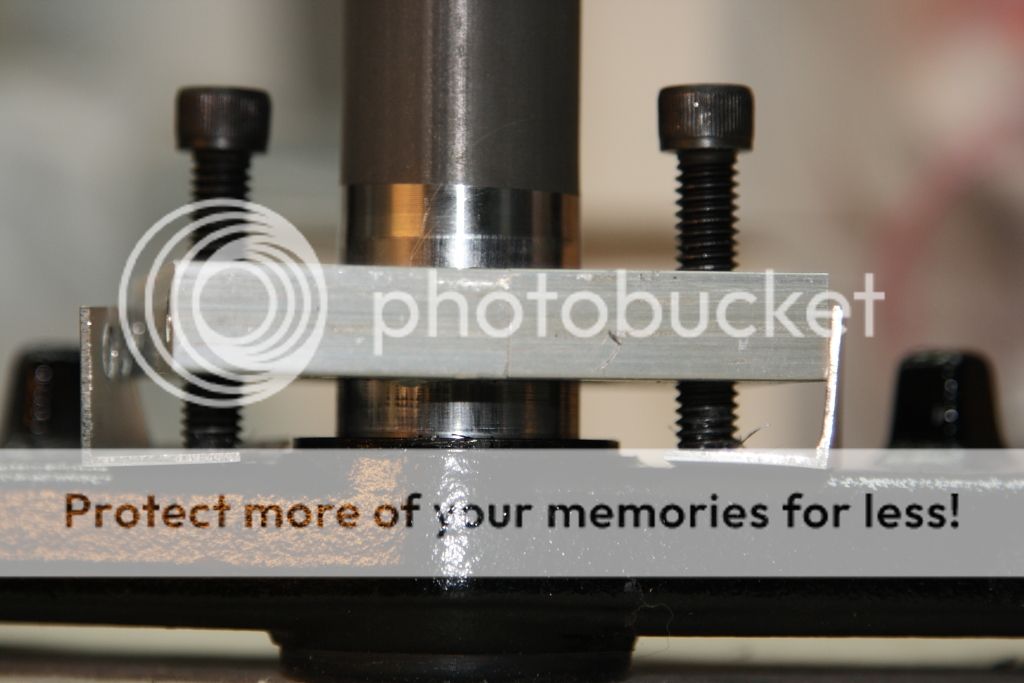
I slid in some thin angle aluminum pieces for the draw bolts to ride on so as to not scratch the bottom crown. Evenly turning the draw bolt, you can see that the race and assembly is sliding up the steering stem.

dp_090412_11.jpg


Finally it comes loose!

dp_090412_12.jpg


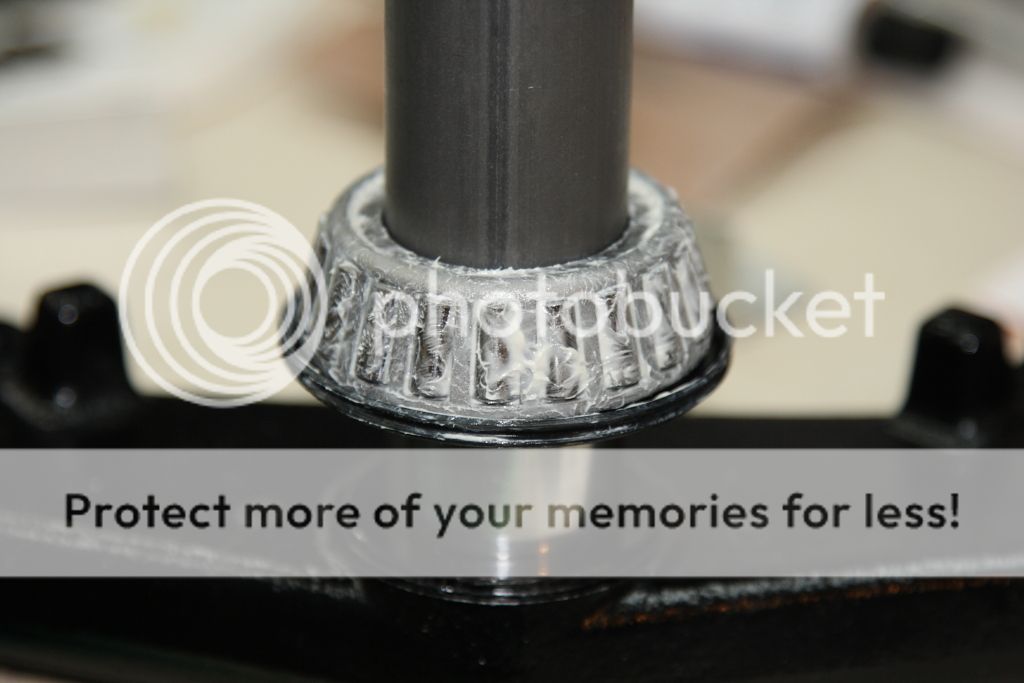
The new lower bearing is packed with white lithium grease by hand. The bottom seal is attached to the bottom of the bearing and the whole assembly is slid down the stem.
 
Last edited:

bd43

Moderator
Staff member
Elite Member
Joined
Aug 24, 2007
Messages
889
Reaction score
79
Points
28
Location
Alberta, Canada (GMT-7)
Visit site
continued.....

dp_090412_13.jpg


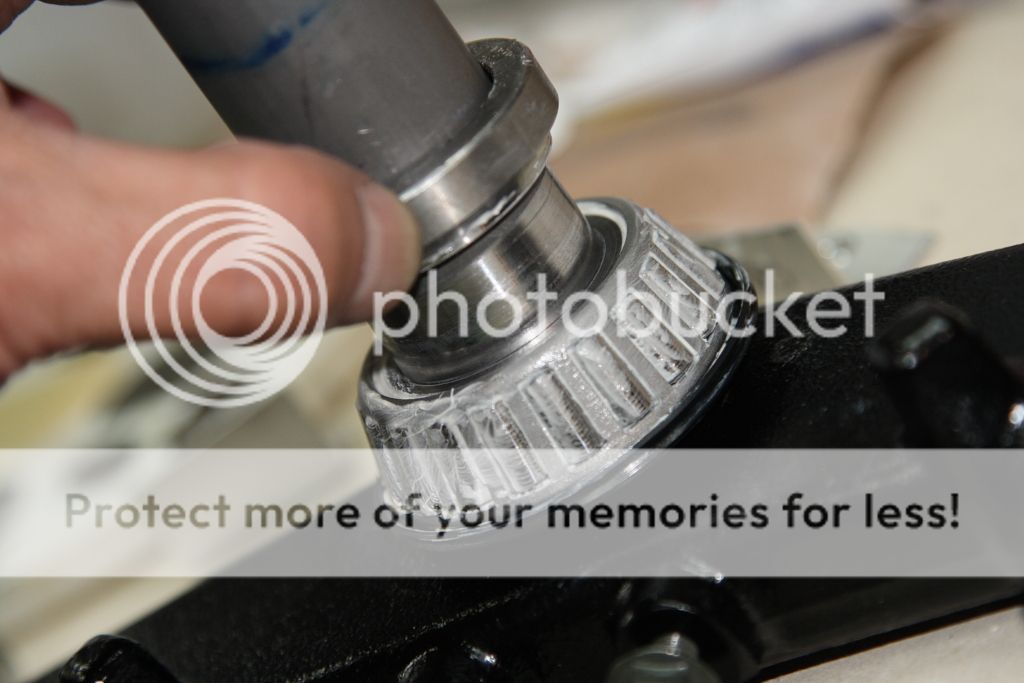
I took the old lower inner race and ground the inside with a grinding stone on my Dremel so that I could slide it down freely on the stem to rest on top of the new bearing only bearing on the inner edge of the new race and not the bearings themselves. With a long steel tube with an inside diameter larger than the stem, I used it to smack the race down to seat against the bottom crown. That's ends the hardest part of this install.

dp_090412_14.jpg


Knocking out the upper and lower outer races was a snap Using a suitable drift, 1/2" steel rod, I tapped them out at the cutout points in the frame. Tap out each side evenly so that it draws out straight to make it easier.

dp_090412_15.jpg


Once both old outer races are removed, clean the seats in the frame, add some grease if you like to the surface, place the new outer races in their proper location, attach the drawbolt arrangement and slowly tighten. This picture doesn't show it, but in the earlier one of the drawbolt assembly, I grooved the hard oak ends to keep the races centered and enough clearance for the ends to pass into the frame so the races can be seated completely in there. If you don't get the races all the way seated, expect your head to come loose over time, so do it right now. This was the second toughest part of the install. Make sure that you are drawing the races in squarely to the frame otherwise you will have a heck of a time getting them seated properly.

dp_090412_16.jpg


With the races properly installed, clean all race surfaces and debris inside frame; I had chips of wood in there. Add grease to the race surfaces and slide the steering stem from the bottom up. Add the grease packed upper bearing followed by the seal and the lower adjuster nut. Notice in this picture the new seal does not extend to the edges of the frame. WTF!

dp_090412_17.jpg


Here, I decided to toss out the new seal and use the old one because it does extend to the edges of the frame making a good seal, so don't wreck it pulling it out! The upper adjuster nut and rubber washer are threaded on and the top crown placed over top with the washer and steering stem nut placed on top, all hand tight for now. The forks are re-installed in the crowns and tighten to hold in place. The front tire is re-installed, the calipers re-attached. Now we have the proper leverage to make the adjustment to the lower adjuster nut to snug up the bearings by pulling back and forth the fork legs at the bottom checking for play in the bearings. Using the spanner wrench again, a combination of tightening the lower adjuster nut, then tightening the steering stem nut, check for play. If there is still play, loosen the steering stem nut, tighten the lower adjuster nut, tighten the steering stem nut, test for play again, and keep doing it until the slop has been removed. Once you have it tighten properly, remove the steering stem nut, lift off the top crown, bring the top adjuster nut down to the lower one, align notches and drop in the lock washer. Re-install top crown, washer then steering nut, torque down. Loosen pinch bolts on upper and lower crwons and align the stanchion tubes with top crown. Tighten and torque pinch bolts. Go through and torque handle bar, brake calipers, front axle and pinch bolt. Re-assemble the rest of the bike.

This removal and installation took the better part of a whole day not including tool preparation. The proper tools is key here in order to do this properly. This is not an easy job and on a scale of 1 to 10 on difficulty, 10 being crazy difficult, I rate this a 7. If you can find a shop that will remove and install the lower race for you, that is half the battle. Hopefully I have outlined enough here for you to plan this out before you take this on in case you decide to.

Good luck.
 
Last edited:

bd43

Moderator
Staff member
Elite Member
Joined
Aug 24, 2007
Messages
889
Reaction score
79
Points
28
Location
Alberta, Canada (GMT-7)
Visit site
I'm about to order these All Balls myself, by any chance is that part number good for an '06?

Kenny, according to the All Balls Website it is the same part number. I'm a little ticked that they did not provide the proper upper seal in the kit. Someone should write them and tell them that. I can honestly say though, this has got to be the most gruelling thing I've done on the bike to date. I don't look forward to doing this again. :rolleyes:
 

bd43

Moderator
Staff member
Elite Member
Joined
Aug 24, 2007
Messages
889
Reaction score
79
Points
28
Location
Alberta, Canada (GMT-7)
Visit site
EXCELLENT write-up bd43. Very impressed with the home-made tools. Is there any noticeable difference in the steering?

Don't know, I just got the front end back together tonight. I didn't do it for the better steering, but for the chance that my stock bearings may have self-destructed like everyone elses, which was not the case. I should mention that we are not humid here, I rode once for 8 hours in the pouring rain, and wash my bike about once every 2 weeks. I'm surprised how the stock bearings looked for the amount of water the bike gets. For those who had premature failure of their bearings, what the heck are you doing to your bikes? :confused:
 

Nelly

International Liaison
Elite Member
Joined
Jul 8, 2007
Messages
8,945
Reaction score
125
Points
63
Location
Co Offaly, ROI
Visit site
Hi Daryl,

That is another quality write up mate. I am in aw of your technical abilities and lateral thinking.
For me the moral of the story is going to be, unless my bearings show signs of premature wear and tear. I am going to leave them be.


Nelly
 

Doorag

Senior Member
Joined
Feb 6, 2008
Messages
1,482
Reaction score
18
Points
0
Location
West London
www.4dbrown.com
I reckon mine are toast but I commute every day - cold, rain, whaever. They also like to salt the roads here with the new oily salt stuff that's a) slick on the road, and b) really hard to clean off yer bike. I'd say it rains 30-40% of the time.
 

brad81987

Junior Member
Joined
Apr 6, 2008
Messages
336
Reaction score
1
Points
0
Location
Neenah, WI; Houghton, MI
Visit site
Great write up. Hopefully won't have to do this for a while but will definitley be useful when the time comes. Anyone though about contacting All Balls about the size of the seal being wrong?
 

Hellgate

Moto Demi-God
Moderator
Elite Member
Joined
Jan 13, 2008
Messages
6,929
Reaction score
85
Points
48
Location
AUSTX
Visit site
What an amazing write up! Thanks very much to the documentation.
 

Denver_FZ6

Junior Member
Joined
May 4, 2008
Messages
369
Reaction score
4
Points
0
Location
Denver, Co. USA
Visit site
Excellent write-up as usual! Just completed this a few weeks ago myself but didn't have time to make a how-to out of it. Your comments reflect my experience as well. I also re-used the factory top seal, just felt it provided a better seal then the smaller All Balls. I didn't have the resources to make a race puller so took it to local shop. They charged 1/2 hour of labor or $45.
Regarding road feel of the All Balls compared with factory, I would say the steering is slightly more precise and better road feel.
 

FZ1inNH

********* w/ Twisted Fate
Elite Member
Joined
Mar 11, 2007
Messages
6,128
Reaction score
75
Points
0
Location
Dover, NH
Visit site
Between you, Nate, Fred and Pete, I don't think ANY member has a need for a manual! Awesome job!!! Since we'll all need it at some point in time, this is valuable enough to print (in color!) and put in my binder in the garage.

Thank YOU!!!
 

bd43

Moderator
Staff member
Elite Member
Joined
Aug 24, 2007
Messages
889
Reaction score
79
Points
28
Location
Alberta, Canada (GMT-7)
Visit site
For me the moral of the story is going to be, unless my bearings show signs of premature wear and tear. I am going to leave them be.


Nelly

I reckon mine are toast but I commute every day - cold, rain, whaever. They also like to salt the roads here with the new oily salt stuff that's a) slick on the road, and b) really hard to clean off yer bike. I'd say it rains 30-40% of the time.

A simple check and what should maybe be part of routine maintenance is to check your head bearings. Just place the bike on the centerstand, lift and suspend the front wheel, I chose to shore up the bike with blocks under the exhaust manifold. The steering should turn smoothly left to right throughout the travel, and grasping firmly at the end of the legs pull back and forth on the legs. You should not feel play or clicking on a good head bearing. If there is slop, you need to address the problem ASAP.

15215d1239549137-how-replace-your-head-bearings-dp_090412_18.jpg


Anyone though about contacting All Balls about the size of the seal being wrong?

Okay, I wrote All Balls....

I just finished replacing my stock head bearings on my 2007 Yamaha FZ6 with your catalog number 22-1004 bearing kit. Everything was a good fit except the top seal. It was too small in diameter to completely seal the opening in the frame and I had to resort to using the stock one. Are you aware of this?

Other than that, I'm happy with the kit.

Thanks.
 
Last edited:

mstewar1

hot diggity
Elite Member
Joined
Aug 10, 2008
Messages
843
Reaction score
22
Points
0
Location
Austin, TX
Visit site
Excellent write-up.

I've done this to my '06, too. My bearings didn't have quite as much grease on them as yours but weren't like the rusty messes some folks have posted.

Like Denver, I took my lower crown to a local shop and had them press off the lower race. I think I paid $40. (for folks in the S.F. bay area, I went to KC Engineering)

I re-used both the lower and the upper seals because of their greater size. Folks, pay attention when you're taking it apart, don't munge up the seals.
 

bugsterkiton

Junior Member
Joined
Dec 31, 2008
Messages
44
Reaction score
0
Points
0
Location
Belgium (Spa)
Visit site
Hi bd43,
It's a very detailed write up.Thanks to share. I changed my steering bearings last winter because the former were "out of duty". I'll made a copy of your puller because the hammer and chissel are dangerous. (I have to changes those of my friend's bike in two weeks).
I can confirm that with the new balls the steering is as smooth as a new bike with no dead point.
Thanks for these very good pictures.:thumbup:
 

ddg

Junior Member
Elite Member
Joined
Jul 5, 2008
Messages
98
Reaction score
1
Points
0
Location
Gander, Newfoundland, Canada
Visit site
The worst part I found of the whole process was whether or not I have it adjusted correctly. The torque settings in the manuals are for ball bearings and not roller bearings. There is no free play at all but I just can't get over how smooth they are. I haven't got a chance to ride with them yet and will have a couple of small rides then doing the test above. Sitting on the bike with the centerstand deployed and leaning back so the front end is off the ground it moves amazing. Good mod. Btw I have 8000kms and had ridden in a bit of rain and my stock bearings were fine, not much grease though.
 
Top