modify stock seat

tejkowskit

Gold Member
Joined
May 18, 2011
Messages
684
Reaction score
9
Points
18
Location
Chicago
Visit site
modifying my stock seat: pic heavy

After over a year of contemplating buying an aftermarket seat so I wouldnt have to sit on a logI finally decided to just try modifying it myself! I couldnt bring myself to buy the extremely expensive top sellerie or corbin's that everyone seems to love. Even used ones were too expensive for me.

I did a lot of research and finally dove into the project this week to kick off the riding season with a (hopefully) comfortable seat. Now that I have done this I am kicking myself for not doing it a long time ago. This is super easy; if you mess up just glue on a new piece of foam and shape it again. It's really trial and error until you find something that works.

I recommend doing this outside as a fine foam powder will get everywhere. Having an air compressor helps to blow the powder off your clothes and bike too.

Supplies
-bread knife or hacksaw blade (some use electric carving knives, but i didnt wanna ruin mine. The hacksaw blade and knife worked perfectly fine and forced me to cut slower)
-angle grinder with flap disc (lower grit removes foam much faster so be careful if you use a low grit disc
-3m all purpose spray adhesive
-1" rebond foam and 0.25" lux-r foam (got mine here Open-Cell Foam - Poly, Acoustic, Dryfast, Lux, Color Foam & More
-scissors
-screw driver and needle nose pliers to remove staples
-vinyl to recover seat (stock cover wont fit if adding size to the seat
-patience
-rubber gloves (if you dont want your hands to be sticky and foam glued to them)
-a hepa mask isnt a bad idea so dont breath any of the fine foam powder while using the angle grinder
-if i forgot anything youll notice in the step by step

Remove staples. Pry up with screw driver and finish pulling them out with the needle nose.
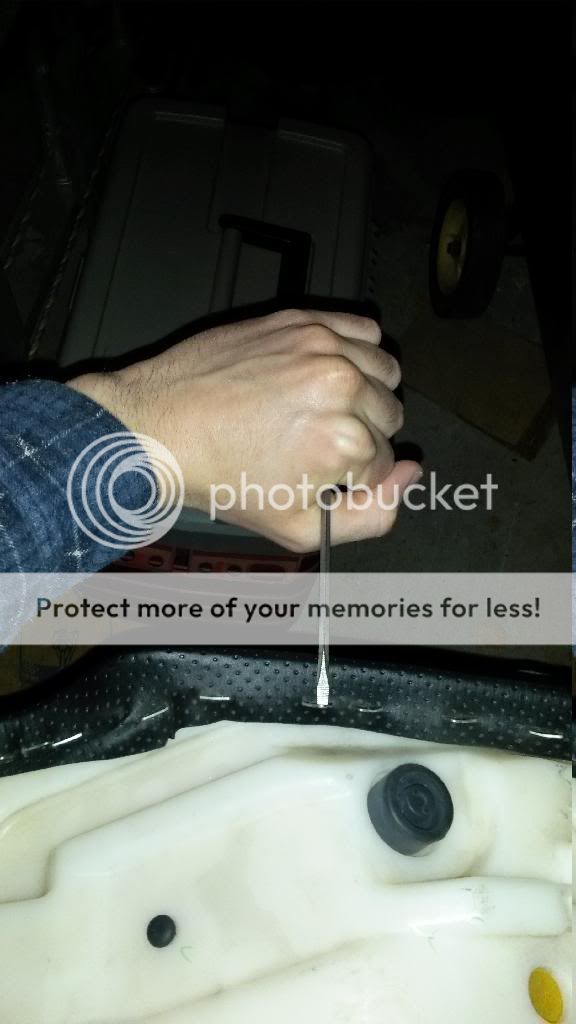
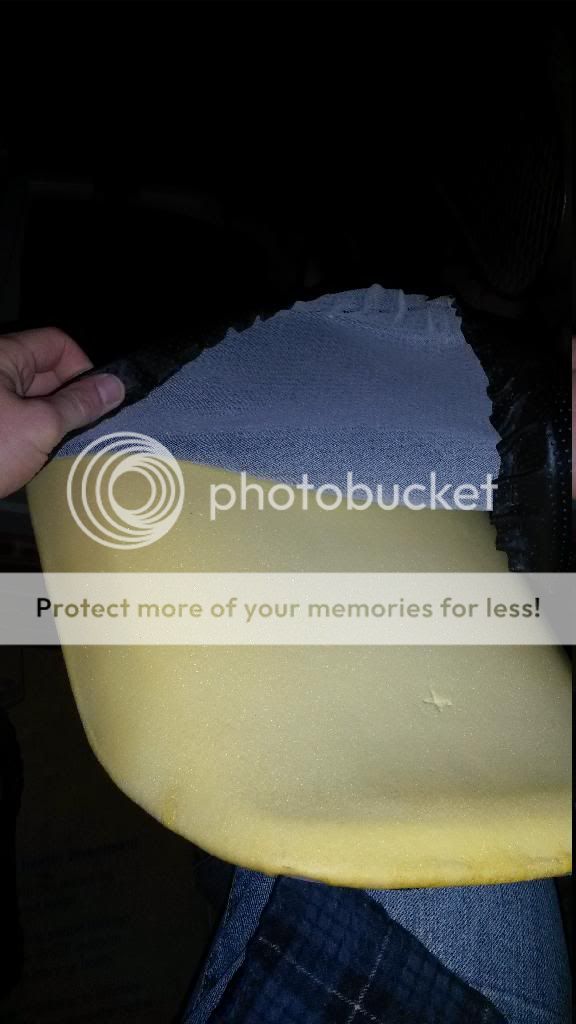
Once staples are out remove the cover

Use a sharpie to draw what youre trying to accomplish. These squigles made sense to me at the time
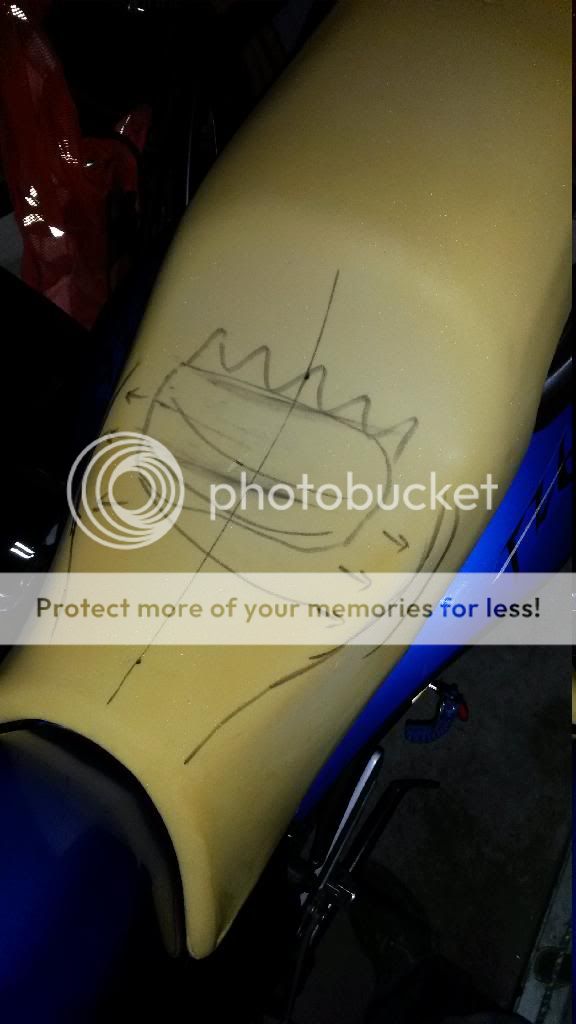
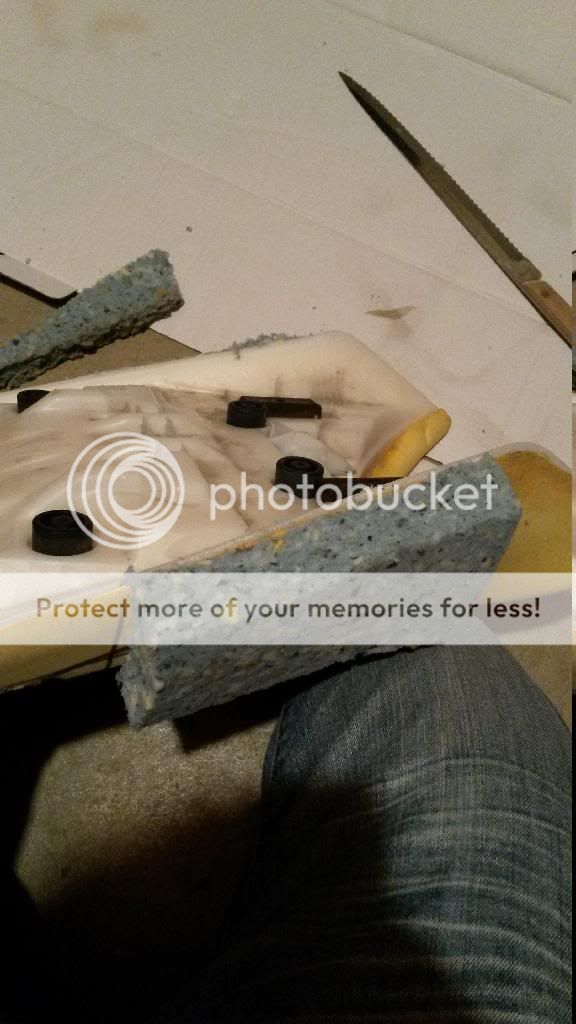
Grab youre blade and cut!
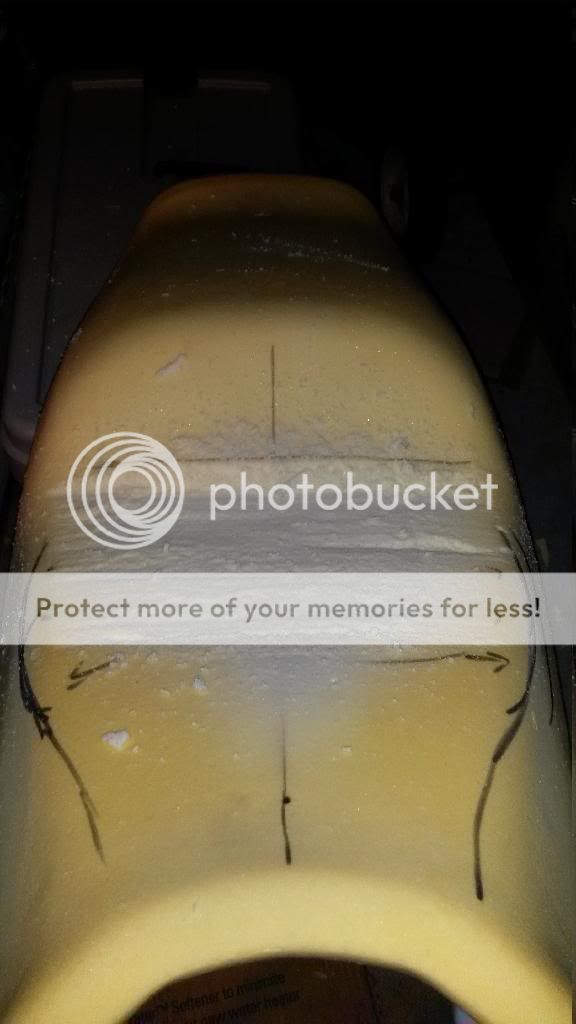
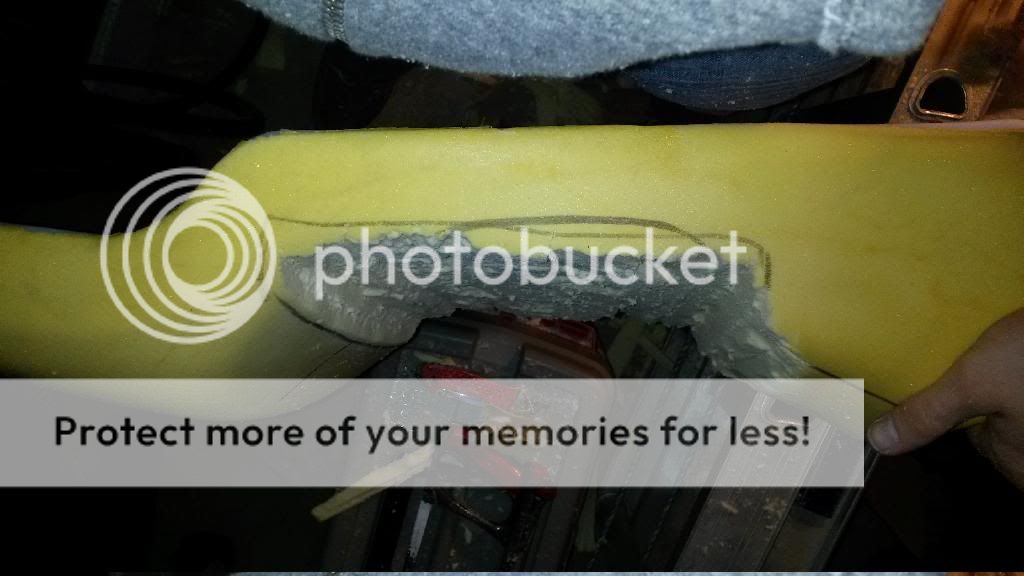
I was nervous to cut too much at first, but after reaching the point of no return i began to cut deeper.
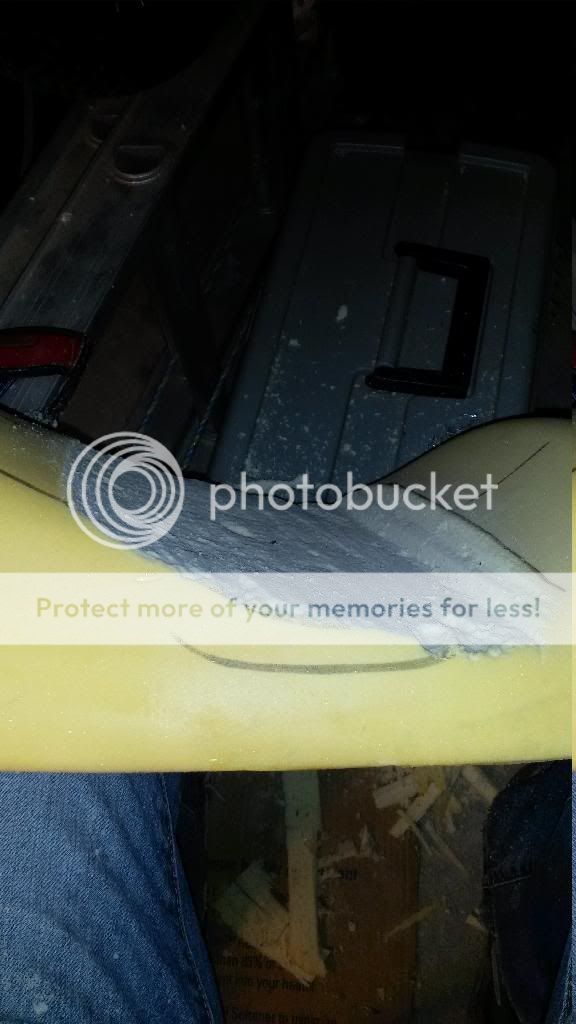
You can see that nasty curve of the stock seat is no more! I was aiming to dish out the spot my butt is on to add support. This pic is upside down..deal with it. This is about as deep as i cut before gluing on the rebond.

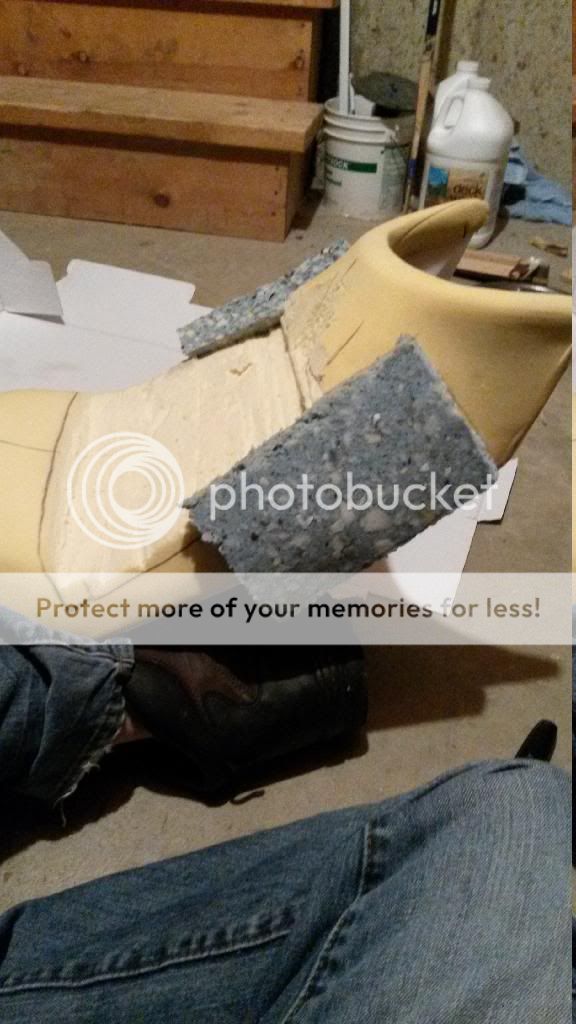
Take your rebond and glue. Here i was just trying to add support and widen the spot under my thighs. Glue and trim excess foam. To glue, spray both surfaces, let them get tacky (wait a minute or two), and stick them together.

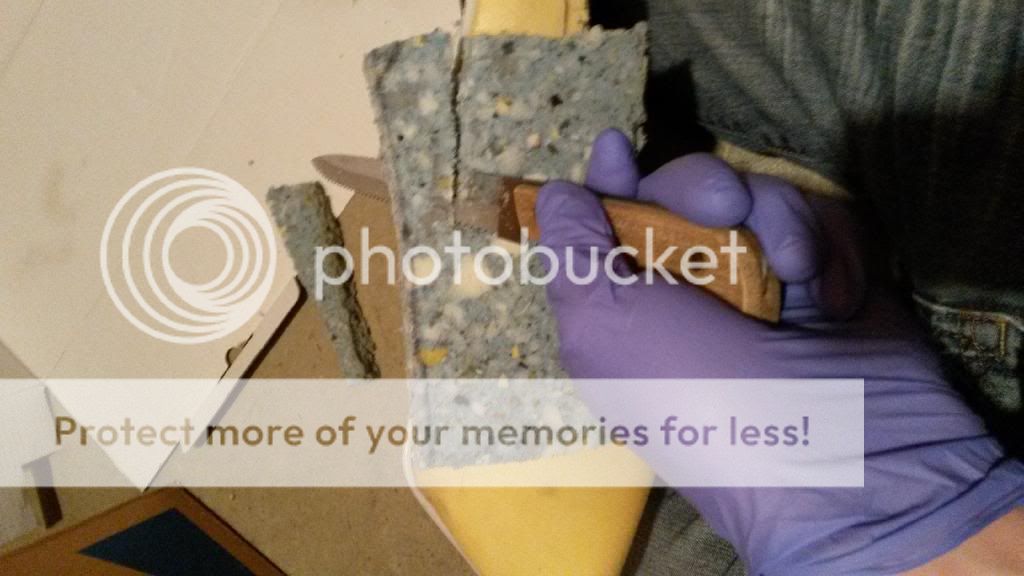
Add more foam to cover the area you want and cut it to form. Its really trial and error. Just add foam and shape. If you need to add more later its no big deal.
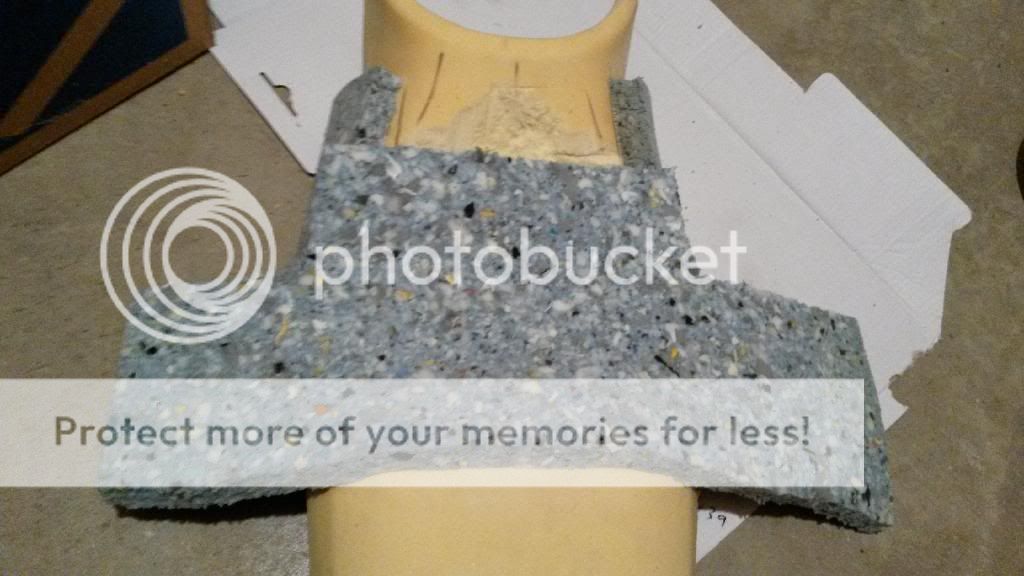
 
Last edited:

tejkowskit

Gold Member
Joined
May 18, 2011
Messages
684
Reaction score
9
Points
18
Location
Chicago
Visit site
Make sure to sit on your seat after you make changes to the foam to get a feel for what you need to trim and shape. Ride it too as its a completely different feel than just sitting on it on the center stand

Once my foam was glued and trimmed i began shaping it with the angle grinder. It was easier for me to shape the seat while it was on the bike; this let me look at the big picute. If you do this just be careful not to slip and grind any of the motorcycle-it will scratch it bad.
Finally reached the shape i wanted (so i thought)

After riding it i noticed the dished out bucket shape i was aiming for was too far back. i realized i ride fairly close to the gas tank and needed more support up front. It was also lower than what i was aiming for.
Remember when i said you can always add foam later to fine tune your shape? I did that here 3 times to add another layer. You can see the lines in the foam where another piece was added. Made nothing more difficult, just took more time. No biggie
Reshape, ride, reshape, ride, reshape, ride. Like i said its trial and error. Take your time so you find a shape, height, and riding position you like.
This is the final shape i decided on.

Once you find the shape you like take your 1/4" foam and cover the whole seat with it. What this does is smooth out the seat and hides any imperfections in the transition of the foams so it doesnt appear lumpy and bumpy when covered. It also adds some cushion.
Some bumps and imperfections still show through the 1/4" so i am going to add another layer once i get more spray adhesive. I used 2 cans up and didnt have enough left to put on this layer. It will also add more cushion than just 1 layer. I tried it and liked it.

All i have left to do is put the 2nd layer of 1/4" foam on and order the vinyl and cover it.

More to come when i finish the project!
 
Last edited:

tejkowskit

Gold Member
Joined
May 18, 2011
Messages
684
Reaction score
9
Points
18
Location
Chicago
Visit site
This is the first time i have ever done any upholstery or worked on a project like this. It really is easy. Like everything else, just be patient. I am really happy with how its turning out, and its way more comfortable than stock for a fraction of the cost of an aftermarket!

Foam- <$50
3m spray-<$13
The vinyl cover will be rather cheap, too

All other tools i had
 

LeeFZ

Junior Member
Joined
Dec 16, 2012
Messages
137
Reaction score
1
Points
0
Location
USA
Visit site
That's awesome man. I'm looking forward for your final result. Keep it updated about your thought. I can sit on it about 100 miles, I have to get off.
 

tejkowskit

Gold Member
Joined
May 18, 2011
Messages
684
Reaction score
9
Points
18
Location
Chicago
Visit site
That's awesome man. I'm looking forward for your final result. Keep it updated about your thought. I can sit on it about 100 miles, I have to get off.

Definitely will keep it updated as i move on. Ya same here..about 100 miles and im constantly squirming. Took a trip to n carolina 2 years ago on the stocker and it was horrible. I plan on doing a few multi day rides this summer and really didnt want to on that stupid seat.
 

dschult2

Junior Member
Joined
Jul 1, 2013
Messages
281
Reaction score
2
Points
0
Location
wyoming,mi
Visit site
Lookin' good. I just my got my seat back from Spencer's to have it lowered and Supracor padding installed. It only cost me $75 as he didn't charge me for the lowering. Can't wait to try it out if we ever get some warm weather. Let us know how your seat is once you get a few rides in.
 

major tom

Junior Member
Joined
Jul 1, 2009
Messages
328
Reaction score
0
Points
0
Location
durango co
Visit site
Re: modifying my stock seat: pic heavy

I can relate! The stock seat is typical of modern seats, they accommodate shorter riders by narrowing to the front leaving no thigh support, so all your weight is pressing on a too small triangle. I am really looking forward to seeing it done. Are you actually going to re-upholster it yourself? I'd farm that out myself.
If you don't mind me asking, how tall are you? I'm 6'. Nice post!
 

tejkowskit

Gold Member
Joined
May 18, 2011
Messages
684
Reaction score
9
Points
18
Location
Chicago
Visit site
Lookin' good. I just my got my seat back from Spencer's to have it lowered and Supracor padding installed. It only cost me $75 as he didn't charge me for the lowering. Can't wait to try it out if we ever get some warm weather. Let us know how your seat is once you get a few rides in.
I came extremely close to sending it to him! But I know he usually keeps it close to stock size so he can reuse the cover, and I wanted to add foam for some more support. He does do it for a great price though.

I can relate! The stock seat is typical of modern seats, they accommodate shorter riders by narrowing to the front leaving no thigh support, so all your weight is pressing on a too small triangle. I am really looking forward to seeing it done. Are you actually going to re-upholster it yourself? I'd farm that out myself.
If you don't mind me asking, how tall are you? I'm 6'. Nice post!
Ya the narrow front was one of the major problems along with the slightly curved seat-like sitting on a log. Those were the main 2 problems I wanted to address, and I think I was successful. I am definitely going to look into covering it myself with vinyl, but I found a shop near me that does cycle seats. If I find it hard to get looking right I'll bring it to them.
I am 5'11". With the wider seat I cant flat foot it anymore, but I still get plenty of toe down to be stable. That and the seat is slightly taller than stock.
 
Last edited:

tejkowskit

Gold Member
Joined
May 18, 2011
Messages
684
Reaction score
9
Points
18
Location
Chicago
Visit site
Added the second layer of 1/4" foam.
Its much more comfy now. I took a 1 hour ride today about 50/50 Highway and busy suburban roads and it felt great. I'm taking a longer day ride tomorrow with a group. About a 4 hour ride so that'll be a good test before I finish it off with the cover.
I also decided to cover it myself. I ordered a piece of vinyl that is recommended for motorcycle seats. Local shop wanted $250-$350 to cover it with just a simple piece of vinyl-no thanks!
 

tejkowskit

Gold Member
Joined
May 18, 2011
Messages
684
Reaction score
9
Points
18
Location
Chicago
Visit site
Seat was very comfortable for a 4 hour ride with a very short break in the middle. I was able to sit still and not fidget most the ride, although I noticed slight hot spots on my ischium nearing the end of the ride.

I'm sure I can do better and since the cover is already off I plan to adjust it a little more.

I also received the vinyl in the mail; updates to come after I do more adding foam/shaping and cover it!
 

tejkowskit

Gold Member
Joined
May 18, 2011
Messages
684
Reaction score
9
Points
18
Location
Chicago
Visit site
OK. After reshaping I have finally reached an end result which I am happy with. I ended up peeling off/shaving the 1/4" blue foam and adding more rebond foam to widen the seat more. I also added some very plush memory foam from an old mattress pad at the nose and under my tail bone. I then took my vinyl and stapled it on!

Blue foam gone, rebond & memory foam added for more width. Width=support :thumbup:

All smoothed out, ready for blue foam to hide any imperfections when covered.


Trim blue foam to fit shape of seat pan once glued.

Don't forget to take test rides in between steps!!

Now to cover. I used a manual staple gun. It takes a bit more patience this way since not every staple gets seated securely, but with patience the cover is now holding strong.

I covered it using the pattern on sign it or cycle seat.com. start at front and rear-staple taught. Then in a zig zag pattern staple the cover down to ensure even tension.
modify_4b.jpg


The sharp curves of our seat make this difficult so don't be afraid to remove staples and re-do a section to get any folds or excess vinyl out. I did this quite a bit. Also helps to use a heatgun or blow dryer or put the vinyl in the dryer for a few minutes. This makes the vinyl MUCH more stretchy and makes it easier to deal with those problem corners.

Pull tight & staple!

Curved spots will have wrinkles and folds on the BOTTOM of the seat pan, but will not show up from above as shown in these 2 pictures.
 

tejkowskit

Gold Member
Joined
May 18, 2011
Messages
684
Reaction score
9
Points
18
Location
Chicago
Visit site
Work your way around the seat, remove staples if needed to perfect a certain area.

Once completely covered, you will need to trim excess vinyul from the underside so the seat fits on the motorcycle.

And the finished product. As you can see, there is a slight air bubble from the concave section I made. This can be minimized by pulling it tight from the side near that section. It is there, but it still looks good. The vinyl is stretchy enough that you don't notice it when you sit on the bubbled spot. Others online have glued this spot down with the spray adhesive;something I may try later on, but for now it really doesn't bother me, and it still looks fine.


This project is really one of trial and error. You will not get the perfect seat your first try. Be patient. You can really get it to custom fit YOUR body if you are patient and test ride it enough!
 

tejkowskit

Gold Member
Joined
May 18, 2011
Messages
684
Reaction score
9
Points
18
Location
Chicago
Visit site
How slick is the vinyl? I like my butt to stick to the seat!

Felt by hand it is only very slightly less grippy, but due to the new shape I actually find myself sliding less. I only ever used to slide forward on hard braking on the stock seat, and do not have that problem anymore. The new shape (along with newly installed fz6r bars) greatly assist in allowing me to grip the tank with my thighs. They do make what they call a 'high tac' vinyl with the same stretch properties which would offer a lot more grip. It is their same all sport vinyl, but made with a grip texture. I opted out of the high tac so I could slide and move my body weight around during more aggressive riding in the twisties. Here's the link:All Sport High-Tac Black | DIY Upholstery Supply
 
Last edited:
Top